

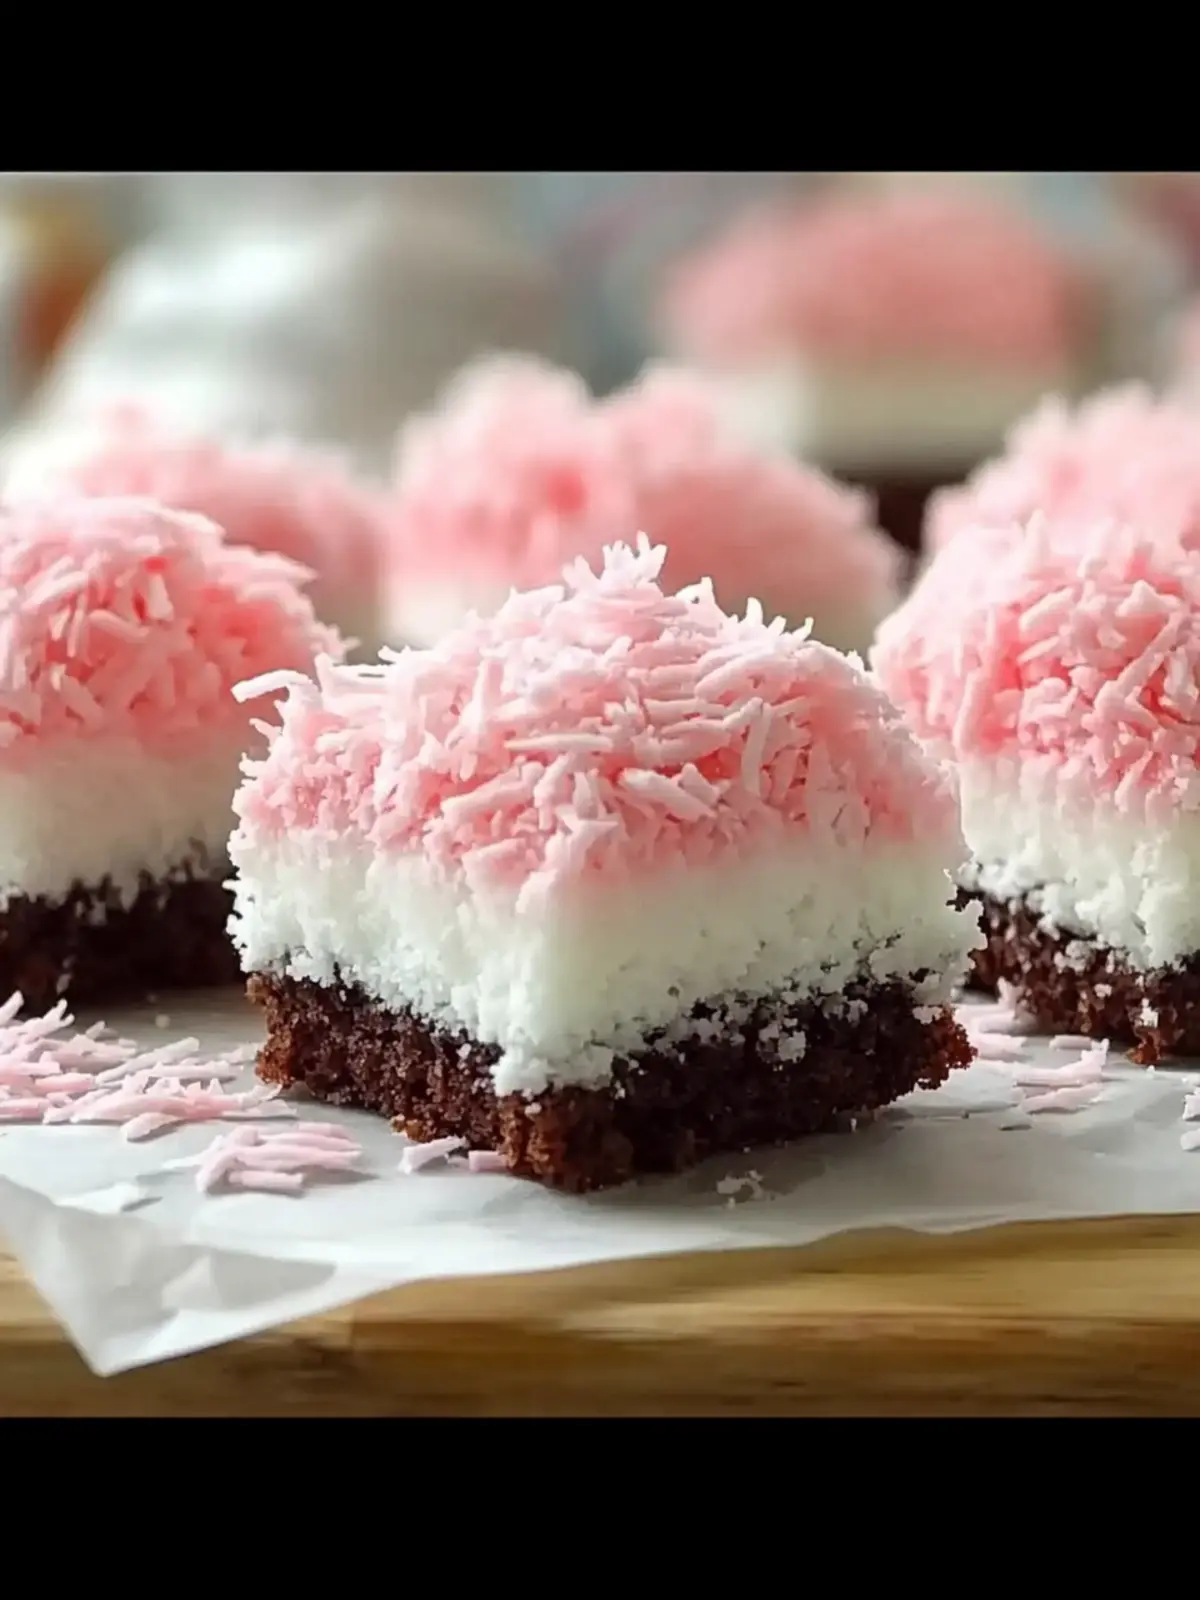
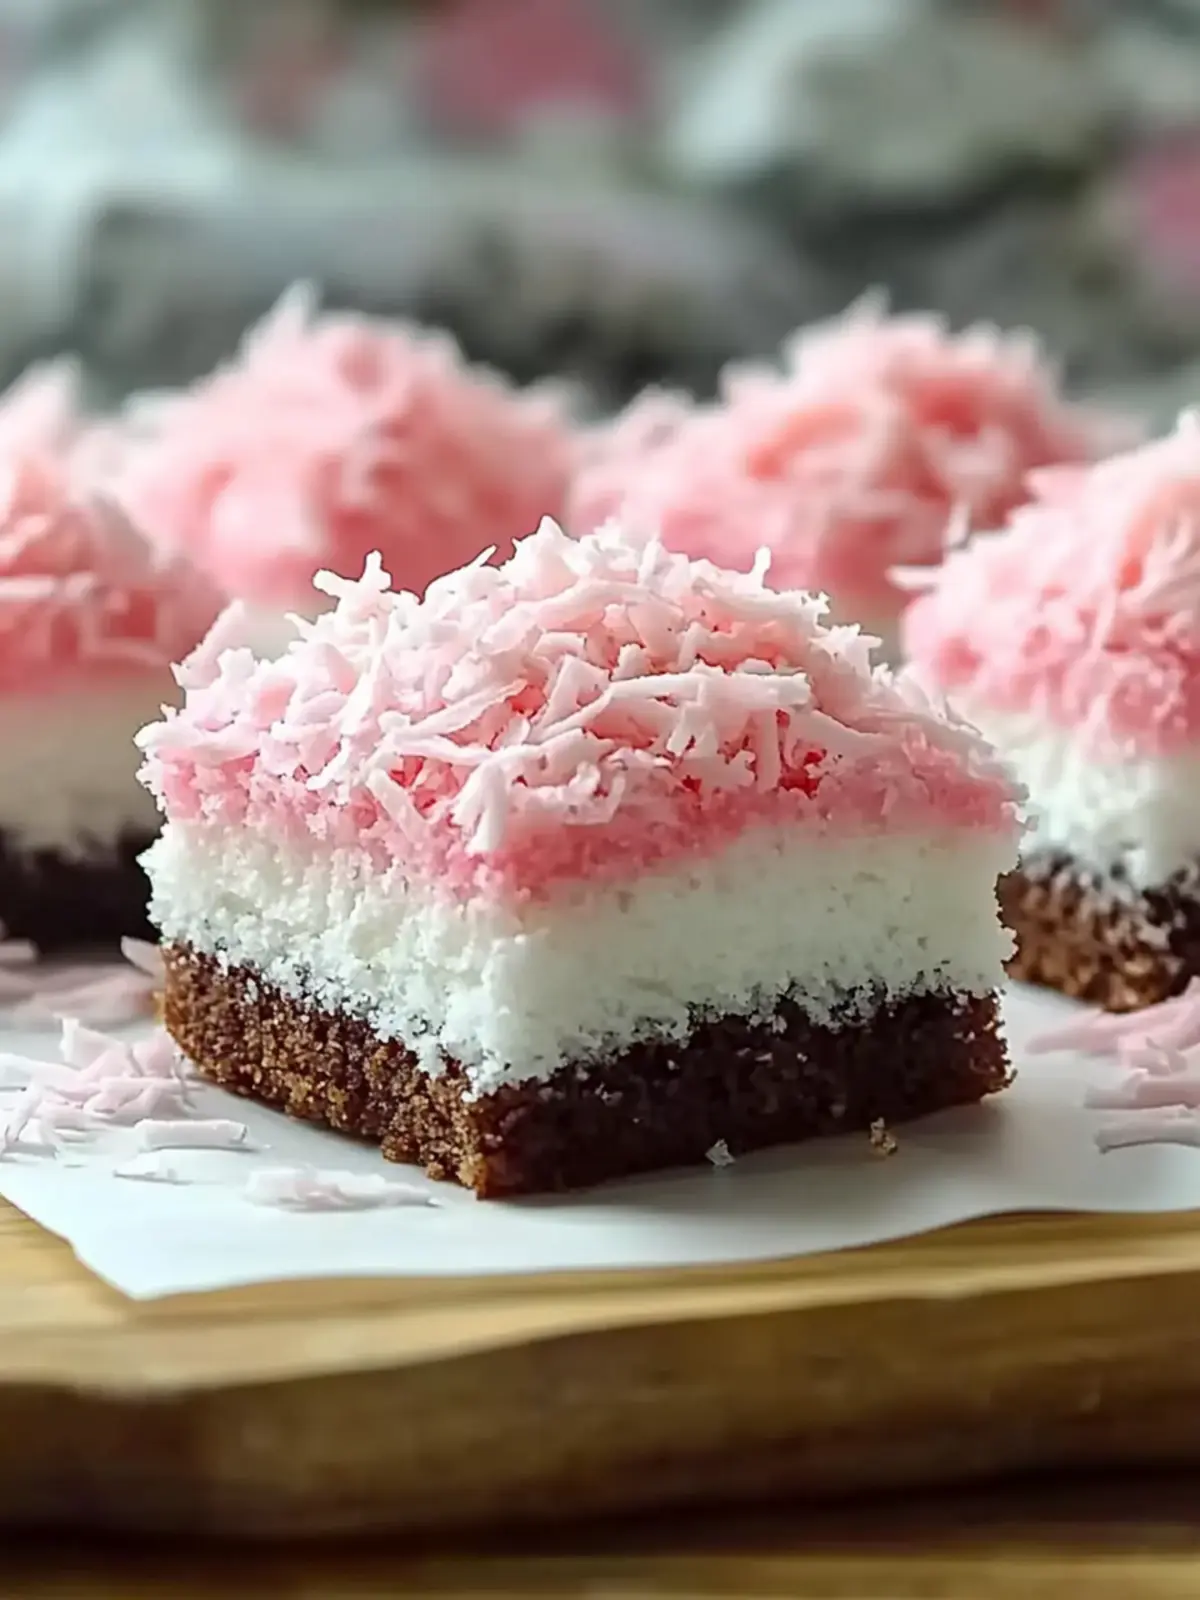
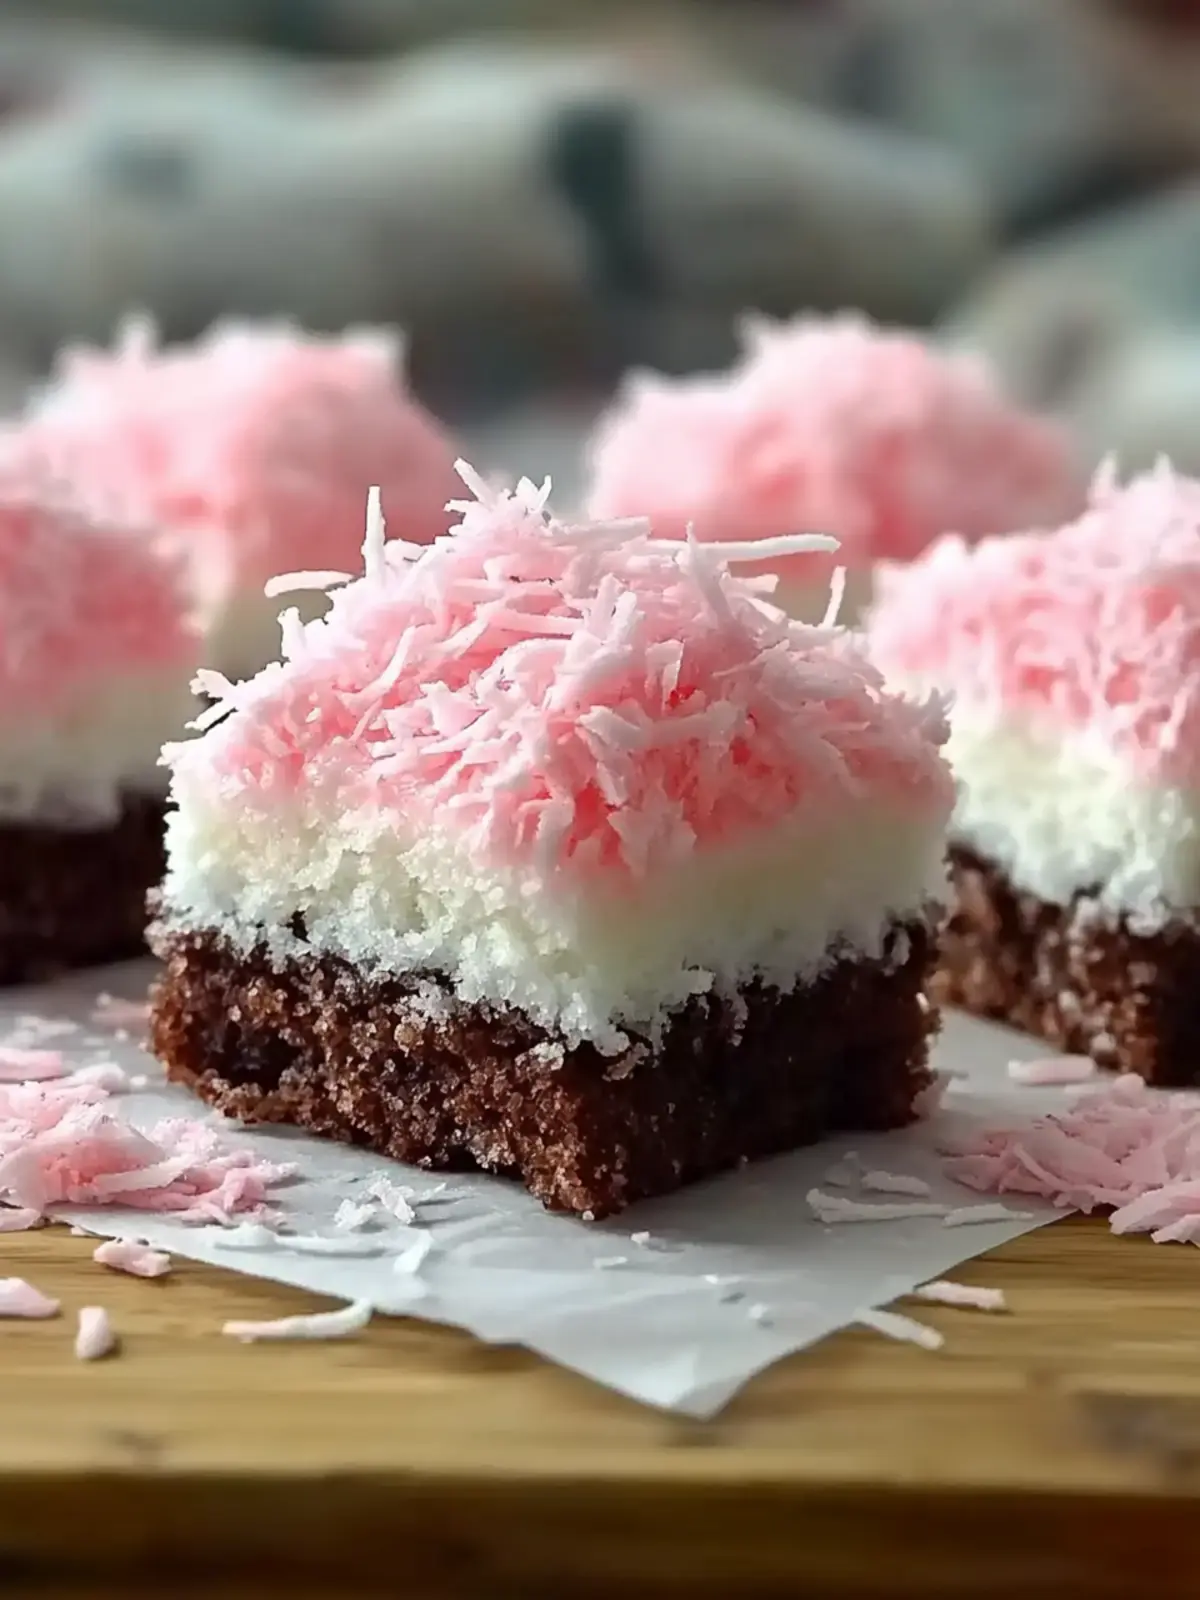
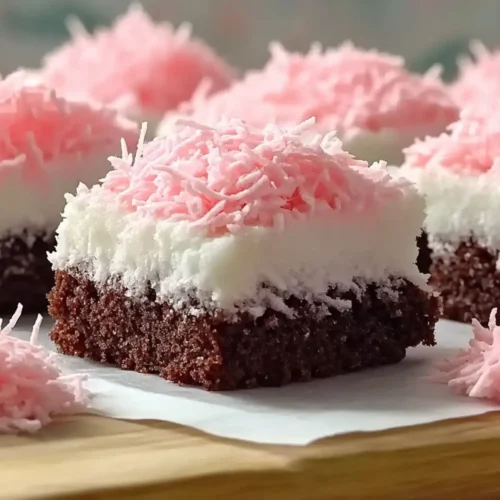
There’s something utterly delightful about opening the fridge and spotting a vibrant batch of Pink Coconut Snowball Cake Bars waiting for you. With their luscious cream layer and whimsical pink coconut topping, these bars are not just a treat; they are a feast for the senses! Ideal for birthdays, potlucks, and all sorts of celebrations, they strike the perfect balance between nostalgia and fun. After a long week, I found myself craving something sweet yet easy to whip up, and this recipe quickly became my go-to. Whether you’re hosting friends or simply want to indulge in a little sweet joy, these bars are quick to make and sure to impress. Plus, they easily adapt to gluten-free and dairy-free lifestyles, ensuring everyone can join in on the fun! So, let’s dive into this delicious adventure and bring a splash of color to your dessert table!
Why are Pink Coconut Snowball Cake Bars irresistible?
Vibrant Colors: The eye-catching pink topping instantly adds fun to any gathering.
Easy to Make: This simple recipe requires minimal effort, perfect for busy schedules.
Creamy Delight: The luscious cream layer pairs perfectly with a rich chocolate base.
Customizable: Easily adapt to gluten-free or dairy-free diets without sacrificing taste.
Crowd-Pleaser: A dessert that invokes nostalgia while appealing to all ages.
Perfect for Sharing: Ideal for parties, potlucks, or cozy family nights, making it a versatile treat everyone will love.
Pink Coconut Snowball Cake Bars Ingredients
• These delightful bars are perfect for any celebration!
For the Cake Base
- All-Purpose Flour – Provides the structure for the cake base; substitute with gluten-free flour for a gluten-free version.
- Cocoa Powder – Adds rich chocolate flavor and color; ensure it’s unsweetened for the best results.
- Baking Powder & Baking Soda – Essential leavening agents to help the cake rise perfectly.
- Salt – Enhances overall flavor and balances the sweetness in the cake.
- Unsalted Butter – Creates a tender texture; be sure to soften it for easy mixing. For a dairy-free option, use vegan butter.
- Granulated Sugar – Sweetens the cake base; can be replaced with a sugar alternative to reduce sweetness.
- Large Eggs – Binds ingredients and adds moisture; substitute with flax eggs for a vegan version.
- Vanilla Extract – Adds depth of flavor; opt for pure vanilla for the best taste.
- Buttermilk – Contributes to the cake’s moisture; substitute with almond milk mixed with vinegar for a dairy-free version.
- Hot Water – Enhances the cocoa and ensures a moist texture for the cake.
For the Cream Layer
- Heavy Whipping Cream – The primary ingredient for a fluffy, creamy layer; use coconut cream for a dairy-free alternative.
- Powdered Sugar – Sweetens and stabilizes the whipped cream; feel free to reduce sugar for a lighter touch.
- Vanilla Extract (for cream layer) – Enhances sweetness and overall flavor in the cream.
- Cream Cheese (optional) – Adds a rich creaminess to the layer; omit for a lighter option.
For the Topping
- Shredded Coconut – Provides texture and a festive look; unsweetened coconut is a healthier choice.
- Pink Food Coloring – Creates the signature eye-catching pink hue; beetroot powder is a natural alternative.
- Milk (if needed) – Adjusts the coconut color; any non-dairy milk works well for this purpose.
Get ready to impress your friends and family with these irresistible Pink Coconut Snowball Cake Bars!
How to Make Pink Coconut Snowball Cake Bars
-
Prepare Base: Preheat your oven to 175°C (350°F) and grease a 9×13 inch pan. In a bowl, whisk together the flour, cocoa powder, baking powder, baking soda, and salt. In a separate bowl, cream the softened butter and sugar until fluffy, then add in the eggs and vanilla. Combine the dry ingredients alternately with buttermilk, followed by hot water, and pour this delightful mixture into your prepared pan. Bake for 25–30 minutes or until set, and let it cool completely.
-
Make Cream Layer: If you decide to use cream cheese, beat it until smooth, then add the heavy whipping cream, powdered sugar, and vanilla. Whip the mixture together until it reaches that light, fluffy texture you crave.
-
Add Topping: In a bowl, mix the shredded coconut with the pink food coloring; if needed, add a touch of milk for a more consistent shade. Sprinkle the colorful coconut over the cream layer and gently press to help it adhere.
-
Chill and Slice: Place your masterpiece in the fridge for at least 1 hour to set. Once chilled, slice into bars, ensuring neat cuts for an impressive presentation.
Optional: Serve with a drizzle of chocolate or fresh berries for an elegant touch.
Exact quantities are listed in the recipe card below.
Storage Tips for Pink Coconut Snowball Cake Bars
Room Temperature: Store bars in an airtight container at room temperature for up to 3 days, ensuring they’re kept away from direct sunlight to maintain freshness.
Fridge: For longer storage, keep the Pink Coconut Snowball Cake Bars in the refrigerator in an airtight container for up to 5 days. Layer with parchment paper to prevent sticking.
Freezer: Freeze the bars wrapped tightly in plastic wrap and placed in a freezer-safe container for up to 2 months. Thaw in the fridge before serving for the best texture.
Reheating: Serve cold or at room temperature; if desired, reheat individual bars briefly in the microwave for a few seconds to enjoy a warm treat.
Make Ahead Options
These Pink Coconut Snowball Cake Bars are perfect for busy home cooks looking to save time! You can prepare the cake base up to 24 hours in advance; simply bake, let it cool completely, and store it wrapped in plastic wrap at room temperature. You can also whip up the cream layer and refrigerate it for up to 3 days. To maintain the luscious texture, keep the cream layer in an airtight container. When it’s time to serve, spread the cream on the cooled cake base, sprinkle the vibrant pink coconut topping, and slice into bars. You’ll have a delightful dessert ready to impress with minimal last-minute effort!
What to Serve with Pink Coconut Snowball Cake Bars?
These delightful bars are destined to be the star of your dessert table, and they pair beautifully with complementary flavors and textures.
-
Hot Coffee: The rich, bold flavor of coffee balances the sweetness of the bars, creating a delightful contrast that warms the soul.
-
Mint Tea: A refreshing mint tea provides a soothing counterpoint, enhancing the tropical notes of the coconut while cleansing the palate.
-
Fresh Berries: Juicy strawberries or raspberries offer a burst of tartness that beautifully offsets the creamy sweetness of the cake bars.
-
Chocolate Drizzle: A rich chocolate drizzle on top adds an indulgent touch, enhancing the chocolate base while presenting a tempting visual.
-
Whipped Cream: A dollop of light, fluffy whipped cream adds an airy texture, making each bite a more luxurious experience.
-
Vanilla Ice Cream: Creamy vanilla ice cream served alongside the cake bars is a classic pairing, creating a delightful melty contrast.
-
Fruit Salad: A colorful fruit salad brings freshness and sweetness, rounding out your dessert experience with bright flavors and refreshing bites.
These serving suggestions will elevate your Pink Coconut Snowball Cake Bars to a new level of delight, inviting friends and family to savor every last bite!
Expert Tips for Pink Coconut Snowball Cake Bars
- Cooling Time: Be sure to let the cake base cool completely before adding the cream layer to avoid melting and losing that fluffy texture.
- Whipping Cream: Chill your mixing bowl and whisk before whipping the cream layer. This helps achieve the perfect, stable peaks for your Pink Coconut Snowball Cake Bars.
- Storage Solutions: Store the bars in an airtight container with parchment paper between layers to prevent sticking. Consume within 4-5 days for the best texture.
- Mixing Care: Avoid overbaking or overmixing the cake batter. Overbaking will result in dryness, while overmixing can lead to tough bars.
- Customizable Flavors: Feel free to experiment with different extracts, like almond or mint, to switch up the flavor profile of your Pink Coconut Snowball Cake Bars.
Pink Coconut Variations
There’s no need to stick to just one version of these delightful bars—get creative in the kitchen!
-
Dairy-Free: Swap all dairy ingredients for coconut cream and vegan butter to keep things creamy and delicious.
-
Gluten-Free: Choose a gluten-free flour blend or almond flour instead of all-purpose flour, ensuring every slice is safe for gluten-sensitive folks.
-
Reduced Sugar: For a lighter bite, try unsweetened shredded coconut and cut down on powdered sugar without compromising the crunch.
-
Nutty Twist: Add toasted walnuts or almonds to the creamy layer for a satisfying crunch and a nod to rich, nutty flavors.
-
Flavor Variations: Swap vanilla extract for almond or mint extract to give these bars a refreshing twist that’ll surprise your taste buds.
-
Coconut-Free: If you’re not a coconut lover, consider topping the cream layer with colorful sprinkles or finely crushed cookies for a different flavor but the same delightful look!
-
Chocolate Lovers: Fold in mini chocolate chips into the cream layer for an enticing extra dose of chocolatey goodness that’s irresistible.
-
Spicy Kick: Add a pinch of cayenne pepper or cinnamon to the cream layer for a surprising heat that balances the sweetness perfectly.
Feel free to mix and match these ideas to craft your perfect version of Pink Coconut Snowball Cake Bars!
Pink Coconut Snowball Cake Bars Recipe FAQs
What type of all-purpose flour should I use for the cake base?
You can use regular all-purpose flour for these bars, but if you’re looking for a gluten-free option, a gluten-free flour blend or almond flour works great! Just make sure to check that your blend contains xanthan gum for the best texture.
How should I store leftover Pink Coconut Snowball Cake Bars?
To store your delicious bars, keep them in an airtight container with layers of parchment paper between each layer to prevent sticking. They’ll stay fresh at room temperature for up to 3 days or in the refrigerator for up to 5 days. If you want to keep them longer, freeze them wrapped tightly for up to 2 months!
Can I freeze Pink Coconut Snowball Cake Bars?
Absolutely! To freeze your bars, wrap them tightly in plastic wrap and then place them in a freezer-safe container. When you’re ready to enjoy them, simply thaw in the fridge overnight for the best texture. They can be enjoyed cold, or you can slightly warm them in the microwave for a cozy treat!
What if my whipped cream mixture doesn’t thicken?
If your whipped cream isn’t thickening, it might be due to the cream being too warm. Make sure everything is chilled, including your mixing bowl and whisk. Start whipping on a lower speed, then gradually increase. If you’re using heavy whipping cream, it should whip up nicely. If it remains thin, try adding a tablespoon of powdered sugar or cornstarch while whipping to help stabilize it.
Are there any dietary considerations for this recipe?
Definitely! These Pink Coconut Snowball Cake Bars can easily cater to various dietary needs. For a dairy-free version, swap regular butter with vegan butter and use coconut cream instead of heavy whipping cream. You can also replace eggs with flax eggs or applesauce for a vegan-friendly alternative. Just be sure to choose gluten-free flour if you’re aiming for a gluten-free dessert!
How do I ensure that my cake base remains moist?
To keep your cake base moist, make sure to not overbake it! Start checking for doneness at the 25-minute mark by inserting a toothpick in the center; it should come out clean but may have a few moist crumbs. Additionally, using hot water in the batter helps to keep the cake moist and enhances the cocoa flavor.
Warm Up with Pink Coconut Snowball Cake Bars Everyone Will Love
Equipment
- Oven
- - 9x13-inch pan
- Mixing bowls
- Whisk
- Electric mixer
Ingredients
For the Cake Base
- 2 cups All-Purpose Flour Substitute with gluten-free flour for a gluten-free version.
- 3/4 cup Cocoa Powder Ensure it's unsweetened for the best results.
- 1 tablespoon Baking Powder
- 1 teaspoon Baking Soda
- 1 teaspoon Salt
- 1 cup Unsalted Butter Use vegan butter for a dairy-free option.
- 2 cups Granulated Sugar Can be replaced with a sugar alternative.
- 3 large Eggs Substitute with flax eggs for a vegan version.
- 1 teaspoon Vanilla Extract Opt for pure vanilla for the best taste.
- 1 cup Buttermilk Substitute with almond milk mixed with vinegar for a dairy-free version.
- 1 cup Hot Water
For the Cream Layer
- 2 cups Heavy Whipping Cream Use coconut cream for a dairy-free alternative.
- 1/2 cup Powdered Sugar Feel free to reduce for a lighter touch.
- 1 teaspoon Vanilla Extract Enhances sweetness and overall flavor.
- 8 ounces Cream Cheese Optional; omit for a lighter option.
For the Topping
- 2 cups Shredded Coconut Unsweetened is a healthier choice.
- 1 tablespoon Pink Food Coloring Beetroot powder is a natural alternative.
- 1 tablespoon Milk Adjusts the coconut color; any non-dairy milk works.
Instructions
Preparation
- Preheat your oven to 175°C (350°F) and grease a 9x13 inch pan.
- In a bowl, whisk together the flour, cocoa powder, baking powder, baking soda, and salt.
- In a separate bowl, cream the softened butter and sugar until fluffy, then add in the eggs and vanilla.
- Combine the dry ingredients alternately with buttermilk, followed by hot water, and pour into your prepared pan.
- Bake for 25–30 minutes or until set, and let it cool completely.
Cream Layer
- If using cream cheese, beat it until smooth, then add the heavy whipping cream, powdered sugar, and vanilla.
- Whip the mixture together until it reaches a light, fluffy texture.
Topping
- Mix the shredded coconut with pink food coloring; add a touch of milk if needed.
- Sprinkle the colorful coconut over the cream layer and gently press to adhere.
Final Steps
- Place in the fridge for at least 1 hour to set.
- Once chilled, slice into bars for an impressive presentation.