

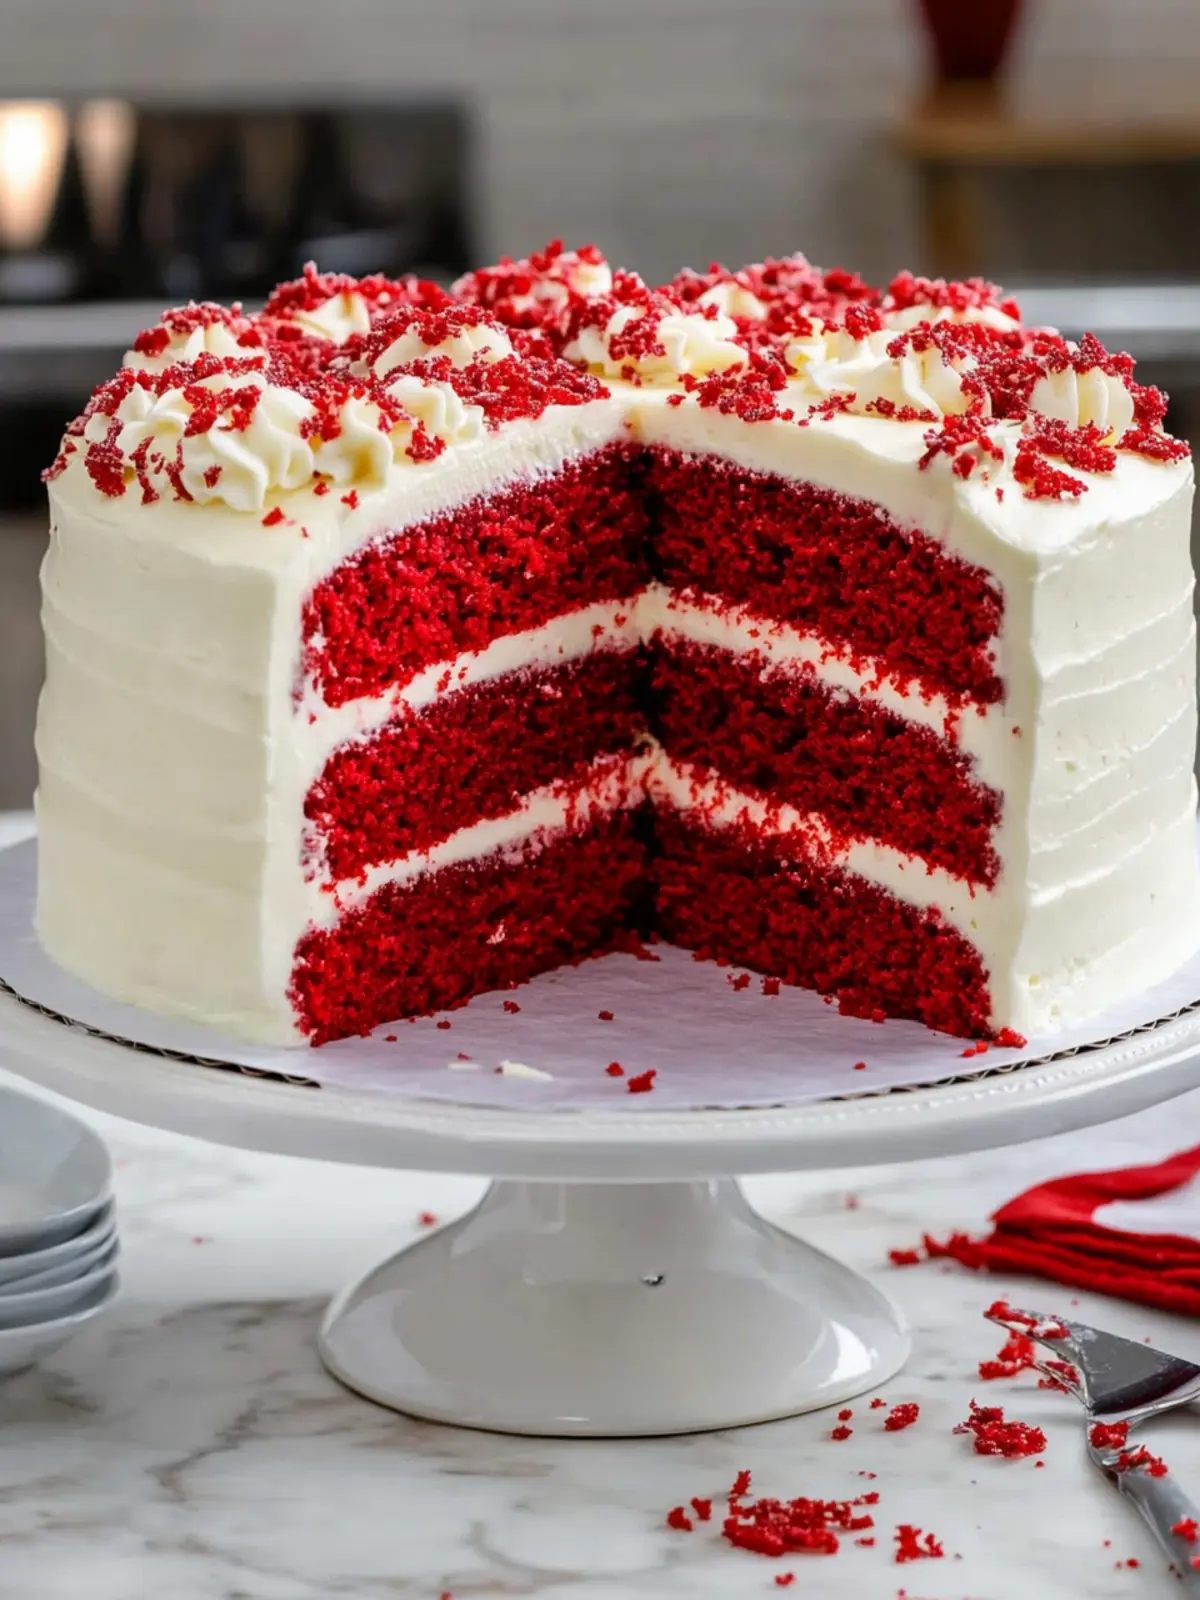
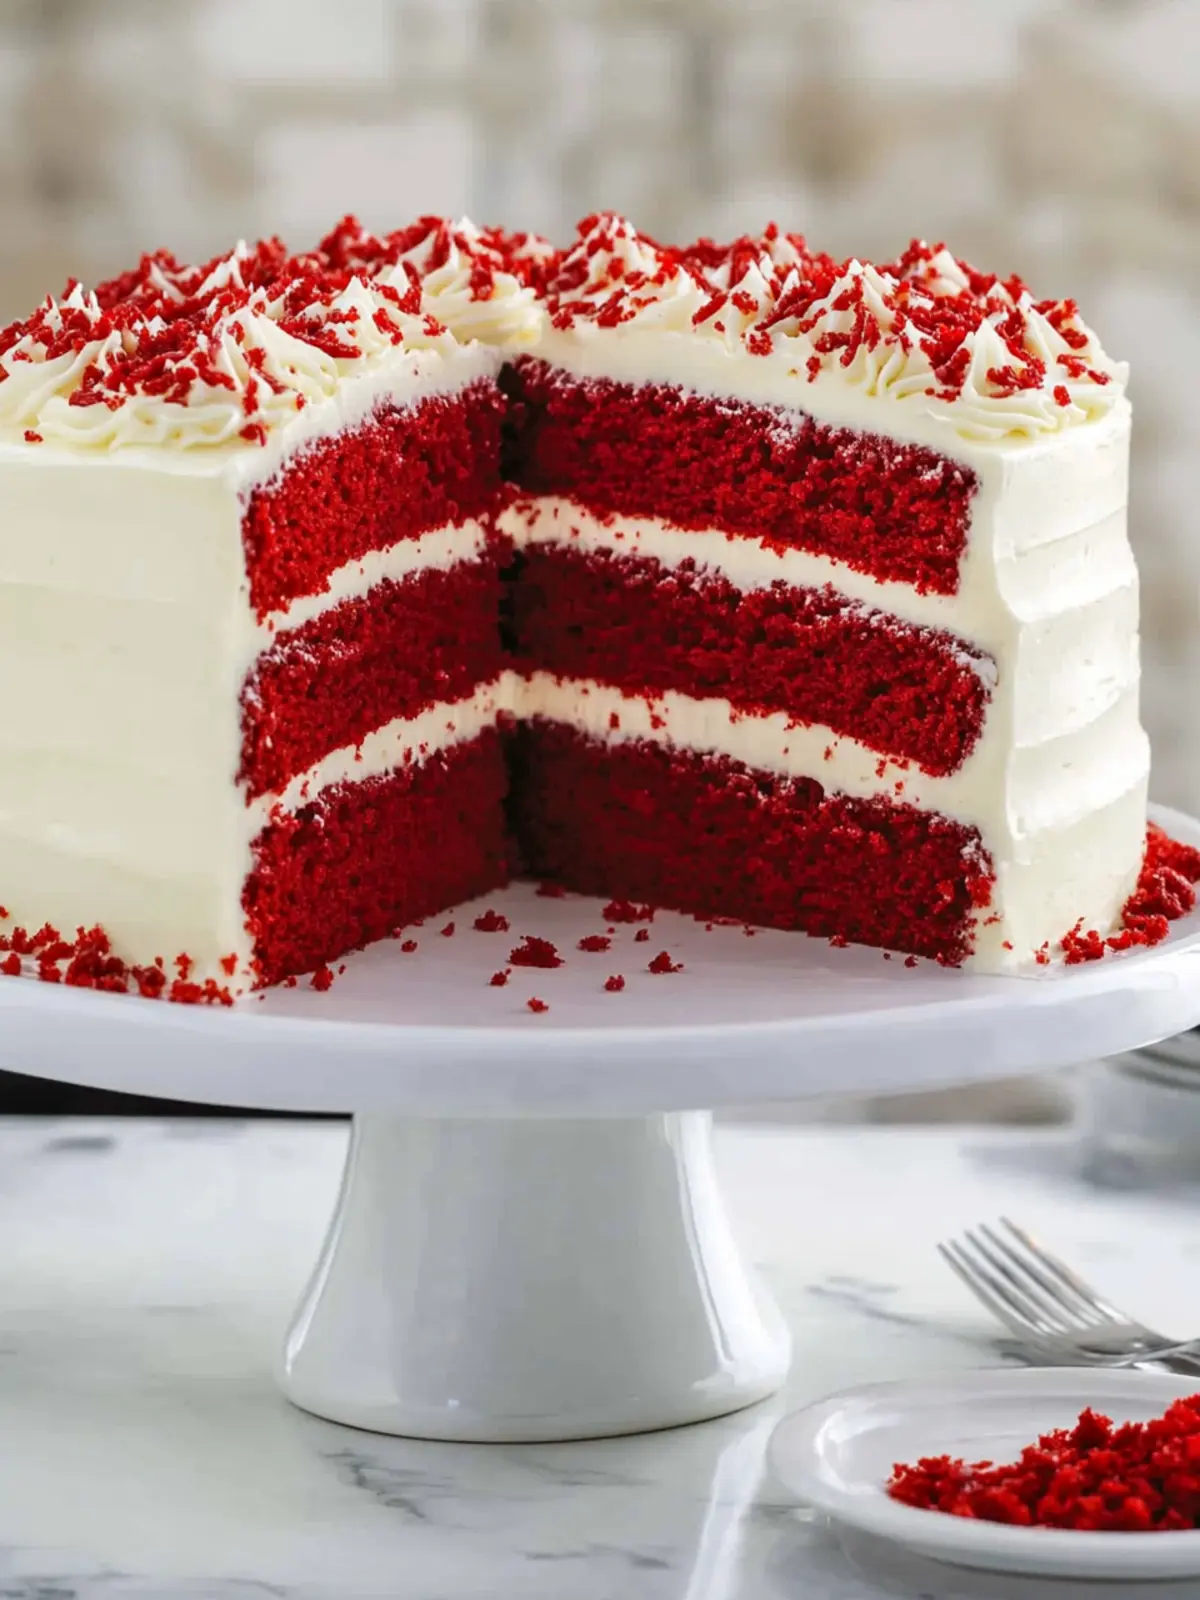
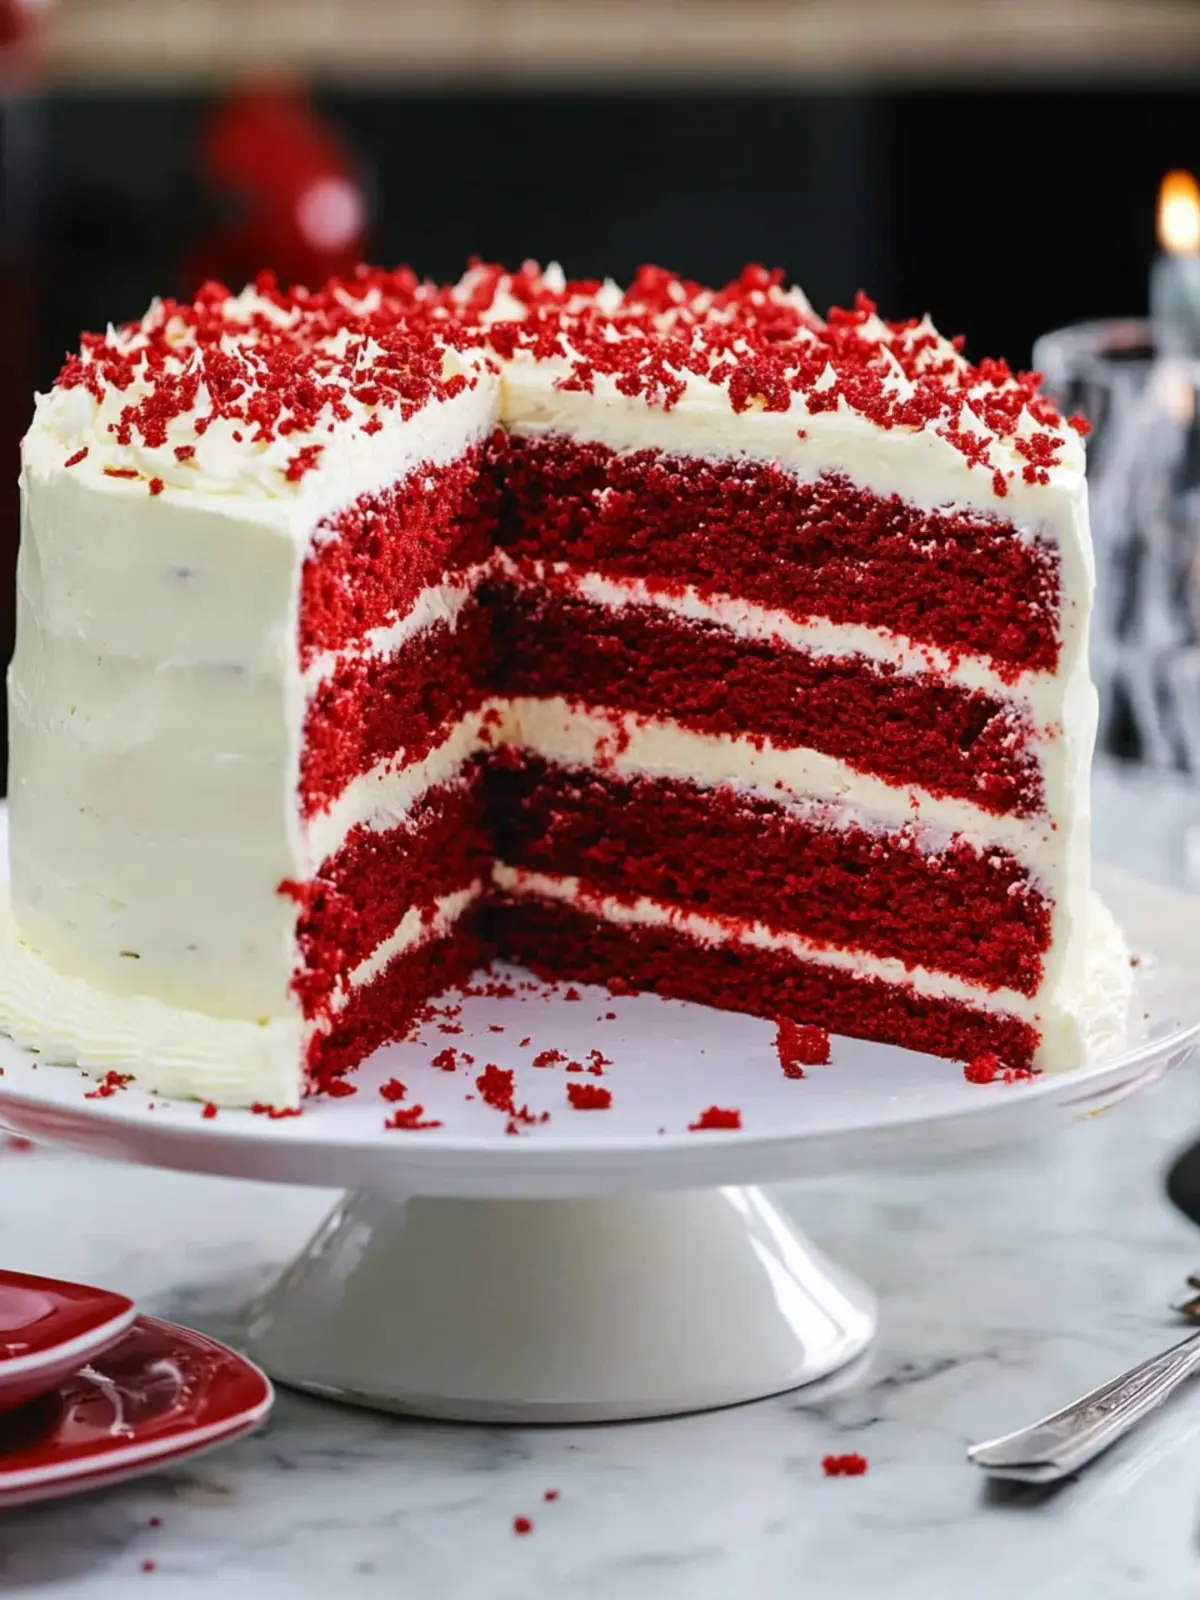
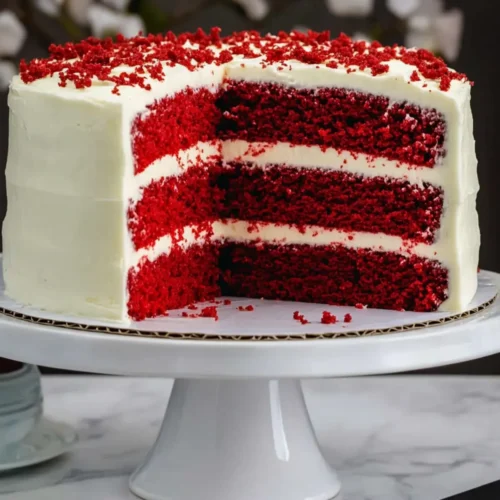
Every bite of my Classic Red Velvet Layer Cake with Cream Cheese Frosting transports me to a world of pure indulgence. There’s something undeniably enchanting about that striking deep red hue, drawing everyone in with its charm. As I slice through the tender layers, the aroma of sweet vanilla and cocoa envelops the kitchen, making it nearly impossible to resist a taste before the guests arrive.
I first discovered this recipe on a chilly afternoon when a craving for something both classic and comforting struck me. Trust me, this cake is more than just a treat for special occasions; it’s a delightful escape from the mundane. Paired with its dreamy cream cheese frosting, this cake strikes the perfect balance between sweet and tangy, leaving you with that melt-in-your-mouth experience.
Whether you’re celebrating a birthday, hosting a gathering, or simply wanting to elevate your dessert game, this moist red velvet layer cake is here to impress. Let’s dive into the recipe that’s bound to become a favorite in your home!
Why is Classic Red Velvet Layer Cake a Must-Try?
Irresistibly Moist: Each slice of this cake boasts a rich, velvety texture that melts in your mouth, making it an unforgettable dessert.
Showstopper Appeal: The vibrant red color and stunning layers not only catch the eye but also elevate any occasion.
Easy to Make: Don’t let its fancy looks fool you; this cake is straightforward enough for bakers of all levels to master.
Fluffy Frosting: The cream cheese frosting adds the perfect tangy sweetness that complements the cake’s flavors beautifully.
Versatile Treat: Ideal for birthdays, holidays, or any gathering, it’s guaranteed to impress your guests and leave them asking for seconds.
Classic Red Velvet Layer Cake Ingredients
• Discover everything you need for this delightful classic red velvet layer cake with cream cheese frosting!
For the Cake
- Vegetable or Canola Oil – Adds moisture and a fluffy texture; melted coconut oil can be a tasty substitute.
- Buttermilk – Provides acidity for tenderness and a tangy flavor; you can substitute with milk plus 1 tsp vinegar per cup.
- Large Eggs – Binds the ingredients and adds richness; using room temperature eggs helps with better mixing.
- Vanilla Extract – Enhances the cake’s overall flavor; for a more intense profile, try using vanilla bean paste.
- White Vinegar – Reacts with baking soda for leavening, giving lift to the cake; lemon juice works as an effective alternative.
- Red Gel Food Coloring – Gives the cake its signature deep hue; liquid food coloring can be used but may require more for the same effect.
- Granulated Sugar – Sweetens and adds moisture; feel free to substitute with a sugar alternative if preferred.
- All-Purpose Flour – Provides structure; for a gluten-free option, use a suitable gluten-free flour blend.
- Unsweetened Cocoa Powder – Imparts a subtle chocolate flavor; make sure to sift it for even distribution.
- Fine Salt – Balances the sweetness and enhances overall flavor.
- Baking Soda and Baking Powder – Essential leavening agents to help the cake rise perfectly.
For the Cream Cheese Frosting
- Unsalted Butter – Provides creaminess and structure; ensure it’s at room temperature for easier mixing.
- Full-Fat Cream Cheese – Adds richness and flavor; using room temperature cream cheese allows for smoother blending.
- Powdered Sugar – Creates a smooth frosting texture; adjust to your desired sweetness.
- Heavy Whipping Cream – Adds fluffiness and can help adjust the consistency of the frosting.
How to Make Classic Red Velvet Layer Cake
-
Preheat Oven: Set your oven to 350°F (175°C), and grease and line three 6-inch cake pans with parchment paper to ensure easy release.
-
Mix Wet Ingredients: In a large bowl, whisk together vegetable oil, buttermilk, large eggs, vanilla extract, white vinegar, and red gel food coloring until smoothly combined.
-
Combine Dry Ingredients: Gradually whisk in granulated sugar, all-purpose flour, cocoa powder, fine salt, baking soda, and baking powder. Mix until the batter is smooth and free of lumps.
-
Bake: Evenly divide the cake batter among the prepared pans. Bake for 27-30 minutes or until a toothpick inserted in the center comes out clean. Allow to cool in the pans for 15 minutes before transferring them to a wire rack.
-
Level Cake: Once completely cooled, carefully level the tops of the cakes with a serrated knife. Crumble any scraps to use for decoration later.
-
Frosting Preparation: In a large bowl, beat unsalted butter and cream cheese together until creamy. Gradually add powdered sugar and heavy whipping cream, mixing until you reach the desired smooth and fluffy consistency.
-
Assemble Cake: Place one layer of cake on a serving plate, spread a generous layer of cream cheese frosting on top, and repeat with the remaining layers. Frost the top and sides of the cake, then decorate with crumbled cake scraps and decorative piping around the edges.
Optional: Add festive sprinkles for a cheerful finishing touch.
Exact quantities are listed in the recipe card below.
Make Ahead Options
Prepare this Classic Red Velvet Layer Cake with Cream Cheese Frosting ahead of time to save precious moments during busy days! You can bake the cake layers up to 3 days in advance; simply wrap them tightly in plastic wrap and refrigerate to maintain their moisture. The cream cheese frosting can be made up to 2 weeks ahead and stored in an airtight container in the fridge—just bring it back to room temperature and beat gently before frosting the cake. When you’re ready to serve, assemble the cake and frost it for a fresh, delightful dessert that’s just as delicious, proving that make-ahead strategies can deliver stunning results with minimal effort.
Tips for the Best Classic Red Velvet Layer Cake
-
Room Temperature Ingredients: Ensure that all your ingredients, especially eggs and cream cheese, are at room temperature for the best texture and mixing.
-
Sifting Matters: Sifting your cocoa powder and flour helps prevent clumps, ensuring a smooth batter for your classic red velvet layer cake.
-
Avoid Overmixing: Once you add the flour, mix just until combined to keep the cake light and tender—overmixing can lead to a dense texture.
-
Cooling Time: Allow your cake layers to cool completely before frosting to avoid melting your cream cheese frosting and creating a mess!
-
Chill for Ease: If you find frosting your cake tricky, chilling the cake layers for about 20 minutes can make them much easier to handle.
What to Serve with Classic Red Velvet Layer Cake?
Elevate your dessert experience with these perfect pairings that complement every delicious bite of your red velvet layer cake.
- Fresh Berries: The tartness of berries like raspberries or strawberries cuts through the cake’s sweetness, providing a delightful contrast.
- Vanilla Ice Cream: A scoop of creamy vanilla ice cream adds a smooth and cool element that balances the cake’s rich flavors beautifully.
- Chocolate Ganache: Enhance your cake with a drizzle of velvety chocolate ganache for an extra layer of indulgence. Its bitterness pairs well with the sweetness.
Enjoying a slice on its own is fantastic, but each addition creates a unique tasting experience that excites the palate!
- Coffee or Espresso: A cup of freshly brewed coffee or a shot of espresso highlights the flavors of the chocolate and complements the cream cheese frosting.
- Caramel Sauce: Drizzling warm caramel sauce over the cake adds a touch of decadence and an unexpected richness that will satisfy any sweet tooth.
- Creamy Cheesecake Dip: A side of rich cheesecake dip allows for more dippable enjoyment, adding a silky texture that brings out the best in red velvet.
- Sparkling Water or Lemonade: For a refreshing palate cleanser, pair your cake with sparkling water infused with lemon or a homemade lemonade. It adds a zesty brightness that rounds out your meal.
Storage Tips for Classic Red Velvet Layer Cake
- Room Temperature: Cake layers can be kept at room temperature for up to 3 days in an airtight container. Make sure to cover the cake to prevent drying out.
- Fridge: Store any frosted classic red velvet layer cake in the fridge for up to a week. Place it in a well-sealed container to maintain the freshness of the cream cheese frosting.
- Freezer: You can freeze unfrosted cake layers for up to one month. Wrap each layer tightly in plastic wrap, then place in an airtight container to avoid freezer burn.
- Reheating: To enjoy leftover cake, you can let it come to room temperature or gently warm individual slices in the microwave for 10-15 seconds.
Classic Red Velvet Layer Cake Variations
Customize your Classic Red Velvet Layer Cake to suit your taste buds and dietary needs for a truly delightful experience!
- Gluten-Free: Use a gluten-free flour blend in place of all-purpose flour for a cake everyone can enjoy. The flavor remains just as rich and enticing!
- Dairy-Free: Substitute buttermilk with a non-dairy milk mixed with 1 tsp of vinegar, and use dairy-free cream cheese in the frosting for a delicious alternative. Your guests won’t even notice!
- Reduced Sugar: Opt for a sugar alternative like stevia or monk fruit sweetener to lower the sweetness without sacrificing that classic flavor. It’s a healthier twist!
- Chocolate Lovers: Add 1/2 cup of semi-sweet chocolate chips into the batter for an extra burst of flavor. Chocolate and red velvet? Yes, please!
- Spiced Up: For a little kick, introduce 1 teaspoon of cinnamon or a dash of cayenne pepper in the batter. This twist adds warmth to each decadent bite.
- Cupcake Version: Use the same batter to create delightful red velvet cupcakes, baking for just 18-21 minutes. Perfect for parties and easier to serve!
- Nutty Crunch: Fold in 1/2 cup of chopped walnuts or pecans into the batter for added texture and a nutty flavor that complements the cake beautifully.
- Fruity Frosting: Experiment with flavors by mixing in pureed strawberries or raspberries into the cream cheese frosting for a fruity twist. It’ll brighten up the classic taste!
Classic Red Velvet Layer Cake Recipe FAQs
How do I choose the right buttermilk for my cake?
When selecting buttermilk, look for fresh, whole buttermilk without added flavors or preservatives. It should have a slightly tangy smell, indicating its freshness. If you don’t have buttermilk on hand, you can easily make a substitute by mixing 1 cup of milk with 1 tablespoon of white vinegar or lemon juice. Allow it to sit for about 5-10 minutes before using.
How should I store my frosted red velvet cake?
To keep your classic red velvet layer cake fresh, store it in the refrigerator for up to a week. Place it in an airtight container or cover it tightly with plastic wrap to prevent the frosting from drying out and to maintain its flavor. When ready to serve, allow the cake to come to room temperature for the best taste and texture.
Can I freeze the cake layers? How should I do it?
Absolutely! Freezing cake layers is a fantastic way to prepare in advance. Here’s how to do it:
- Allow the baked layers to cool completely.
- Wrap each layer tightly in plastic wrap, ensuring there’s no air exposure.
- Place the wrapped layers in an airtight container or freezer bag to prevent freezer burn.
When you’re ready to enjoy the cake, thaw the layers in the fridge overnight, and then frost them when they reach room temperature.
What should I do if my cake doesn’t rise properly?
If your cake doesn’t rise as expected, it might be due to expired leavening agents. Always check the expiration dates on your baking soda and baking powder before use. Additionally, ensure you’re mixing the wet and dry ingredients just until combined; overmixing can cause the cake to be dense. If you’ve followed these tips and still have a flat cake, you may want to adjust your oven temperature—an oven thermometer can help ascertain the accuracy of your baking temperature.
What are some allergy considerations for this recipe?
When baking this classic red velvet layer cake, consider common allergies related to the ingredients. For a nut-free alternative, ensure your baking powder is labeled as nut-free, as some brands may have cross-contamination. If you’re catering to someone gluten-sensitive, use a gluten-free flour blend instead of all-purpose flour. Additionally, for dairy allergies, substitute the buttermilk with a non-dairy milk plus vinegar mix, and use dairy-free cream cheese for the frosting.
How long can I keep leftover cream cheese frosting?
Leftover cream cheese frosting can be stored in the refrigerator for up to 2 weeks. Place it in an airtight container to maintain its freshness. If you have extra frosting and want to keep it longer, it can be frozen for up to 3 months. Just make sure to thaw it in the refrigerator overnight before using it again, and give it a good stir for the best consistency.
Classic Red Velvet Layer Cake with Cream Cheese Frosting Bliss
Equipment
- Mixing bowls
- Whisk
- cake pans
- Oven
- Electric mixer
Ingredients
For the Cake
- 1 cup Vegetable or Canola Oil can use melted coconut oil as substitute
- 1 cup Buttermilk can substitute with milk plus 1 tsp vinegar per cup
- 2 large Eggs room temperature preferred
- 1 tsp Vanilla Extract or vanilla bean paste for a stronger flavor
- 1 tsp White Vinegar or lemon juice as an alternative
- 2 tbsp Red Gel Food Coloring liquid can be used but may require more
- 1.5 cups Granulated Sugar can substitute with a sugar alternative
- 2.5 cups All-Purpose Flour gluten-free flour blend can be used as a substitute
- 1 tbsp Unsweetened Cocoa Powder sift before use
- 1 tsp Fine Salt
- 1 tsp Baking Soda
- 1 tsp Baking Powder
For the Cream Cheese Frosting
- 1 cup Unsalted Butter at room temperature
- 8 oz Full-Fat Cream Cheese at room temperature
- 4 cups Powdered Sugar adjust to desired sweetness
- 1 cup Heavy Whipping Cream for fluffiness
Instructions
Baking the Cake
- Preheat Oven: Set your oven to 350°F (175°C), and grease and line three 6-inch cake pans with parchment paper to ensure easy release.
- Mix Wet Ingredients: In a large bowl, whisk together vegetable oil, buttermilk, large eggs, vanilla extract, white vinegar, and red gel food coloring until smoothly combined.
- Combine Dry Ingredients: Gradually whisk in granulated sugar, all-purpose flour, cocoa powder, fine salt, baking soda, and baking powder. Mix until the batter is smooth and free of lumps.
- Bake: Evenly divide the cake batter among the prepared pans. Bake for 27-30 minutes or until a toothpick inserted in the center comes out clean. Allow to cool in the pans for 15 minutes before transferring them to a wire rack.
- Level Cake: Once completely cooled, carefully level the tops of the cakes with a serrated knife. Crumble any scraps to use for decoration later.
- Frosting Preparation: In a large bowl, beat unsalted butter and cream cheese together until creamy. Gradually add powdered sugar and heavy whipping cream, mixing until you reach the desired smooth and fluffy consistency.
- Assemble Cake: Place one layer of cake on a serving plate, spread a generous layer of cream cheese frosting on top, and repeat with the remaining layers. Frost the top and sides of the cake, then decorate with crumbled cake scraps and decorative piping around the edges.