

When the vibrant hues of spring began to bloom, I found myself yearning for a sweet treat that mirrored that cheerful spirit. Enter the Pink Velvet Cake—a delightful twist on the classic that combines a stunning pink interior with the luxuriousness of cream cheese frosting. I first crafted this cake for my niece’s birthday, and each slice sparked pure joy among my family and their guests. Its delicate sweetness and tender crumb are reminiscent of vintage American desserts, yet it stands out with a unique flavor profile, boasting no cocoa powder.
Perfect for celebrations—whether it’s a birthday bash or an elegant afternoon tea—this cake invites you to celebrate life’s little moments with a slice of nostalgia. Its fluffy texture and striking color are sure to impress, and the best part? It’s surprisingly easy to make! So, if you’re looking to reignite your kitchen creativity and charm your friends and family, this Pink Velvet Cake is the ultimate recipe to bring a splash of joy to your table. Let’s get baking!

Why is Pink Velvet Cake so special?
Irresistible Flavor: The vibrant pink hue, paired with the tang of cream cheese frosting, creates a delightful taste that will have your taste buds singing.
Easy to Make: This recipe is straightforward, requiring only basic baking skills, perfect for both novice and seasoned bakers.
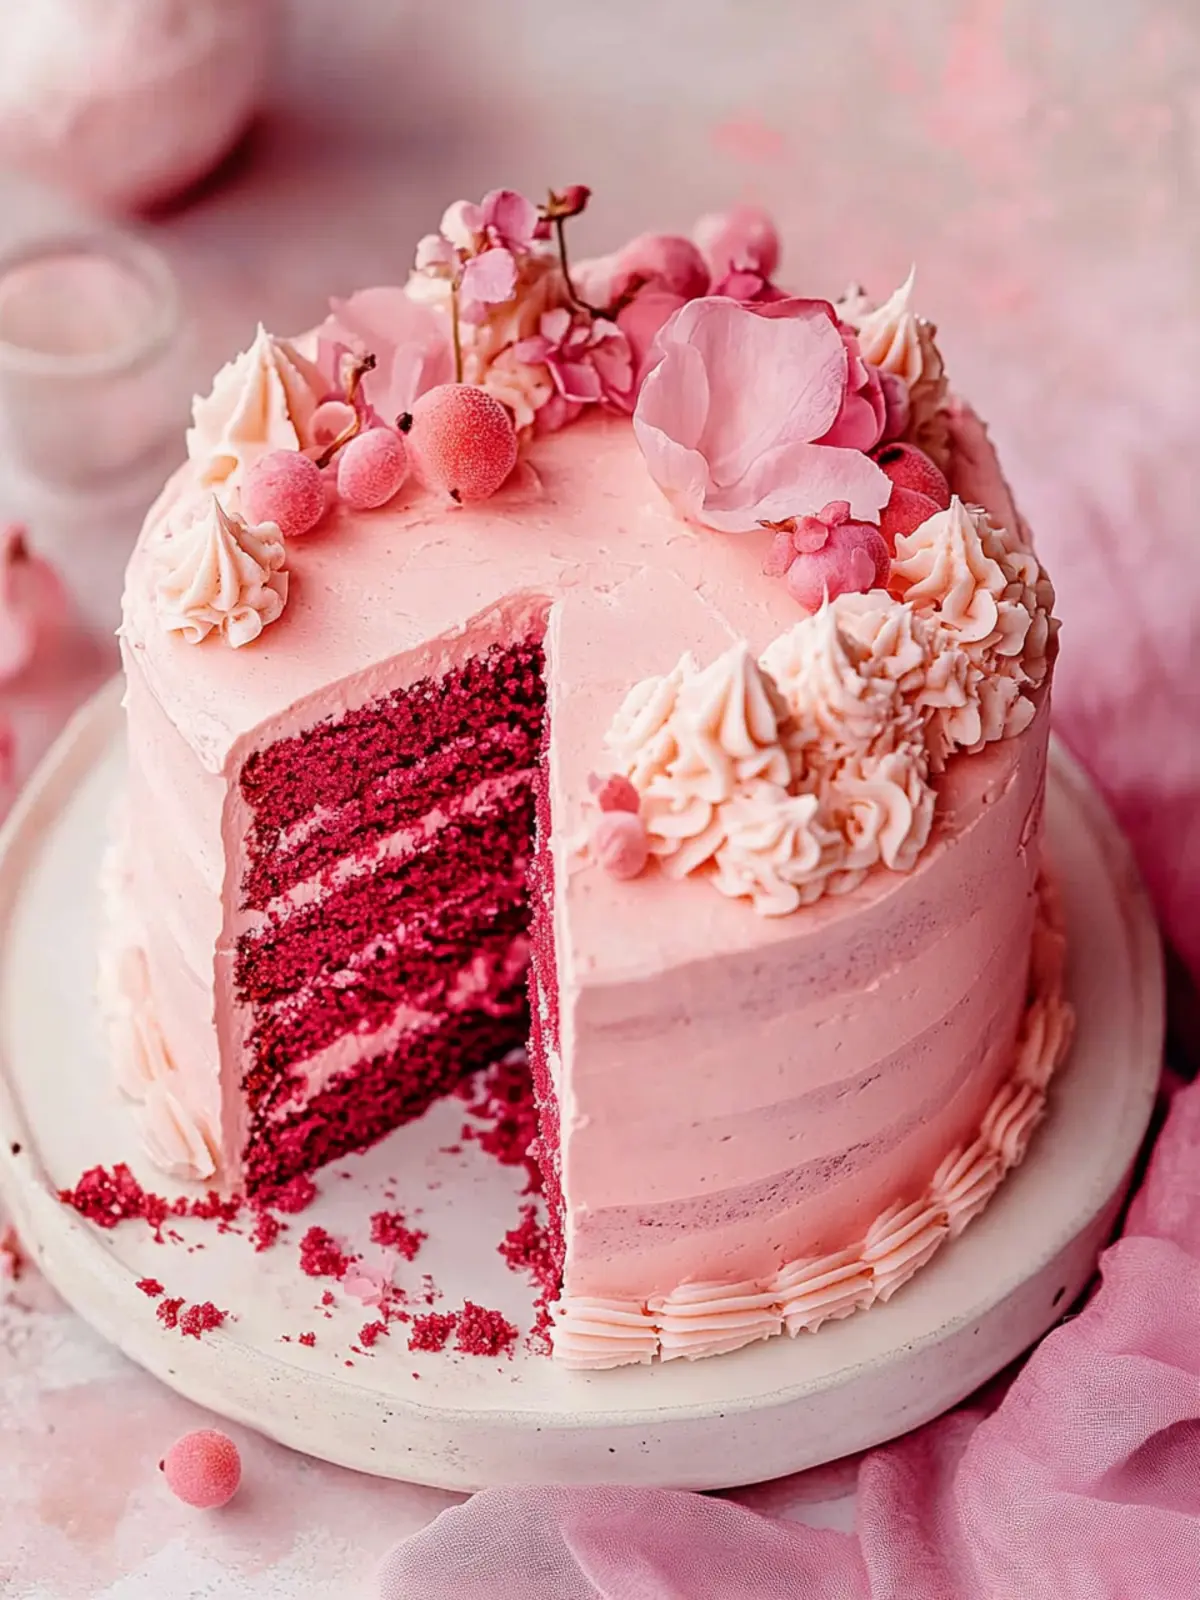
Eye-Catching Appeal: With its gorgeous color and vintage aesthetic, this cake is a showstopper for any occasion, from birthdays to tea parties.
No Cocoa Powder: This unique twist on velvet cake uses no cocoa powder, offering a light, refreshing taste different from traditional options.
Versatile Variations: Customize your creation by incorporating fruit fillings or experimenting with different frosting colors, making it your own unique masterpiece!
Whether you’re looking for a crowd-pleasing dessert or a sweet treat to enjoy at home, this Pink Velvet Cake is sure to become a treasured recipe in your collection!
Pink Velvet Cake Ingredients
For the Cake
• Unsalted Butter – Provides richness and moisture; substitute with salted butter, adjusting salt quantity.
• Vegetable Oil – Adds moisture and tenderness; can substitute with canola oil or melted coconut oil.
• Granulated Sugar – Sweetens the cake and helps with its structure; no direct substitutes suggested.
• Sea Salt – Enhances flavor; standard table salt can be used.
• Egg Whites – Creates a light and fluffy texture; whole eggs can be substituted but will alter color and texture.
• Pure Vanilla Extract – Adds depth of flavor; imitation vanilla can be used but may not be as rich.
• White Vinegar – Reacts with buttermilk to enhance fluffiness; apple cider vinegar is a suitable alternative.
• Pink Gel Food Coloring – Provides vibrant color; natural alternatives may cause color changes during baking.
• Cake Flour – Ensures a tender texture; substitute with all-purpose flour mixed with cornstarch (¾ cup + 2 tbsp flour + 2 tbsp cornstarch).
• Baking Powder – Essential for leavening; no substitutions recommended.
• Baking Soda – Also aids in leavening; ensure freshness for best results.
• Buttermilk – Adds moisture and a slight tang; store-bought buttermilk is preferred for consistency.
For the Cream Cheese Frosting
• Softened Butter – Provides a creamy base; ensure it’s at room temperature for easier mixing.
• Cream Cheese – Adds richness; use full-fat cream cheese for the best texture.
• Sea Salt – Enhances sweetness; adjust to taste.
• Powdered Sugar – Sweetens and thickens the frosting; sift for a smoother texture.
• Vanilla Extract – Boosts flavor; pure vanilla is recommended for a richer taste.
How to Make Pink Velvet Cake
-
Preheat the oven to 355°F (180°C). Prepare three 8” round pans by greasing them and lining the bottoms with parchment paper to prevent sticking.
-
Mix butter, vegetable oil, granulated sugar, and sea salt in a mixer until the mixture is light and fluffy—about 3-5 minutes should do the trick!
-
Add egg whites gradually, blending well until the mixture thickens. Next, mix in the pure vanilla extract and white vinegar, ensuring everything is well combined.
-
Dye the batter by incorporating pink gel food coloring slowly, stirring until you achieve your desired shade of pink.
-
Sift in half of the cake flour, along with the baking powder and baking soda. Gently fold in buttermilk, followed by the remaining flour, while being cautious not to overmix—stop when just combined.
-
Divide the batter evenly among the prepared pans. Bake in the preheated oven for 15-18 minutes or until a toothpick inserted in the center comes out mostly clean.
-
Cool the cakes in the pans for about 8 minutes before turning them out onto racks to cool completely. This helps maintain their fluffy texture.
-
Trim the edges of the cooled cake layers for a neat finish before frosting them with your cream cheese frosting.
For the Cream Cheese Frosting:
-
Beat the softened butter in a mixing bowl until creamy. Gradually add the sea salt and powdered sugar, mixing until the frosting is light and fluffy.
-
Blend in the cream cheese, mixing until light and airy. Finally, add the vanilla extract and adjust the frosting’s consistency as needed with a splash of milk.
For Assembly:
-
Layer the first cake on a serving plate and spread a generous amount of cream cheese frosting on top. Repeat with the remaining layers.
-
Chill the assembled cake for 10 minutes to set the crumb coat before covering it entirely with a pale pink frosting.
-
Decorate using piping bags filled with cream cheese frosting tinted with extra food coloring for whimsical designs.
Optional: Top with edible flowers for a stunning presentation.
Exact quantities are listed in the recipe card below.

Make Ahead Options
These delightful Pink Velvet Cakes are perfect for meal prep enthusiasts! You can bake the cake layers up to 2 days in advance. Once cooled, wrap the layers tightly in plastic wrap and refrigerate them to maintain moisture and freshness. As for the cream cheese frosting, it can also be prepared up to 3 days ahead; just store it in an airtight container in the fridge. When you’re ready to serve, simply assemble the cake by frosting the layers, and let it sit at room temperature for about 30 minutes before slicing to allow the frosting to soften and enhance the flavors. This way, you’ll enjoy a stunning dessert with minimal last-minute effort!
Pink Velvet Cake Variations
Feel free to make this delightful Pink Velvet Cake even more uniquely yours with these fun twists!
-
Natural Color: Use beet juice or raspberry puree instead of food coloring for a beautiful, earthy hue.
For an all-natural option that’s just as vibrant, beet juice brings a lovely color without any artificial ingredients. -
Berry Delight: Add a raspberry filling between the cake layers for a fruity surprise!
Centering layers with a tart raspberry filling adds both depth of flavor and a pop of bright color to every slice. -
Citrus Zest: Incorporate lemon zest into the batter for a refreshing citrus note.
The bright notes of lemon elevate the flavor and balance the sweetness, making every bite feel like sunshine. -
Nutty Crunch: Fold in finely chopped pistachios or almonds for added texture.
These nuts not only add crunch but also bring a lovely nutty flavor that pairs beautifully with the creamy frosting. -
Choco-Alternative: For a chocolate twist, replace some of the cake flour with cocoa powder for a chocolate-pink version.
Imagine a delightful surprise as your friends bite into a beautiful pink cake with a hint of chocolate goodness! -
Frosting Flavor: Experiment with flavored cream cheese frosting, such as lemon or orange, for a lively twist!
Adding citrus to the frosting takes the entire cake experience up a notch, making each slice even more irresistible. -
Spicy Kick: Mix in a pinch of cayenne pepper for an unexpected spicy kick.
A little heat brightens the sweetness and creates a playful contrast, perfect for adventurous taste buds! -
Whipped Cream Finish: Top the cake with a fluffy layer of whipped cream for added lightness.
A cloud-like layer of whipped cream softens the sweetness and adds a delightful texture that feels elegant and decadent.
How to Store and Freeze Pink Velvet Cake
Fridge: Keep the frosted Pink Velvet Cake in an airtight container in the refrigerator for up to 5 days. This helps maintain its moisture and the integrity of the cream cheese frosting.
Freezer: You can freeze un-frosted cake layers for up to 3 months. Wrap each layer tightly in plastic wrap, then aluminum foil, to protect from freezer burn.
Reheating: To enjoy, thaw the cake layers in the fridge overnight. If frosted, let it sit at room temperature for about 15-30 minutes before serving for optimal flavor and texture.
Make-Ahead: Bake and frost the Pink Velvet Cake 1-2 days before your event. Store it in the fridge until ready to enjoy, making it a perfect make-ahead dessert!
What to Serve with Pink Velvet Cake?
Looking to elevate your dessert experience? The delightful Pink Velvet Cake pairs beautifully with a variety of accompaniments that enhance its sweetness and charm.
- Fresh Berries: The tartness of strawberries or raspberries complements the cake’s sweetness and adds a refreshing touch.
- Vanilla Ice Cream: Creamy vanilla ice cream creates a delightful contrast to the fluffy cake, making each bite feel indulgent.
- Whipped Cream: Light and airy whipped cream adds an extra layer of creaminess and pairs perfectly with the tangy frosting.
- Sparkling Lemonade: A refreshing glass of sparkling lemonade cleanses the palate and balances the sweetness of the cake.
- Fruit Salad: A vibrant mix of seasonal fruits brings brightness to your dessert table and adds a healthy element to your meal.
- Chocolate-Covered Strawberries: The richness of chocolate pairs wonderfully with the lightness of the cake, creating a decadent treat to savor.
- Tea or Coffee: A warm cup of tea or coffee offers a comforting balance to the sweetness of the Pink Velvet Cake, perfect for afternoon delight.
- Chocolate Ganache: Drizzling chocolate ganache over each slice adds a sophisticated twist while enhancing the cake’s luxurious feel.
- Cream Cheese Cookies: For a fun theme, serve alongside cream cheese cookies—echoing the frosting flavor and creating a cohesive dessert spread.
- Buttercream Cupcakes: Continue the celebration with colorful buttercream cupcakes for a visually delightful dessert platter—who can resist more sweetness?
Expert Tips for Pink Velvet Cake
Room Temperature Ingredients: Ensure all refrigerated items, like butter and cream cheese, are at room temperature for smooth mixing and optimal texture.
Flour Measurement: Use the spoon-and-level method to measure cake flour accurately; too much flour can lead to a dense Pink Velvet Cake.
Gentle Mixing: Fold the flour mixture in gently to avoid overmixing, which can make your cake tough instead of fluffy.
Color Adjustment: Add pink gel food coloring gradually, testing as you go. The pink color deepens as the cake bakes!
Cooling Period: Allow the cakes to cool completely for the best frosting application, preventing melting and sliding.
Serving Tip: Store the frosted Pink Velvet Cake in the fridge due to the cream cheese frosting, but let it sit at room temperature for a few minutes before serving for the best flavor.
Pink Velvet Cake Recipe FAQs
How do I choose the right ripeness of ingredients for the Pink Velvet Cake?
Absolutely! Use fresh, high-quality ingredients for the best results. For the butter, choose one that’s creamy and slightly soft to the touch, ensuring easy mixing. The eggs should be fresh for maximum fluffiness, while the buttermilk should be within its expiration date to maintain flavor and moisture in your cake.
What’s the best way to store Pink Velvet Cake, and how long will it last?
To keep your Pink Velvet Cake delicious, store it in an airtight container in the refrigerator. It will stay fresh for up to 5 days due to the cream cheese frosting, which requires cooler temperatures. If it’s un-frosted, you can keep it at room temperature for 3-4 days—just ensure it’s wrapped tightly to avoid dryness!
Can I freeze Pink Velvet Cake, and how should I do it?
Yes, you can absolutely freeze your Pink Velvet Cake! To freeze un-frosted layers, wrap each layer tightly in plastic wrap followed by aluminum foil. This prevents freezer burn and keeps them fresh for up to 3 months. When you’re ready to enjoy, simply thaw in the fridge overnight and allow to sit at room temperature for 15-30 minutes before serving to regain its texture.
What if my cake layers dome or aren’t even after baking?
Very! If your cake layers dome in the oven, you can gently press them down while they’re still warm—just be careful not to squish them too much. For uneven layers, use a serrated knife to level the tops once they have cooled. Trimming them will ensure easier stacking and a beautiful presentation when frosted.
Are there any dietary considerations I should keep in mind when making this Pink Velvet Cake?
Indeed! If you’re concerned about allergies, remember that this recipe includes gluten from cake flour and dairy from cream cheese and buttermilk. If you’re baking for someone with food sensitivities, consider using gluten-free flour and dairy alternatives like almond milk mixed with a bit of vinegar to mimic buttermilk. Always confirm with your guests to keep everyone safe and happy!

Delightful Pink Velvet Cake with Creamy Frosting Magic
Equipment
- - Mixer
- Oven
- 8-inch round cake pans
- Parchment paper
- Measuring cups
- Measuring spoons
- Mixing bowls
- Spatula
Ingredients
For the Cake
- 1 cup Unsalted Butter Softened
- 1/2 cup Vegetable Oil
- 1 cup Granulated Sugar
- 1/2 teaspoon Sea Salt
- 4 large Egg Whites
- 1 teaspoon Pure Vanilla Extract
- 1 teaspoon White Vinegar
- 1 teaspoon Pink Gel Food Coloring
- 2 cups Cake Flour Or all-purpose flour with cornstarch
- 1 tablespoon Baking Powder
- 1 teaspoon Baking Soda
- 1 cup Buttermilk Store-bought preferred
For the Cream Cheese Frosting
- 1 cup Softened Butter Room temperature
- 8 oz Cream Cheese Full-fat for best texture
- 1/4 teaspoon Sea Salt Adjust to taste
- 4 cups Powdered Sugar Sifted
- 1 teaspoon Vanilla Extract Pure recommended
Instructions
For the Cake
- Preheat the oven to 355°F (180°C). Prepare three 8” round pans by greasing them and lining the bottoms with parchment paper to prevent sticking.
- Mix butter, vegetable oil, granulated sugar, and sea salt in a mixer until the mixture is light and fluffy—about 3-5 minutes should do the trick!
- Add egg whites gradually, blending well until the mixture thickens. Next, mix in the pure vanilla extract and white vinegar, ensuring everything is well combined.
- Dye the batter by incorporating pink gel food coloring slowly, stirring until you achieve your desired shade of pink.
- Sift in half of the cake flour, along with the baking powder and baking soda. Gently fold in buttermilk, followed by the remaining flour, while being cautious not to overmix—stop when just combined.
- Divide the batter evenly among the prepared pans. Bake in the preheated oven for 15-18 minutes or until a toothpick inserted in the center comes out mostly clean.
- Cool the cakes in the pans for about 8 minutes before turning them out onto racks to cool completely.
- Trim the edges of the cooled cake layers for a neat finish before frosting them with your cream cheese frosting.
For the Cream Cheese Frosting
- Beat the softened butter in a mixing bowl until creamy. Gradually add the sea salt and powdered sugar, mixing until the frosting is light and fluffy.
- Blend in the cream cheese, mixing until light and airy. Finally, add the vanilla extract and adjust the frosting's consistency as needed with a splash of milk.
For Assembly
- Layer the first cake on a serving plate and spread a generous amount of cream cheese frosting on top. Repeat with the remaining layers.
- Chill the assembled cake for 10 minutes to set the crumb coat before covering it entirely with a pale pink frosting.
- Decorate using piping bags filled with cream cheese frosting tinted with extra food coloring for whimsical designs.