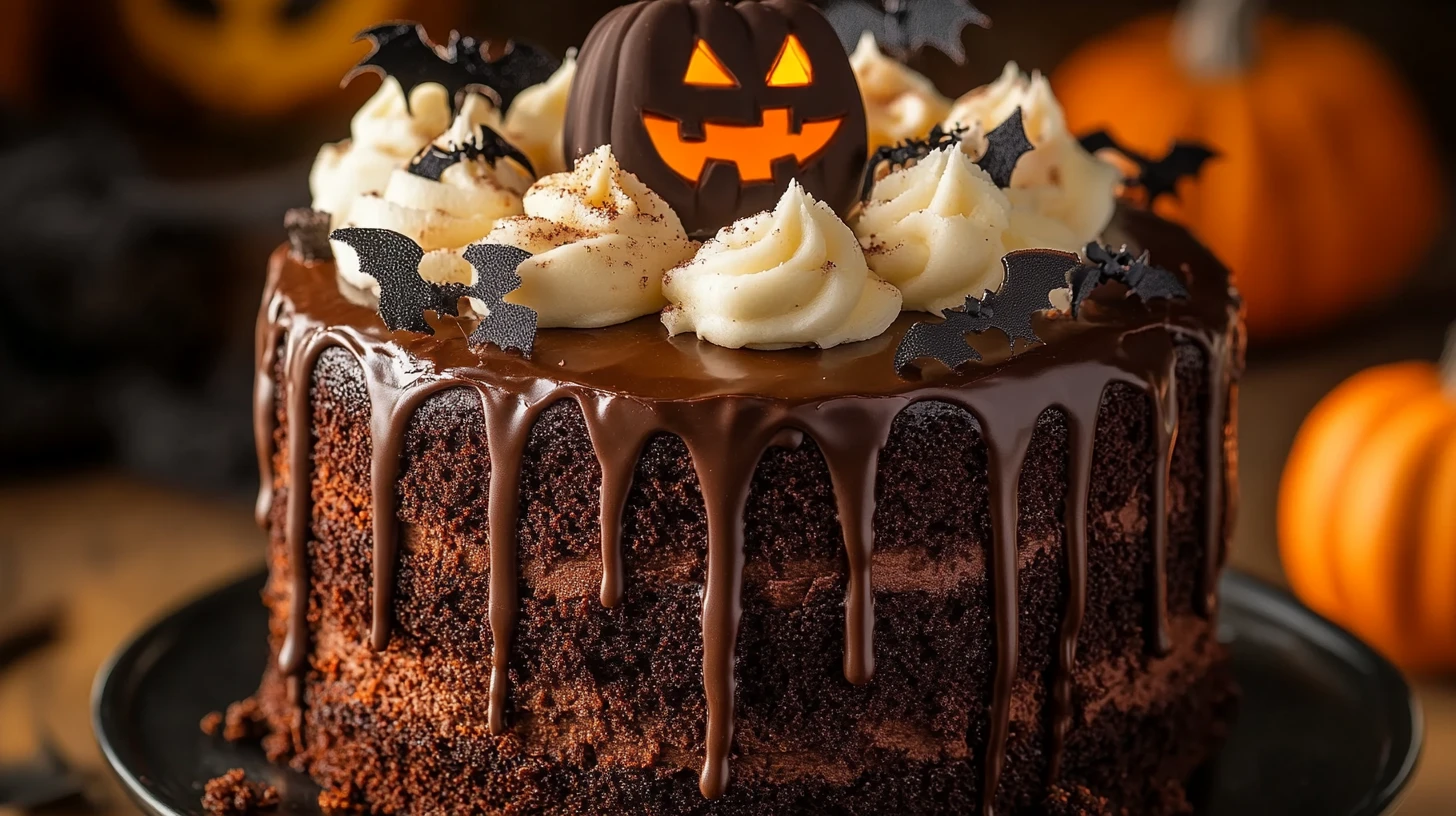
Every Halloween, I enjoy making a stunning homemade chocolate cake. It’s the star of our spooky baking traditions. This dessert has been a hit for ten years, loved for its deep chocolate taste and fun decorations. If you’re looking for another festive treat, check out our Delicious Apple Crumble Cheesecake for every occasion!
This cake is more than just a treat. It’s a celebration of the season, turning a simple sheet cake into a showstopper. It’s perfect for any Halloween party, big or small, and always gets rave reviews.
The cake’s charm lies in its flexibility. You can make it gluten-free or add fun touches like Gummy Worms and Candy Eyes. The dark cocoa makes it a rich, intense chocolate color, perfect for Halloween.
Creating this cake is easy, even for beginners. It only needs 12 ingredients and simple steps. You can make it in various sizes, from 6-inch to 9-inch rounds, making it adaptable to your needs.
Get ready to be the Halloween baking star with this delicious and dramatic chocolate cake!
Understanding the Magic Behind Halloween Chocolate Cake Making
Making the perfect Halloween chocolate cake is all about skill, passion, and the right tools. I’ll show you how to turn your kitchen into a spooky wonderland. You’ll learn expert tips to make your cake stand out.
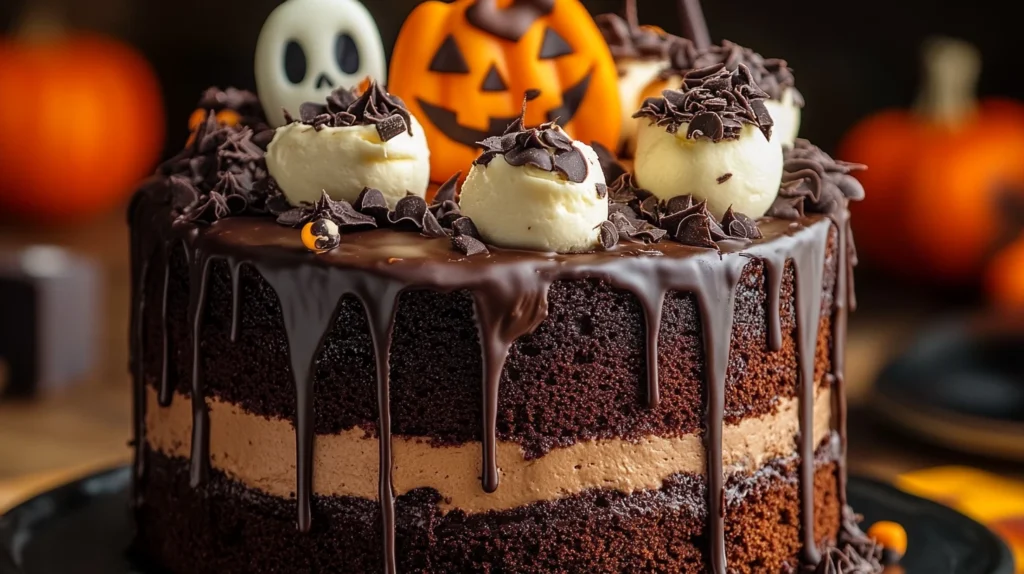
To make a spectacular Halloween chocolate cake, you need to know the key ingredients and tools. These will take your baking to the next level.
Essential Baking Tools and Equipment
Every baker needs the right tools to make a perfect chocolate cake. Here are my top picks:
- KitchenAid Stand Mixer 4.5 Quart
- Halloween bat cookie cutter
- Sturdy mixing bowls
- Precise measuring cups and spoons
- Quality cake pans
- Offset spatula
- Parchment paper
Key Ingredients for Success
Choosing the right ingredients is key for a delicious Halloween treat. Here’s what you need:
| Ingredient | Quantity | Purpose |
|---|---|---|
| Unsalted Butter | ½ cup | Adds richness and moisture |
| Granulated Sugar | ¾ cup | Provides sweetness |
| Large Eggs | 3 | Binds ingredients |
| Unsweetened Cocoa Powder | ½ cup | Creates deep chocolate flavor |
Time and Temperature Considerations
Professional bakers stress the importance of precise temperature and timing. Here’s how to do it right:
- Preheat oven to 350°F (177°C)
- Bake for 40 minutes
- Allow 2-4 hours cooling time
- Ensure ingredients are room temperature
Pro tip: Always use high-quality ingredients like premium cocoa powder and fresh eggs for the best Halloween chocolate cake!
Chocolate Cake Recipe From Scratch Easy Halloween
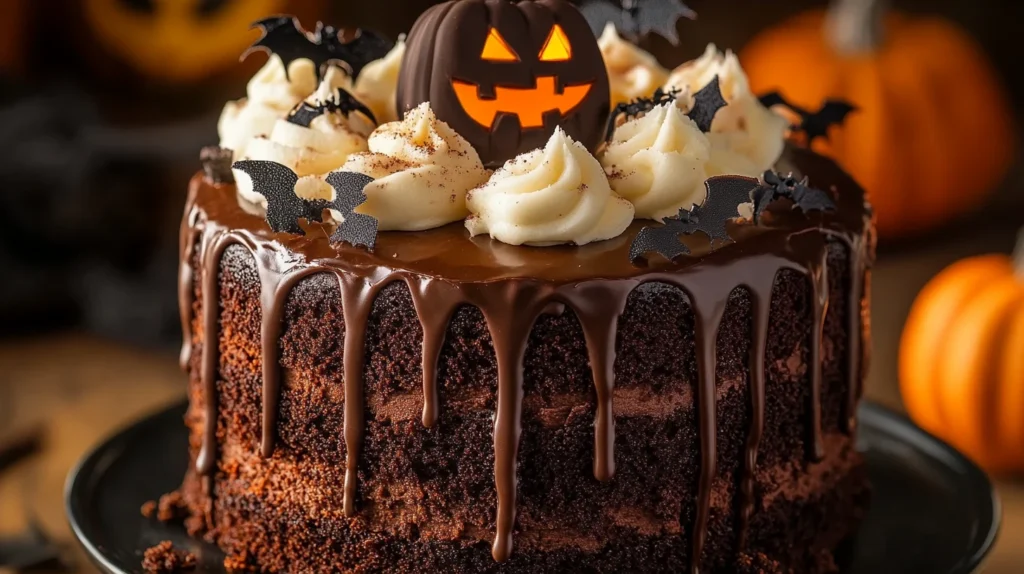
Making a tasty homemade chocolate cake for Halloween is easy. I’ll show you a simple recipe to make your Halloween baking fun!
Here are the ingredients you’ll need for this spooky chocolate cake:
- 1 cup melted butter
- 2 cups sugar
- 1 3/4 cups all-purpose flour
- 1 cup cocoa powder
- 1/2 cup plain Greek yogurt
- 2 teaspoons vanilla extract
- 4 eggs
- 1 tablespoon baking powder
- 1/2 teaspoon baking soda
- 1/2 teaspoon kosher salt
- 1 cup very hot water
This homemade chocolate cake is easy to make. Use a stand mixer to mix the ingredients well. Pro tip: Mix dry ingredients separately before combining with wet ingredients to ensure a perfect texture.
Baking details for your Halloween chocolate cake:
- Prep time: 20 minutes
- Bake time: 28-32 minutes
- Oven temperature: 350°F
- Yields: 2 9-inch cake pans
To make your Halloween baking even better, freeze your cake rounds for 8+ hours before frosting. This step makes the cake more consistent and flavorful, impressing your spooky guests!
Gathering Your Ingredients: A Complete Shopping List
Making the perfect Halloween chocolate cake needs careful planning and the right ingredients. For more baking tips and inspiration, explore our Easy Kefir Sheet Cake Recipe to elevate your baking skills. I’ll guide you through the essential items for your spooky dessert.
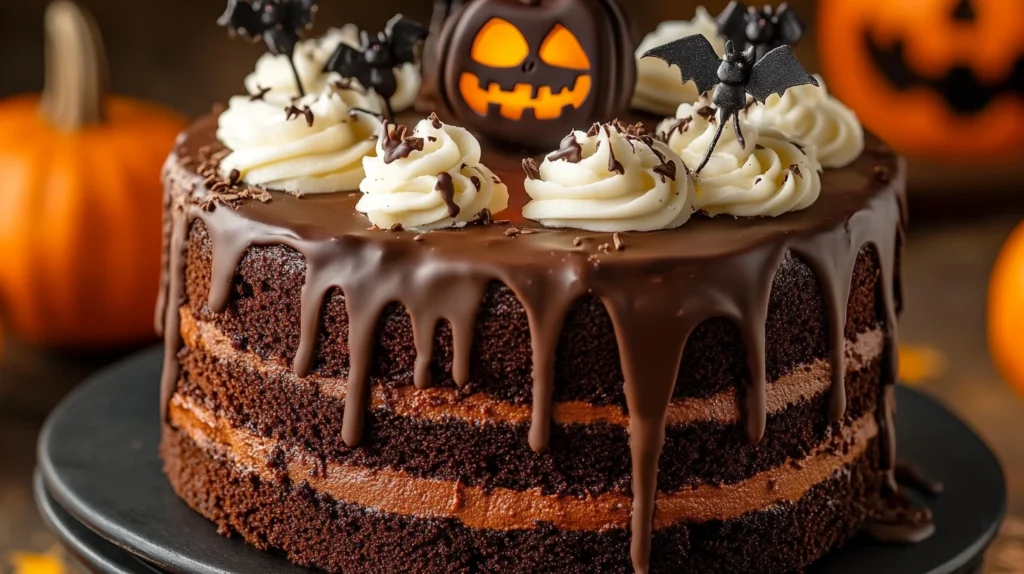
Dry Ingredients Checklist
- All-purpose flour (2 cups)
- Unsweetened cocoa powder (3/4 cup)
- Granulated sugar (2 cups)
- Baking soda (1 1/2 teaspoons)
- Baking powder (1/2 teaspoon)
- Salt (1/2 teaspoon)
Wet Ingredients Overview
- Vegetable oil (1/2 cup)
- Large eggs (2)
- Vanilla extract (2 teaspoons)
- Buttermilk (1 cup)
- Hot coffee (1 cup)
Special Halloween Decorating Supplies
To make your cake a spooky masterpiece, get these decorations:
| Decoration Item | Quantity Suggested |
|---|---|
| Candy corn | 1 small bag |
| Halloween sprinkles | 1 container |
| Plastic spiders | 10-12 pieces |
| Googly eyes | 1 pack |
| Milano cookies (for tombstones) | 1 package |
| Marshmallows (for spider webs) | 1 bag |
| Oreo cookies | 1 package |
Pro tip: Check your pantry before shopping to avoid buying duplicate items. A well-organized grocery list ensures a smooth baking experience!
Preparing Your Kitchen and Baking Space
Starting your spooky chocolate cake adventure requires smart kitchen prep. An organized baking space can turn your baking into a joy. Let’s go over the key steps to set up a smooth baking area.
Before you begin your Halloween chocolate cake, let’s get your kitchen ready. A well-organized baking space makes the whole process fun and stress-free.
Kitchen Essentials Checklist
- Clean and clear countertop space
- Preheat oven to 350°F (177°C)
- Gather all baking tools and ingredients
- Prepare 9×13 baking pan
- Line pan with parchment paper
Must-Have Baking Tools
- Mixing bowls – various sizes
- Measuring cups and spoons
- Electric mixer or whisk
- Cooling rack
- Spatula
- Kitchen scale (optional but helpful)
Having everything ready means no frantic searches. Lay out your ingredients and tools before you start. This way, you avoid stress and stay focused on your baking.
Pro tip: Read the recipe from start to finish before you begin. It helps avoid surprises and makes baking your Halloween chocolate cake a breeze.
Step-by-Step Mixing and Baking Process
Making the perfect Halloween chocolate cake needs precision and care. I’ll guide you through each step. This way, you’ll make a delicious and spooky dessert that will wow your guests.
Creating the Perfect Batter
The key to a great chocolate cake is in the batter. Begin by getting your dry ingredients ready: 2 cups all-purpose flour, 2 cups granulated sugar, 1 teaspoon baking soda, and 1 teaspoon kosher salt. Then, mix the wet ingredients in another bowl:
- ½ cup unsalted butter
- ½ cup vegetable oil
- ½ cup instant espresso
- 2 large eggs
- 1 teaspoon vanilla extract
- ½ cup full-fat buttermilk
Baking Temperature and Timing Tips
Preheat your oven to 350°F for baking. Use the Nordic Ware Haunted Skull Cake Pan for a spooky look. Pour the batter into the pan carefully to ensure it’s even. Bake for about 50 minutes, checking with a toothpick to see if it’s done.
Cooling and Preparation for Decorating
Cooling the cake is very important. After baking, let it rest in the pan for 10 minutes. Then, move it to a wire rack to cool completely for 1-2 hours. This step helps the frosting stay firm and makes decorating easier.
By following these steps, you’ll make a Halloween chocolate cake that’s both tasty and beautiful. It’s ready for your spooky decorations!
Creating the Rich Chocolate Buttercream Frosting
Making the perfect homemade frosting is an art. It turns an ordinary cake into a delicious masterpiece. My chocolate buttercream frosting recipe will make your Halloween cake stand out. It’s creamy, rich, and irresistible.
Let’s explore the key ingredients and how to make this delightful chocolate buttercream:
- 1 1/2 cups room-temperature unsalted butter
- 5 cups powdered sugar
- 2/3 cup unsweetened cocoa powder
- Pinch of fine sea salt
- 2 teaspoons vanilla extract
- 1 dark chocolate bar (60-72% cacao), melted and cooled
- 4-5 tablespoons heavy cream or whole milk
The secret to a smooth frosting is in the technique. Use a stand mixer and beat the butter on medium-high speed for 6-7 minutes. This makes it incredibly smooth and pale.
| Ingredient | Quantity | Purpose |
|---|---|---|
| Butter | 1 1/2 cups | Creates creamy base |
| Powdered Sugar | 5 cups | Provides sweetness and structure |
| Cocoa Powder | 2/3 cup | Adds rich chocolate flavor |
When making your chocolate buttercream, add powdered sugar slowly to avoid graininess. Start mixing on low speed, then go high for a minute. Adjust the consistency by adding more sugar or cream as needed.
This recipe makes enough frosting for 24 cupcakes or a 9-inch layer cake. Pro tip: Store your frosting in an airtight container in the fridge for up to 7 days. This keeps it fresh for your spooky Halloween treat!
Spooky Decorating Techniques and Ideas
Transforming a simple cake into a Halloween masterpiece is easy. I’ll share spooky ideas that will make your cake the star of any Halloween party.
Making Marshmallow Spider Webs
With Halloween cake decorating, you can make terrifying treats from simple ingredients. To make marshmallow spider webs, microwave marshmallows until they stretch. Then, gently pull them across your cake. This creates a spooky web effect.
- Microwave marshmallows for 10-15 seconds
- Stretch carefully between fingers
- Drape web-like strands across cake surface
- Use dark chocolate background for maximum contrast
Creating Ghost Cookie Toppers
Take your spooky desserts to the next level with meringue ghost cookie toppers. Pipe meringue into ghost shapes and bake at a low temperature. This creates delicate, ghostly decorations that float over your chocolate cake.
| Ingredient | Quantity | Purpose |
|---|---|---|
| Egg whites | 2 | Meringue base |
| Powdered sugar | 1/2 cup | Sweetness and structure |
| Black food coloring | Few drops | Ghost facial details |
Adding Final Halloween Touches
My favorite decorating tricks involve unexpected elements. Crushed Oreos create a graveyard look, while candy corn and Halloween sprinkles add fun. Milano cookie tombstones add a whimsical touch to your spooky dessert.
- Sprinkle crushed Oreos for graveyard texture
- Add candy corn around cake edges
- Place Milano cookie tombstones strategically
- Use gummy worms for extra creepiness
Storage Tips and Make-Ahead Options
Learning how to store cake is key to keeping your Halloween chocolate cake fresh. I’ll share some expert tips for baking ahead. These will help your dessert stay delicious.
Proper storage is essential for keeping desserts like your cake in top shape. Here are my best suggestions:
- Room Temperature Storage:
- Keep the cake in an airtight container
- Best consumed within 2 days
- Store away from direct sunlight
- Refrigeration Techniques:
- Store in a sealed container
- Lasts up to 5 days
- Pro tip: Bring to room temperature before serving
- Freezing for Long-Term Storage:
- Wrap tightly in plastic wrap
- Add a layer of aluminum foil
- Freezes beautifully for up to 3 months
For the best storage, make sure your cake is cool before putting it away. Use containers with a bit of air to prevent moisture. Freezing works well if you slice the cake first. This makes thawing and serving easier.
More make-ahead baking tips: keep the frosting separate from the cake layers. This helps avoid sogginess and keeps the cake’s texture perfect. Thaw frozen cakes in the fridge overnight for the best taste.
Alternative Dietary Options and Substitutions
Baking a delicious Halloween chocolate cake doesn’t mean you have to give up on dietary needs. Smart ingredient swaps make it possible for everyone to enjoy this spooky treat. I’ll show you how to make gluten-free cake and dairy-free desserts that taste just as good as the original.
Dietary alternatives are key for home bakers today. They help manage food sensitivities or just offer new culinary options. These changes make your Halloween cake inclusive and delicious for everyone.
Gluten-Free Cake Modifications
Making your Halloween chocolate cake gluten-free is simpler than you might think. Here are the main substitutions:
- Replace all-purpose flour with a gluten-free flour blend (1:1 ratio)
- Use xanthan gum to improve texture and binding
- Check all additional ingredients for gluten contamination
Dairy-Free Dessert Solutions
Creating dairy-free desserts needs careful ingredient swaps. My top picks include:
- Substitute butter with melted coconut oil
- Use almond milk or oat milk instead of regular milk
- Replace buttermilk with dairy-free yogurt mixed with lemon juice
When picking ingredients for your gluten-free cake or dairy-free desserts, always check labels. Some ingredients might have gluten or dairy that could affect your diet.
Pro tip: Test your alternative ingredients in small batches to ensure the best flavor and texture!

Spooky Halloween Chocolate Cake
Ingredients
- 2 cups all-purpose flour
- 1¾ cups granulated sugar
- ¾ cup unsweetened cocoa powder
- 1½ teaspoons baking powder
- 1½ teaspoons baking soda
- 1 teaspoon salt
- 2 large eggs
- 1 cup whole milk
- ½ cup vegetable oil
- 2 teaspoons vanilla extract
- 1 cup boiling water
- For the Frosting:
- 1 cup unsalted butter softened
- 3½ cups powdered sugar
- ½ cup unsweetened cocoa powder
- ½ cup heavy cream
- 1 teaspoon vanilla extract
- For Decoration:
- Assorted Halloween-themed candies e.g., gummy worms, candy eyes
- Black and orange sprinkles
Instructions
- Prepare the Cake:
- Preheat your oven to 350°F (175°C). Grease and flour two 9-inch round baking pans.
- In a large mixing bowl, sift together the flour, sugar, cocoa powder, baking powder, baking soda, and salt.
- Add the eggs, milk, oil, and vanilla extract to the dry ingredients. Beat on medium speed until well combined.
- Gradually stir in the boiling water until the batter is smooth. Note: The batter will be thin.
- Pour the batter evenly into the prepared pans.
- Bake for 30-35 minutes, or until a toothpick inserted into the center comes out clean.
- Remove from the oven and allow the cakes to cool in the pans for 10 minutes. Then, transfer them to a wire rack to cool completely.
- Prepare the Frosting:
- In a large bowl, beat the softened butter until creamy.
- Sift together the powdered sugar and cocoa powder. Gradually add this mixture to the butter, alternating with the heavy cream, beating on low speed until combined.
- Add the vanilla extract and increase the mixer speed to medium-high. Beat until the frosting is light and fluffy.
- Assemble and Decorate:
- Place one cake layer on a serving plate. Spread a layer of frosting on top.
- Place the second cake layer on top and frost the top and sides of the cake.
- Decorate with Halloween-themed candies and sprinkles as desired.
Conclusion
Making the perfect Halloween chocolate cake is more than just a recipe. It’s about creating a special experience for everyone. My homemade treats have turned ordinary Halloween parties into unforgettable celebrations.
The festive desserts I’ve shared are easy to make and fun to customize. Whether you’re new to baking or have years of experience, this recipe is a great starting point. It lets you add your own twist and make each cake special.
Halloween baking brings people together with joy and tasty treats. This recipe combines rich chocolate with fun decorations like ghosts and spider webs. It’s a great way to celebrate the season and make memories.
The key ingredient in any Halloween dessert is love and creativity. Let your imagination soar and enjoy every step of your baking journey. It’s all about having fun and making something special.
FAQ
How long does this Halloween chocolate cake take to bake?
The cake bakes for 40 minutes at 350°F (177°C). Use a toothpick to check if it’s done. A clean toothpick means the cake is ready.
Can I make this cake gluten-free?
Yes, you can! Use gluten-free flour instead of all-purpose flour. Make sure all ingredients are gluten-free for dietary needs.
What are some creative Halloween decorating ideas for the cake?
Use decorations like candy corn, plastic spiders, and googly eyes. Milano cookie tombstones and marshmallow spider webs are great too. Oreo crumbs can make a spooky graveyard look.
How long can I store the decorated Halloween chocolate cake?
Store it in an airtight container at room temperature for 2 days. Or refrigerate for up to 5 days. Freeze for up to 3 months with plastic wrap and foil.
Can I make this cake dairy-free?
Yes, use melted coconut oil instead of butter. Choose non-dairy milk for buttermilk. For frosting, use dairy-free butter and cream for a tasty dairy-free version.
What type of frosting works best with this Halloween chocolate cake?
Use chocolate buttercream frosting. It’s made with butter, sugar, cocoa, cream, salt, and vanilla. Cream cheese frosting adds a tangy twist.
How do I prevent the frosting from melting when decorating?
Let the cake cool for 2-4 hours before frosting. This keeps the frosting from melting or sliding off.
What baking tools do I need for this recipe?
You’ll need mixing bowls, a 9×13 pan, parchment paper, a stand mixer, and measuring cups. Also, a cooling rack and basic utensils like whisks and spatulas.
Can I make this cake in advance?
Yes, bake the cake a day ahead and store it in an airtight container. Frost and decorate just before serving for fresh looks.
Are there any tips for getting a moist chocolate cake?
Use vegetable oil, buttermilk, and hot coffee for moisture. Don’t overbake. Cool the cake completely before frosting to keep it moist.

