

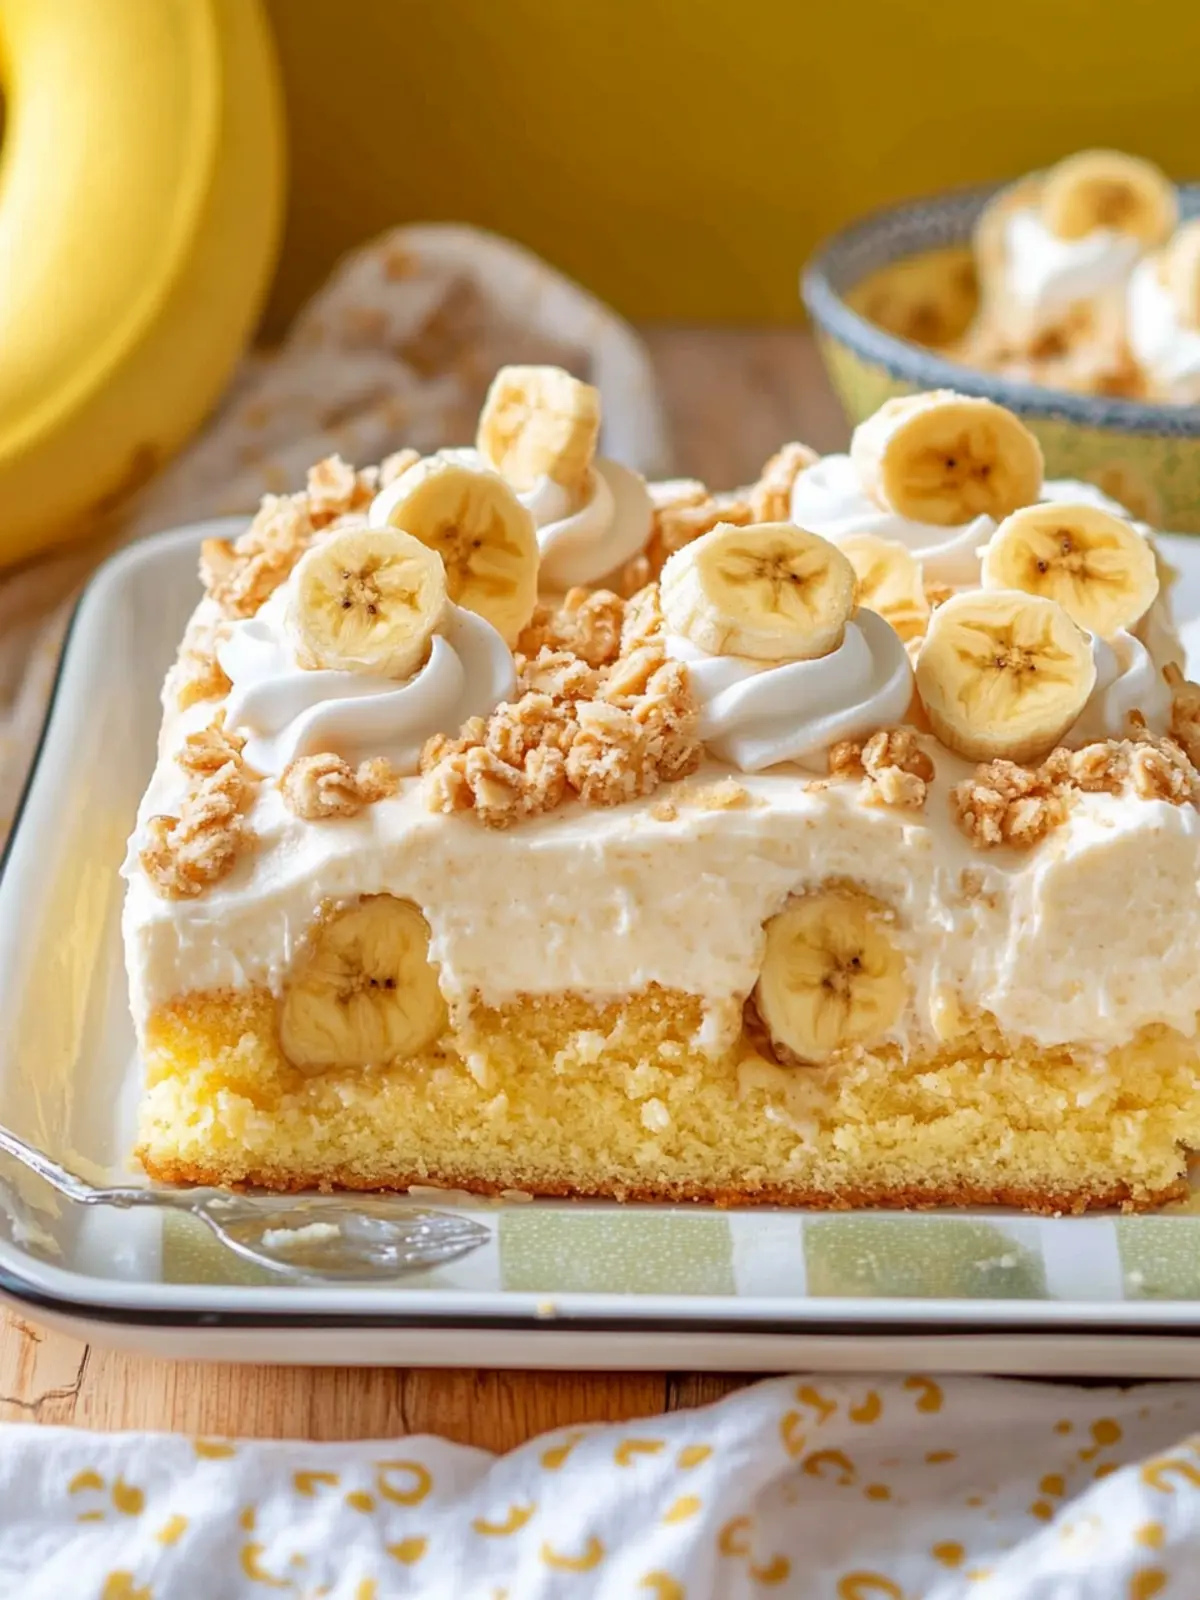
When that unmistakable banana aroma fills my kitchen, there’s no turning back. It whisked me away to lazy summer afternoons spent savoring creamy banana pudding straight from my grandmother’s fridge. This nostalgia inspired my latest creation: a Decadent Banana Pudding Poke Cake that perfectly marries the flavors I adore with a fun twist. The moist yellow cake is infused with rich banana goodness, while the creamy vanilla pudding seeps into every nook and cranny, creating a dessert that’s both delightful and impressive. Topped with fluffy whipped cream and a crunchy sprinkle of Nilla Wafers, it’s a showstopper for any gathering—or simply an indulgent treat for a cozy night in. Whether you’re a busy home cook or a baking aficionado, this recipe offers a delicious escape from everyday fast food. Let’s dive into this simple yet satisfying dessert that’s sure to become a favorite in your home!
Why is Banana Pudding Poke Cake a must-try?
Irresistible nostalgia: This Banana Pudding Poke Cake brings back cherished memories of classic desserts, combining the richness of layered pudding with the comforting flavors of bananas.
Simple to make: With minimal ingredients and straightforward steps, this recipe is perfect for both novice and experienced bakers.
Crowd-pleaser: Ideal for gatherings, it impresses guests while satisfying everyone’s sweet tooth.
Texture heaven: The combination of moist cake and creamy pudding guarantees a melt-in-your-mouth experience that’s simply unforgettable.
Versatile base: Customize it by swapping in chocolate pudding or even peanut butter for a slightly different flavor profile.
Experience this delightful dessert and explore why it’s a favorite among many!
Banana Pudding Poke Cake Ingredients
For the Cake
• Cooking Spray – Prevents sticking; ensure even coverage in the cake pan.
• Flour – For pan dusting; all-purpose flour works best for a smooth release.
• Box Yellow Cake Mix – Provides the cake base; follow package instructions for extra ingredients.
For the Pudding Filling
• Vanilla Pudding Mix (2 boxes) – Forms the creamy filling; can substitute with instant coconut pudding for a flavor twist.
• Milk (3 cups) – Adds creaminess to the pudding mix; use whole milk for richness or almond milk as a dairy-free alternative.
For the Topping
• Heavy Cream (2 cups) – Creates a luscious whipped topping; you can use Cool Whip as a convenient shortcut.
• Sugar (2 Tbsp) – Sweetener for the whipped cream; adjust based on your desired level of sweetness.
• Vanilla Extract (1 tsp) – Enhances flavor; pure vanilla extract is preferred for the best taste.
For Layering
• Bananas (3, thinly sliced) – Adds natural sweetness and moisture; opt for ripe but firm bananas for the best texture.
• Nilla Wafers (20 + 4 crushed) – Offers crunch and a classic flavor pairing; substitute with graham crackers for a different twist.
Enjoy crafting this Banana Pudding Poke Cake that will have everyone asking for seconds!
How to Make Banana Pudding Poke Cake
-
Preheat the oven according to the yellow cake mix instructions. Don’t forget to prepare your cake pan by spraying it with cooking spray and dusting it with flour to prevent any sticking!
-
Mix the yellow cake according to the package instructions. Bake for the recommended time, usually around 25-30 minutes, or until a toothpick inserted comes out clean. Let it cool completely before proceeding.
-
Whisk together the vanilla pudding mix and milk in a bowl. Allow it to sit for about 5 minutes until it thickens slightly, creating a creamy filling.
-
Poke holes throughout the cooled cake using a fork or skewer. Pour the prepared pudding over the cake, making sure it seeps into all the holes for maximum flavor absorption.
-
Layer the banana slices evenly over the pudding layer. Then sprinkle crushed Nilla Wafers on top for that delightful crunch.
-
Whip the heavy cream along with sugar and vanilla until soft peaks form. Gently spread this fluffy topping over the entire cake, creating an inviting finish.
-
Garnish with the remaining whole Nilla Wafers and refrigerate the cake for at least 1 hour to let the flavors meld beautifully before serving.
Optional: Serve with an extra sprinkle of crushed Nilla Wafers for a decorative touch!
Exact quantities are listed in the recipe card below.
Expert Tips for Banana Pudding Poke Cake
- Cool Completely: Allow the cake to cool completely before poking holes; if it’s warm, it may crumble when handled.
- Stay Moist: For an extra moist Banana Pudding Poke Cake, add an additional cup of milk to the pudding mixture.
- Pudding Consistency: Let the pudding thicken slightly before pouring it over the cake; this helps it absorb better without making the cake soggy.
- Whipping Technique: Whip the heavy cream until soft peaks form to achieve a stable topping that holds its shape beautifully.
- Storage Smarts: Keep leftovers covered in the refrigerator and consume within three days; the Nilla Wafers will soften over time.
Make Ahead Options
Preparing the Banana Pudding Poke Cake ahead of time is a fantastic way to save valuable hours, making it ideal for busy weeknights or special gatherings. You can bake the yellow cake and let it cool completely up to 24 hours in advance; simply cover it with plastic wrap to maintain its moistness. The pudding can also be mixed and refrigerated for up to 3 days; just be sure to cover it tightly to prevent any skin from forming. When you’re ready to serve, poke the cake, pour in the pudding, layer the bananas and Nilla Wafers, and top with whipped cream. This way, your dessert will be just as delicious, and you’ll be relaxed and prepared when it’s time to impress your guests!
What to Serve with Banana Pudding Poke Cake?
Elevate your dessert experience with delightful accompaniments that complement this creamy delight.
- Fresh Fruit Salad: A refreshing medley of seasonal fruits balances the sweetness of the cake and adds a pop of color.
- Vanilla Ice Cream: The creamy, cold contrast with warm cake makes for a nostalgic treat, enhancing every bite.
- Caramel Sauce: Drizzling this rich sauce offers a delightful contrast, deepening the flavor profile with its buttery sweetness.
- Chocolate Shavings: Sprinkle these on top for added elegance and a touch of richness that pairs beautifully with bananas.
- Lemon Sorbet: This zesty frozen treat cuts through the richness, providing a refreshing twist that cleanses the palate.
- Sweet Tea: A glass of this classic beverage adds a familiar touch, enhancing the southern charm of this dessert.
- Espresso: Serve a shot of espresso on the side for an energizing contrast, perfect for coffee lovers seeking balance.
These pairings will transform your Banana Pudding Poke Cake into a delightful culinary experience!
Storage Tips for Banana Pudding Poke Cake
Fridge: Store any leftover Banana Pudding Poke Cake covered with plastic wrap or in an airtight container for up to 3 days. This keeps it fresh while preventing it from drying out.
Freezer: If you want to enjoy this delicious dessert later, freeze the cake without the whipped topping for up to 2 months. Wrap it well in foil or plastic wrap to avoid freezer burn.
Reheating: To serve, simply thaw the frozen cake overnight in the fridge, then top it with fresh whipped cream before digging in. Avoid reheating to maintain the delicate textures.
Topping Preservation: If possible, add the Nilla Wafers just before serving, as they will lose their crunch when stored for too long. Enjoy!
Banana Pudding Poke Cake Variations
Dive into the world of possibilities as you customize this delightful dessert with these fun twists!
-
Chocolate Pudding: Swap vanilla pudding for chocolate for a rich, indulgent flavor. It’s a delicious blend that will surely satisfy your chocolate cravings.
-
Peanut Butter Delight: Layer creamy peanut butter between the pudding and bananas for a nutty flavor explosion that will make your taste buds dance!
-
Berry Bliss: Replace bananas with fresh strawberries or blueberries for a refreshing, fruity take on this classic dessert. It’s a delightful twist perfect for summer gatherings.
-
Dairy-Free: Use almond or coconut milk and vegan whipped topping for a dairy-free version that doesn’t compromise on taste. Everyone can enjoy this luscious cake!
-
Coconut Twist: Substitute vanilla pudding with coconut pudding to add a tropical flair. Top with toasted coconut for extra texture and flavor that transports you to the beach.
-
Bananas Foster: Enhance the banana layers by sautéing them in butter and brown sugar before layering. This adds a sweet caramelization that’s simply irresistible.
-
Spicy Kick: For a touch of warmth, sprinkle in a dash of cinnamon or nutmeg into the pudding mix. It adds a cozy flavor profile that’s especially inviting during cooler months.
-
Nutty Crunch: Fold in some chopped nuts, like pecans or walnuts, into the Nilla Wafers for an extra crunchy topping that enhances the cake’s texture beautifully.
Let your culinary creativity flow as you adopt these variations to make the Banana Pudding Poke Cake your very own!
Banana Pudding Poke Cake Recipe FAQs
What type of bananas should I use?
For the best texture and flavor, choose ripe but firm bananas, as they provide natural sweetness without becoming mushy. Avoid bananas that have dark spots all over, as this indicates overripeness.
How should I store leftover Banana Pudding Poke Cake?
Store any leftovers in the refrigerator, covered with plastic wrap or in an airtight container for up to 3 days. This will help keep the cake moist and the flavors fresh while preventing it from drying out.
Can I freeze Banana Pudding Poke Cake?
Absolutely! You can freeze the cake without the whipped topping for up to 2 months. Wrap it tightly in plastic wrap or foil to avoid freezer burn. When you’re ready to enjoy it, simply thaw the cake overnight in the refrigerator, then top it with fresh whipped cream before serving.
What should I do if my pudding doesn’t thicken properly?
If your pudding doesn’t thicken as expected, ensure you gave it enough time to set (about 5 minutes). If it’s still runny, whisk in a little bit more pudding mix and let it sit for another few minutes. Make sure you’re using the right ratio of milk as instructed on the pudding mix package.
Is this dessert safe for people with egg allergies?
Yes! This Banana Pudding Poke Cake is a great choice for those with egg allergies as it does not use eggs in the cake mix or pudding preparation. However, always check the specific brands of the cake mix and pudding you choose, as formulations can vary.
Heavenly Banana Pudding Poke Cake Your New Favorite Dessert
Equipment
- Mixing bowl
- cake pan
- Whisk
- fork or skewer
Ingredients
For the Cake
- 1 can Cooking Spray Prevents sticking; ensure even coverage in the cake pan
- 1 cup Flour All-purpose flour for pan dusting
- 1 box Yellow Cake Mix Follow package instructions for extra ingredients
For the Pudding Filling
- 2 boxes Vanilla Pudding Mix Forms the creamy filling
- 3 cups Milk Use whole milk for richness or almond milk as a dairy-free alternative
For the Topping
- 2 cups Heavy Cream Creates a luscious whipped topping
- 2 Tbsp Sugar Adjust based on desired sweetness
- 1 tsp Vanilla Extract Pure vanilla extract is preferred
For Layering
- 3 Bananas Thinly sliced; ripe but firm for best texture
- 20 Nilla Wafers Offers crunch; substitute with graham crackers for a different twist
Instructions
Instructions
- Preheat the oven according to the yellow cake mix instructions. Prepare your cake pan by spraying it with cooking spray and dusting it with flour.
- Mix the yellow cake according to package instructions. Bake for 25-30 minutes, or until a toothpick inserted comes out clean. Let it cool completely.
- Whisk together the vanilla pudding mix and milk in a bowl. Allow it to sit for about 5 minutes until it thickens slightly.
- Poke holes throughout the cooled cake using a fork or skewer. Pour the prepared pudding over the cake.
- Layer the banana slices evenly over the pudding layer and sprinkle crushed Nilla Wafers on top.
- Whip the heavy cream along with sugar and vanilla until soft peaks form. Spread this topping over the entire cake.
- Garnish with the remaining whole Nilla Wafers and refrigerate for at least 1 hour before serving.