

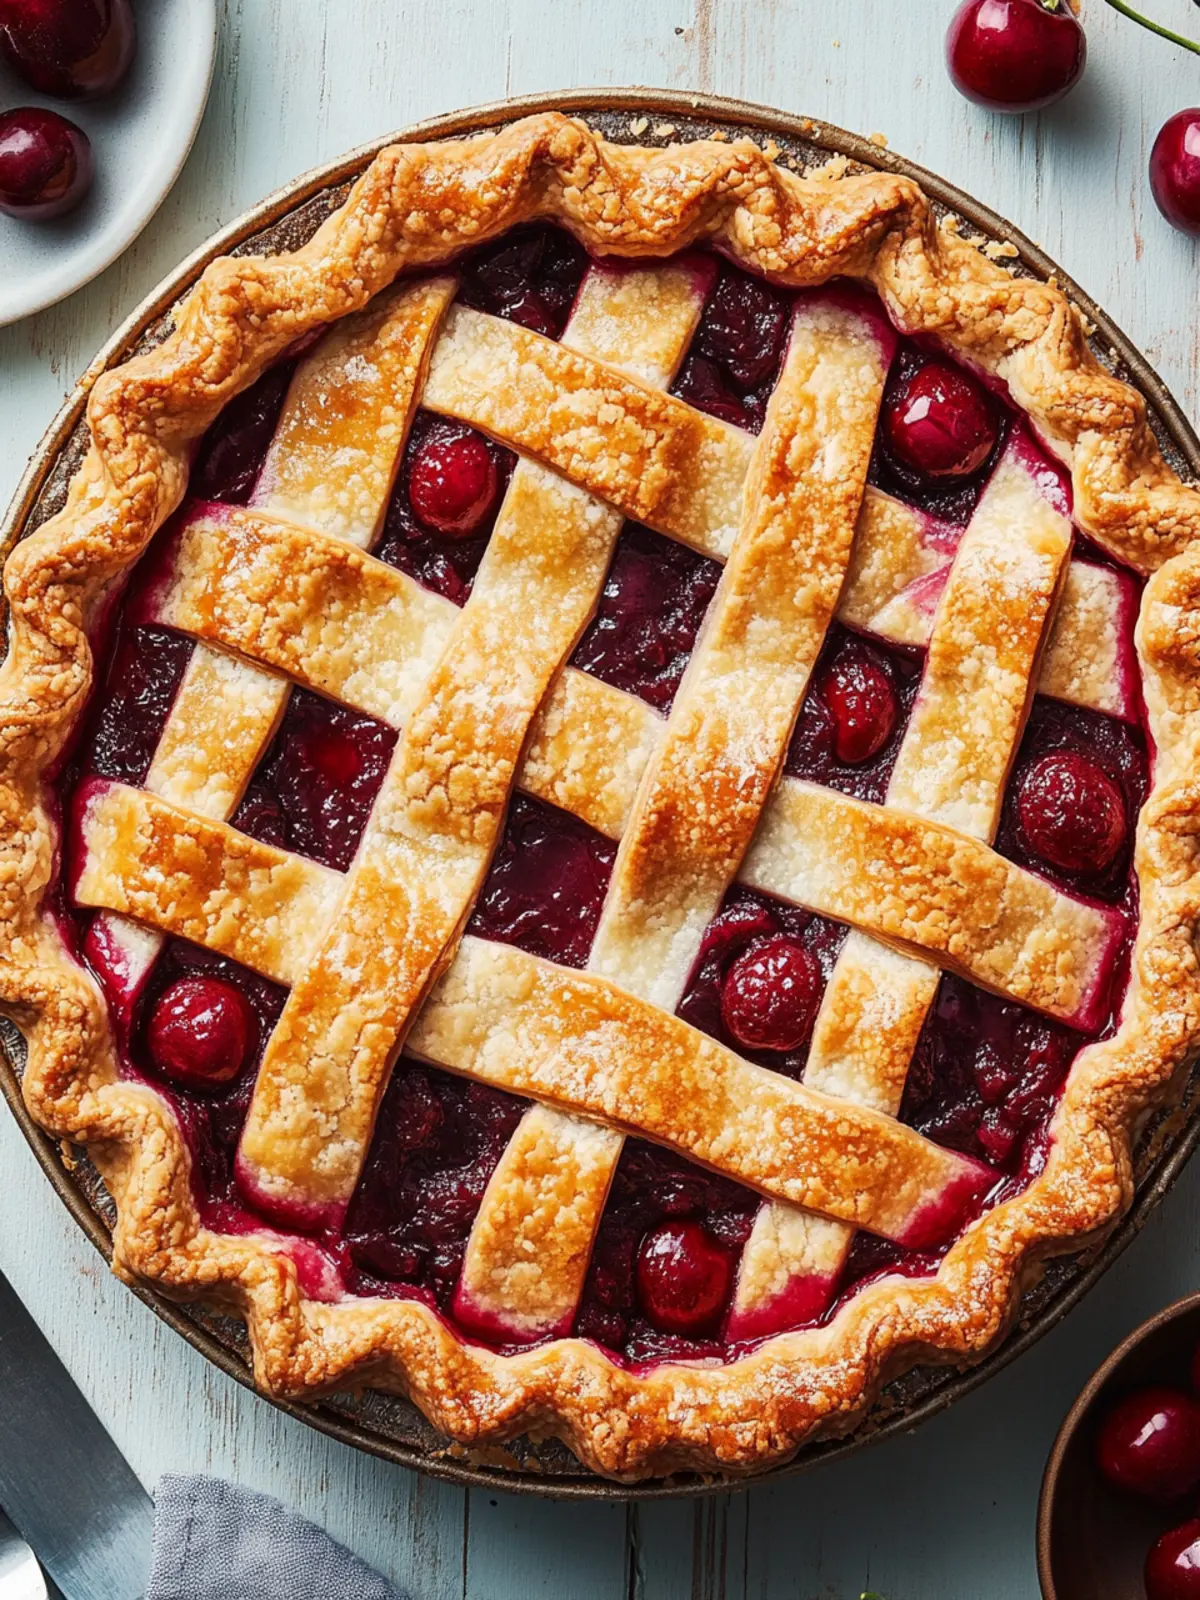
As the sun-soaked days of summer roll in, there’s nothing quite like indulging in a slice of homemade cherry pie to capture the season’s essence. Picture this: the tartness of fresh cherries melded with a touch of sweetness, all encased in a perfectly flaky crust that shatters with every bite. This classic cherry pie recipe isn’t just about dessert; it’s about crafting memories that linger long after the last forkful is gone.
I discovered this delightful recipe after a friend gifted me a basket of ripe cherries from her garden. The thought of turning those gems into a warm pie sent me on a culinary adventure. As I mixed the ingredients, the kitchen filled with the heavenly aroma of cinnamon and almond, drawing my family to the table long before it was ready to be served. This pie is not only a feast for the senses but also a crowd-pleaser that transforms gatherings into special occasions. Let’s dive into this delightful project that promises to be the star of your next summer gathering!
Why will you love this cherry pie recipe?
Homemade Happiness: This recipe captures the joy of baking from scratch, offering satisfaction in every step.
Jammy Goodness: The fresh cherry filling strikes the perfect balance of sweet and tart, guaranteeing a delicious explosion of flavor.
Flaky Perfection: With a golden crust that adds a delightful crunch, each bite is a textural delight.
Perfect for Gatherings: Impress your friends and family with a classic dessert that’s perfect for summer BBQs or holiday festivities.
Versatile Options: Feel free to experiment with variations, like different fruits or toppings, ensuring this pie can adapt to all tastes.
Nostalgic Treat: This cherry pie recipe isn’t just dessert; it’s a piece of summer nostalgia that creates lasting memories for everyone around the table.
Cherry Pie Recipe Ingredients
For the Filling
• Fresh Cherries – Essential for flavor; use a mix of tart and sweet for the best balance. Substitute with frozen cherries if fresh are unavailable.
• Granulated Sugar – Sweetens the filling; adjust to taste based on the cherry tartness.
• Cornstarch – Thickens the filling to achieve that desirable jammy texture.
• Juice of 1/2 Lemon – Adds brightness and enhances the cherry flavor.
• Ground Cinnamon – Introduces warmth and depth to the filling.
• Ground Ginger – Offers a hint of subtle spice; omit for a milder taste.
• Almond or Vanilla Extract – Deepens flavor; use almond for a unique twist.
For the Crust
• Store-bought Pie Dough or Homemade Dough – For the crust; homemade dough adds a personal touch and love.
• All-purpose Flour – For dusting when rolling out the dough to prevent sticking.
• Large Egg (beaten) – For brushing the crust, helping create that golden sheen.
• Turbinado Sugar – For sprinkling on the crust, adding texture and sweetness.
This cherry pie recipe is a splendid way to celebrate the joy of baking with loved ones!
How to Make Cherry Pie
-
Prepare Filling: In a large pot, combine fresh cherries, granulated sugar, cornstarch, lemon juice, ground ginger, ground cinnamon, almond extract, and kosher salt. Bring to a boil, then lower the heat and simmer for 15 minutes until it thickens to a jam-like consistency. Let the filling cool completely.
-
Dough Preparation: While the filling cools, allow your pie dough to rest at room temperature. Roll out two crusts into 12-inch rounds. Fit one into a 9-inch pie plate and refrigerate. Cut the second round into 1-inch strips for a lovely lattice top, then refrigerate both crusts until ready.
-
Preheat Oven: Preheat your oven to 425°F and place a baking sheet inside to catch any drips while baking the pie.
-
Assemble Pie: Pour the cooled cherry filling into the chilled pie crust. Create a beautiful lattice top using the cut strips, pinching the edges and crimping for a decorative finish.
-
Chill: Brush the lattice with the beaten egg and sprinkle with turbinado sugar for added crunch. Chill the pie for 30 minutes to help it hold its shape during baking.
-
Bake: Carefully place the pie on the preheated baking sheet. Bake at 425°F for 25 minutes, then reduce the temperature to 375°F and continue baking for 45-60 minutes until the crust is golden brown and the filling is bubbling.
-
Cool: Allow your cherry pie to cool completely on a wire rack before slicing. This helps the filling set up beautifully!
Optional: Serve warm with a scoop of vanilla ice cream for an indulgent treat.
Exact quantities are listed in the recipe card below.
Make Ahead Options
These cherry pie recipe preparations are perfect for busy cooks looking to save time! You can prepare the cherry filling up to 3 days in advance by cooking it as instructed and storing it in an airtight container in the refrigerator. The pie dough can also be made ahead — it will keep well wrapped in plastic for up to 3 days or frozen for up to a month. When ready to bake, simply roll out the chilled dough and assemble the pie with the cooled filling. If you choose to freeze the assembled pie, bake it straight from the freezer, adding a few extra minutes to the cooking time for delicious results just as fresh as if baked today!
What to Serve with Classic Cherry Pie?
As you prepare to slice into your delicious cherry pie, let’s explore some delightful pairings to elevate your dessert experience.
-
Vanilla Ice Cream: The creamy, cold texture beautifully contrasts the warm, jammy filling of your cherry pie, creating a blissful balance.
-
Whipped Cream: Light and airy, this classic topping adds a fluffy sweetness that complements the tartness of the cherries perfectly.
-
Fresh Mint Leaves: A sprinkle of fresh mint not only brings a pop of color but also elevates the pie’s flavors with a refreshing note.
-
Lemonade or Iced Tea: Refreshing beverages like lemonade or iced tea cleanse the palate beautifully, enhancing the enjoyment of your cherry pie.
-
Chocolate Drizzle: A rich chocolate drizzle adds a decadent twist, enhancing the sweet-tartness of the cherries while appealing to chocolate lovers.
-
Nuts or Granola: For crunch lovers, serving alongside crushed nuts or granola offers a pleasurable texture contrast to the smooth filling.
-
Coffee or Espresso: A warm cup of coffee or espresso perfectly complements the sweetness of the cherry pie, making it an ideal pairing for a cozy gathering.
-
Cheese Plate: Serve with mild cheeses like brie or mascarpone—these creamy textures blend beautifully with the pie’s tartness while introducing a savory element.
Each pairing enhances your cherry pie experience, ensuring that this classic dessert shines at your next gathering!
How to Store and Freeze Cherry Pie
Room Temperature: Let the cherry pie cool completely, then cover it loosely with aluminum foil or a kitchen towel. It can be stored at room temperature for up to 2 days for best texture.
Fridge: If you have leftover pie or want to keep it fresh longer, refrigerate it for up to 5 days. Wrap it tightly with plastic wrap to prevent it from drying out.
Freezer: For longer storage, freeze baked and cooled slices of cherry pie wrapped tightly in plastic wrap or placed in an airtight container. They can be frozen for up to 1 month without losing flavor.
Reheating: To enjoy your cherry pie after freezing, allow it to thaw in the fridge overnight. Reheat individual slices in the oven at 350°F for about 15 minutes to restore that flaky crust and luscious filling in this cherry pie recipe.
Cherry Pie Variations
Customize this homemade cherry pie recipe to create your own twist of delightful flavors and textures!
- Berry Medley: Mix in a handful of blueberries or raspberries with the cherries for a colorful, fruity delight that adds freshness and variety.
- Peachy Keen: Swap half the cherries for fresh sliced peaches. The sweet, juicy peaches balance the tartness of the cherries beautifully.
- Nutty Crust: Add finely chopped almonds or walnuts to your pie dough for a delightful crunch that complements the jammy filling.
- Spicy Kick: Incorporate a pinch of cayenne pepper or a dash of chili powder in your filling for a warm, unexpected heat that dances on your palate.
- Coconut Topping: Replace the lattice top with sweetened shredded coconut for a chewy, tropical-inspired flair that sings summer.
- Maple Sweetness: Substitute half of the granulated sugar with pure maple syrup for a rich, earthy sweetness that elevates your cherry pie experience.
- Lemon Zest Boost: Grate some lemon zest into the filling for an added zing that brightens the overall flavor profile and enhances the cherries’ vibrancy.
- Crumbly Topping: Try a buttery crumb topping made of oats and brown sugar instead of the lattice crust for a rustic charm and a delightful textural contrast.
Expert Tips for Your Cherry Pie Recipe
- Quality Cherries: Use a mix of sweet and tart cherries for the best flavor. Frozen cherries can work, but fresh is ideal.
- Thickening Tip: If the cherry filling seems too runny, add a bit more cornstarch, but be cautious not to overdo it—aim for a jammy consistency.
- Dough Handling: Keep your dough cold to prevent shrinking during baking; refrigerate both the fitted crust and the lattice strips thoroughly.
- Taste Test: Before adding sugar to the filling, taste the cherries; adjust the sweetness to suit your preference for this cherry pie recipe.
- Egg Wash Magic: Brush the crust generously with beaten egg for a golden, shiny finish, and sprinkle with turbinado sugar for extra crunch.
Cherry Pie Recipe FAQs
What kind of cherries should I use for my cherry pie?
Using a mix of tart and sweet cherries is ideal for achieving the perfect balance of flavor in your cherry pie recipe. The tart cherries provide a nice zing, while the sweet ones add a delightful sweetness. If fresh cherries aren’t available, frozen cherries can be a great substitute; just be sure to thaw and drain excess liquid before using.
How should I store my leftover cherry pie?
To store your cherry pie, allow it to cool completely. You can cover it loosely with aluminum foil or a kitchen towel if you plan to eat it within 2 days at room temperature. For longer storage, wrap it well with plastic wrap and refrigerate for up to 5 days. This keeps it fresh and prevents drying out!
Can I freeze cherry pie, and if so, how?
Absolutely! To freeze your cherry pie, make sure it’s fully cooled, then wrap individual slices tightly in plastic wrap or place them in an airtight container. You can freeze it for up to one month while preserving its flavor. When you’re ready to enjoy, simply thaw in the fridge overnight and reheat in the oven at 350°F for about 15 minutes for that fresh-baked taste.
What can I do if my cherry filling is too runny?
If your cherry filling ends up too runny, don’t worry! You can thicken it by mixing an additional 1-2 tablespoons of cornstarch with a little water or cherry juice, and then gently stirring this mixture back into the simmering filling. Cook it on low heat until it thickens to a jam-like consistency. Remember to taste and adjust the sugar based on the sweetness of the cherries!
Can pets safely consume the cherries used in this recipe?
Cherries can be harmful to pets, especially the pits, which contain cyanide and can be toxic. It’s best to keep your cherry pie out of reach of dogs, cats, or other pets, as the filling and pits can pose health risks. If you want to share some fruit with them, opt for pet-safe fruits like blueberries or apples (without seeds) instead.
How can I adjust this recipe to accommodate allergies?
If you or your guests have dietary restrictions, there are several substitutions you can make in this cherry pie recipe. For a gluten-free crust, opt for a gluten-free pie dough. Maple syrup or agave can replace granulated sugar for a lower-glycemic option. Also, if you’re allergic to almonds, simply use pure vanilla extract instead of almond extract for a delightful twist without the risk!

Irresistible Cherry Pie Recipe with Homemade Jammy Filling
Equipment
- - 9-inch pie plate
- - Large pot
- Baking sheet
- Rolling Pin
Ingredients
For the Filling
- 4 cups Fresh Cherries Use a mix of tart and sweet
- 1 cup Granulated Sugar Adjust to taste based on the tartness of cherries
- 1/4 cup Cornstarch Thickens the filling
- 1/2 cup Lemon Juice Adds brightness
- 1 teaspoon Ground Cinnamon Adds warmth
- 1/2 teaspoon Ground Ginger Optional for spice
- 1 teaspoon Almond Extract For deepening flavor
For the Crust
- 1 package Store-bought Pie Dough Or use homemade dough
- 1 cup All-purpose Flour For dusting
- 1 large Egg Beaten, for brushing
- 2 tablespoons Turbinado Sugar For sprinkling on crust
Instructions
Directions
- In a large pot, combine fresh cherries, granulated sugar, cornstarch, lemon juice, ground ginger, ground cinnamon, almond extract, and kosher salt. Bring to a boil, then lower the heat and simmer for 15 minutes until it thickens to a jam-like consistency. Let the filling cool completely.
- While the filling cools, allow your pie dough to rest at room temperature. Roll out two crusts into 12-inch rounds. Fit one into a 9-inch pie plate and refrigerate. Cut the second round into 1-inch strips for a lovely lattice top, then refrigerate both crusts until ready.
- Preheat your oven to 425°F and place a baking sheet inside to catch any drips while baking the pie.
- Pour the cooled cherry filling into the chilled pie crust. Create a beautiful lattice top using the cut strips, pinching the edges and crimping for a decorative finish.
- Brush the lattice with the beaten egg and sprinkle with turbinado sugar for added crunch. Chill the pie for 30 minutes to help it hold its shape during baking.
- Carefully place the pie on the preheated baking sheet. Bake at 425°F for 25 minutes, then reduce the temperature to 375°F and continue baking for 45-60 minutes until the crust is golden brown and the filling is bubbling.
- Allow your cherry pie to cool completely on a wire rack before slicing.