

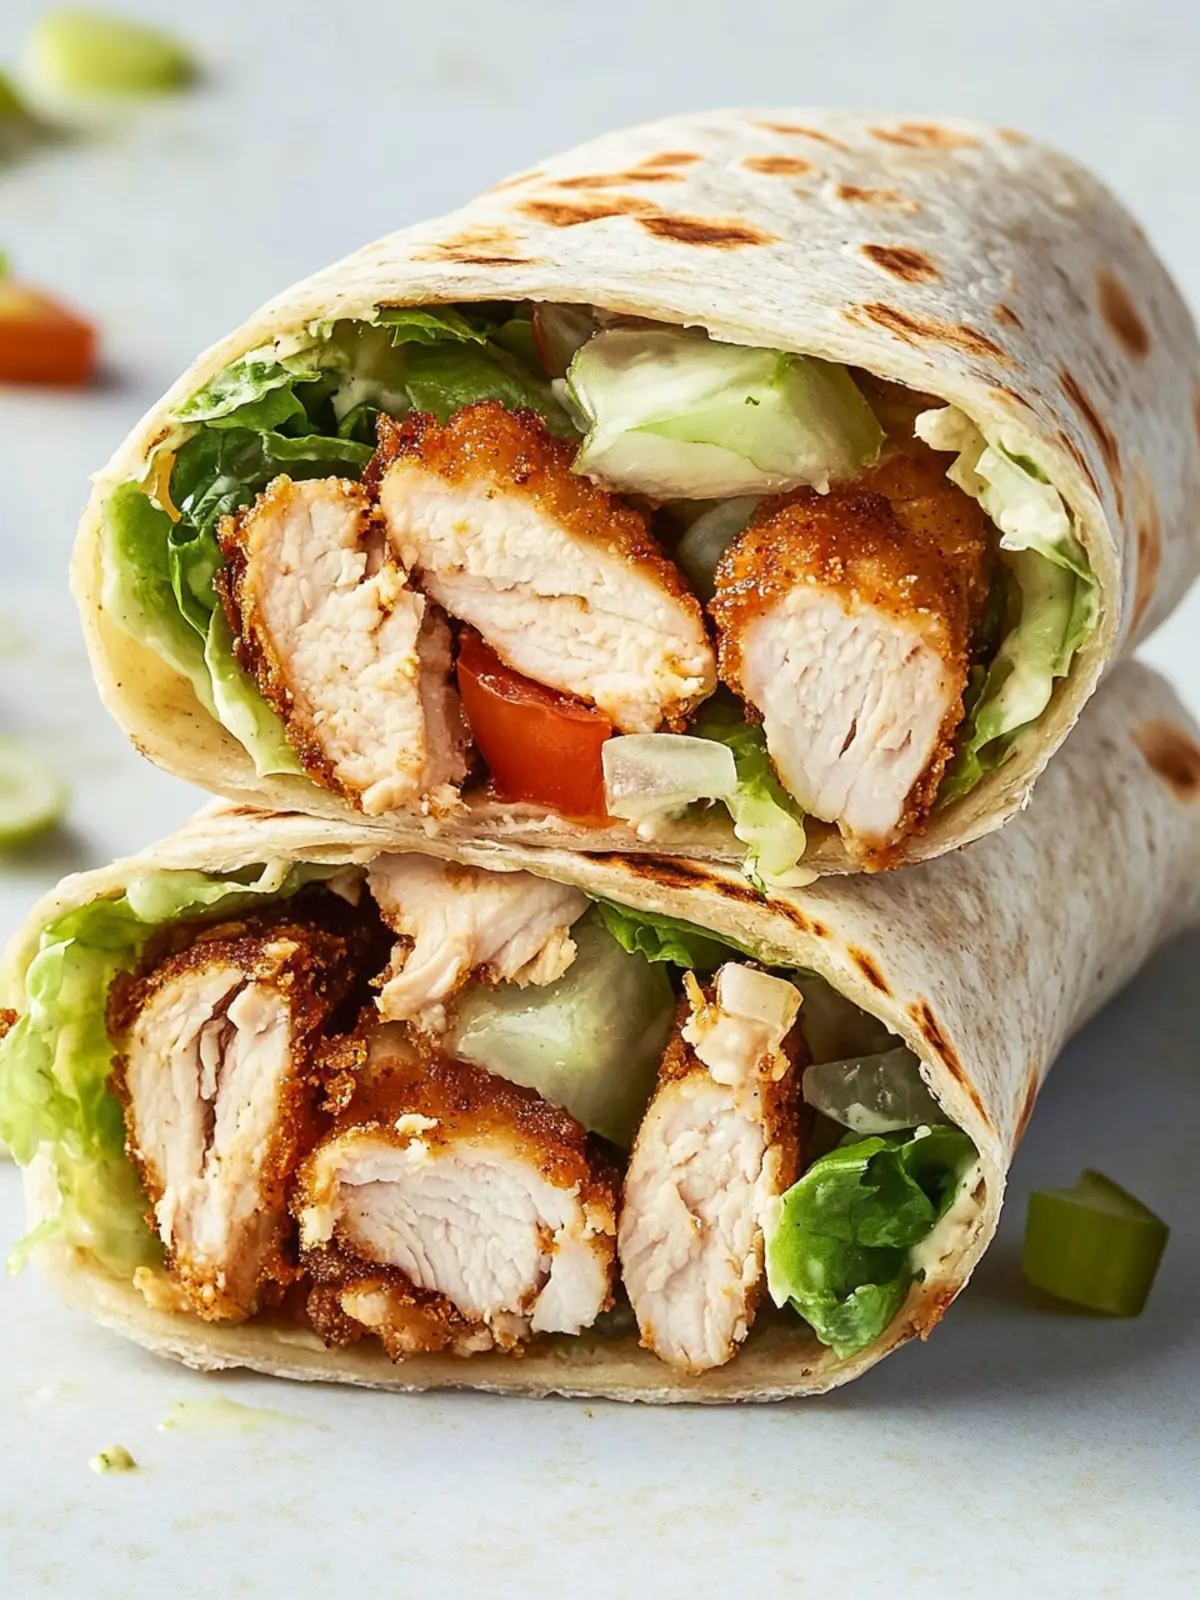
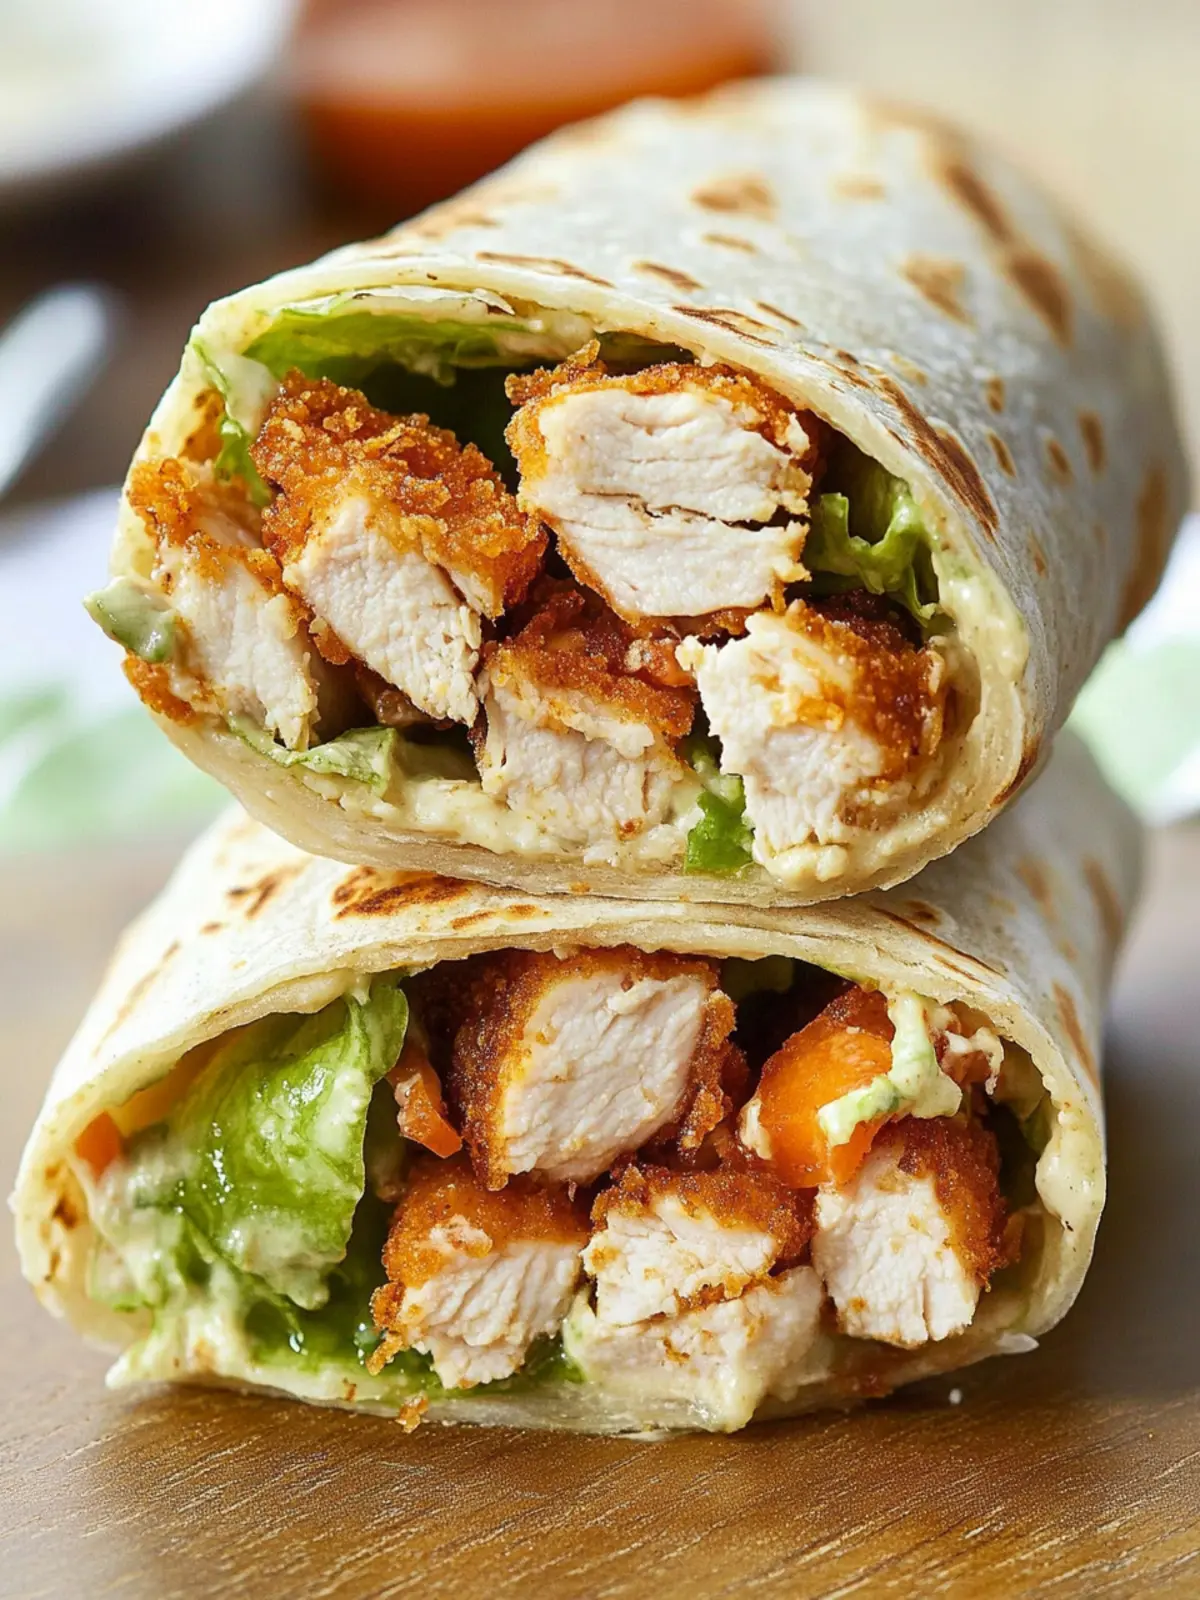
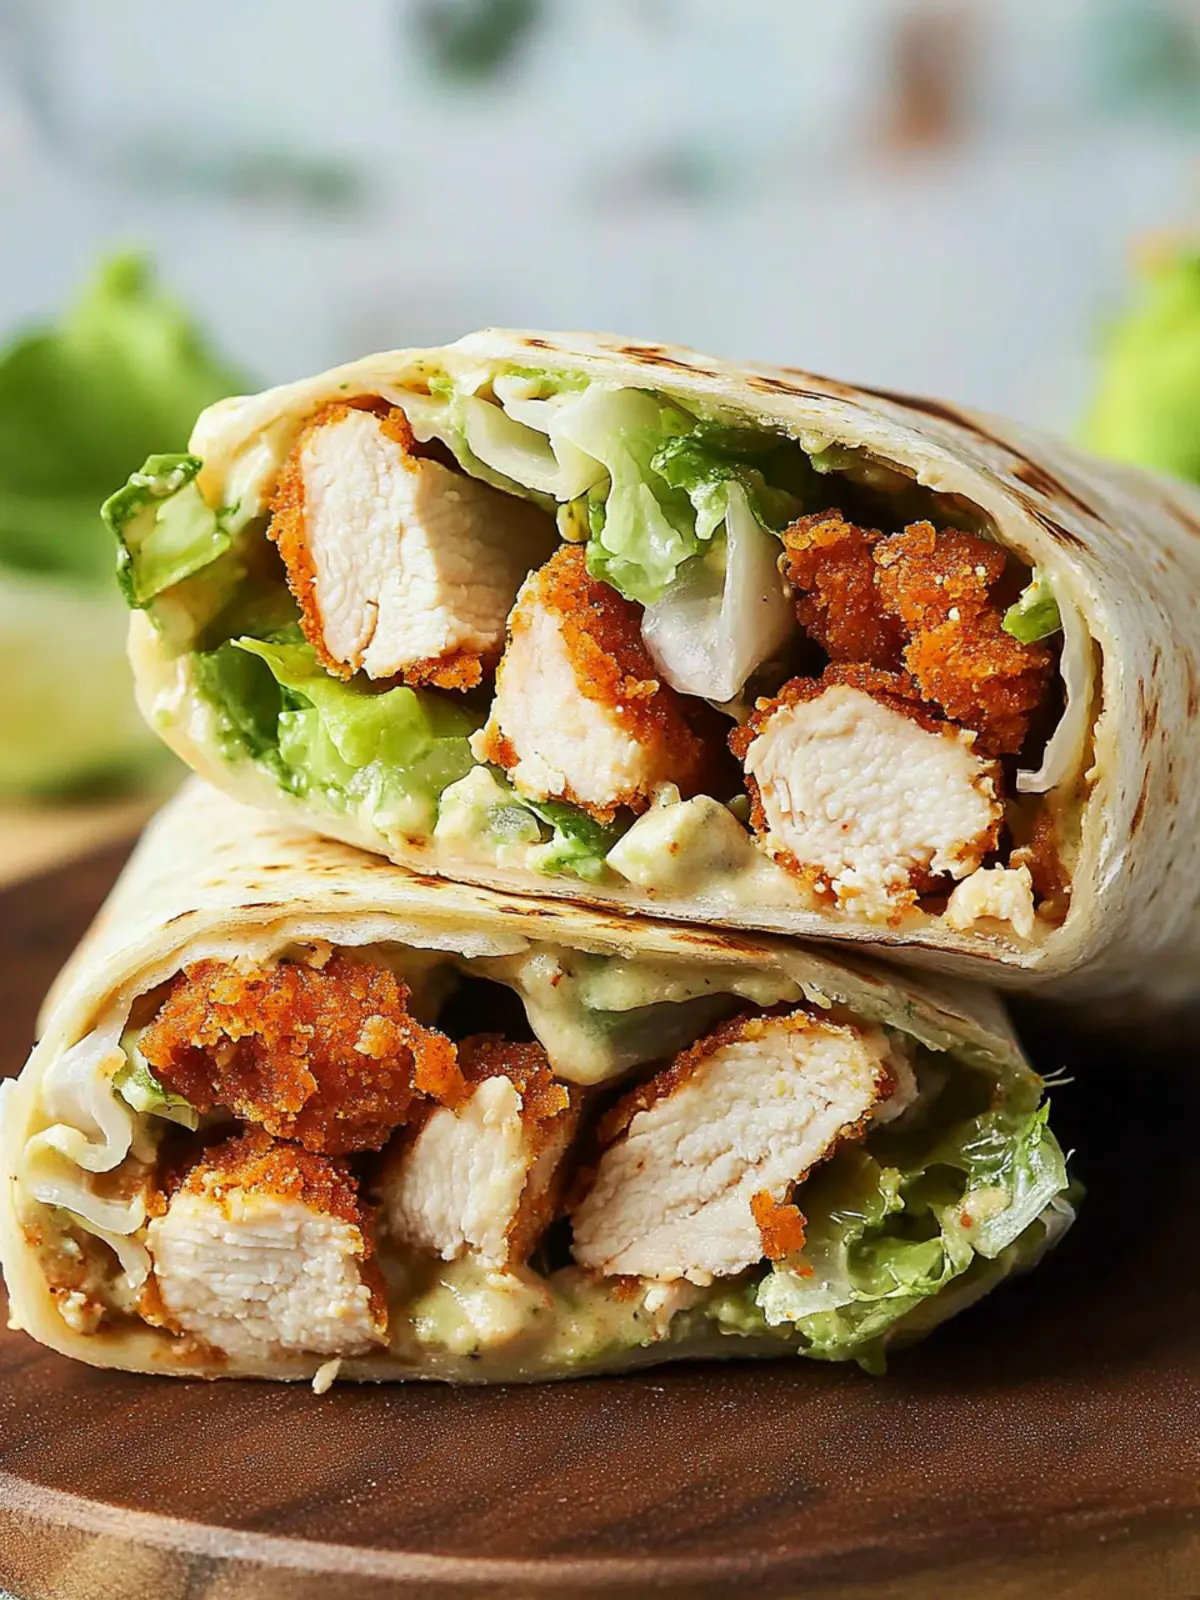
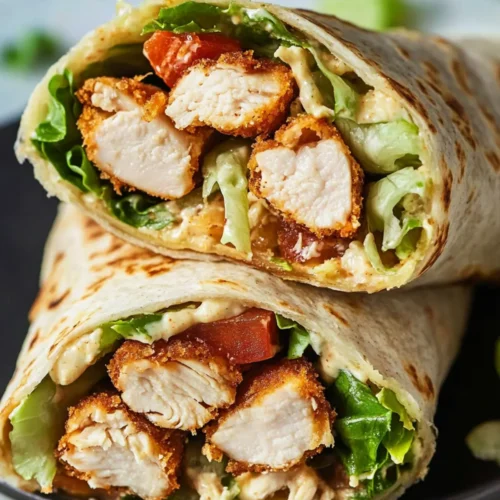
There’s nothing quite like the sound of crispy chicken sizzling in a hot pan to lift your spirits after a long day. I recently found myself craving a meal that balanced convenience with flavor, and that’s when the idea for this Crispy Chicken Caesar Wrap struck me. It combines all the classic elements of the timeless salad—but wraps them in a warm, golden tortilla that gets beautifully toasty on the outside.
Imagine wrapping your hands around this hearty creation, with layers of seasoned chicken, crispy bacon, and creamy, homemade Caesar dressing. The flavors clashing delightfully with the crunch of romaine lettuce take any ordinary meal to new heights. It’s the perfect antidote for anyone feeling weary of fast food and in desperate need of something homemade and satisfying.
Whether you’re preparing a quick dinner for one or looking to impress at a casual gathering, this recipe is as versatile as it is delicious. Ready in just 30 minutes, you’ll want to make this crispy delight again and again! Let’s dive into how you can whip up this culinary winner in your own kitchen.
Why will you love this Chicken Caesar Wrap?
Crispy Perfection: The golden-brown chicken brings an irresistible crunch that takes this classic wrap to the next level.
Homemade Goodness: With fresh ingredients and a creamy Caesar dressing, you’ll savor every bite, knowing it’s made with love.
Quick & Easy: Ready in just 30 minutes, this recipe fits perfectly into busy weeknights without sacrificing flavor.
Crowd-Pleasing Meal: Whether for a solo dinner or a fun gathering, everyone will rave about this delightful wrap.
Customizable: Want to switch it up? Feel free to add veggies or swap the proteins; the possibilities are endless!
Discover more ways to elevate your meal with delicious wraps that are sure to please!
Chicken Caesar Wrap Ingredients
For the Dressing
- Anchovies – adds a savory depth to your Caesar dressing that enhances the wrap’s flavor.
- Garlic – essential for that aromatic punch in the dressing, making every bite delightful.
- Dijon Mustard – provides a touch of tang that complements the other flavors beautifully.
- Worcestershire Sauce – brings a hint of umami that elevates the overall taste profile.
- Lemon Juice – brightens the dressing and keeps things fresh and vibrant.
- Egg Yolk – acts as an emulsifier to create a rich and creamy texture.
- Olive Oil – the foundation for the dressing, ensuring a smooth and luscious finish.
- Parmesan Cheese – adds a salty, cheesy undertone that’s classic for any Chicken Caesar wrap.
- Black Pepper – adds a touch of spice; adjust according to your heat preference.
For the Chicken
- Boneless Chicken Breast – the star of the show, breaded and fried to crispy perfection.
- All-Purpose Flour – helps create a golden crust when coated on the chicken.
- Garlic Powder – enhances flavor in the chicken’s coating mix.
- Ground Cumin – offers a warm, earthy taste that complements the other spices.
- Paprika – lends a hint of sweetness and color to the crispy coating.
- Salt and Pepper – essential for seasoning the flour mixture to elevate chicken flavor.
For the Wrap
- Eggs – used for dipping the chicken, ensuring a well-adhered breadcrumb layer.
- Panko Breadcrumbs – provides an extra-crispy finish; regular breadcrumbs work too if needed.
- Oil for Frying – necessary for achieving that mouthwatering crunch.
- Bacon – crispy bacon bits add a luxurious, savory touch that makes each bite scrumptious.
- Romaine Lettuce – gives a refreshing crunch, balancing the richness of the wrap.
- Wheat Tortilla – the perfect soft exterior that holds all your delicious fillings together.
- Shaved Parmesan (optional) – for those who can’t resist an extra layer of cheesy goodness, sprinkle this on top!
With this delicious roadmap laid out, you’re all set to bring the magic of a Crispy Chicken Caesar Wrap into your kitchen. Happy cooking!
How to Make Crispy Chicken Caesar Wrap
-
Whisk the Dressing: In a small bowl, combine anchovies, garlic, Dijon mustard, Worcestershire sauce, lemon juice, and egg yolk. Whisk until well blended; it should be smooth and creamy.
-
Emulsify the Dressing: While whisking, slowly drizzle in olive oil. Continue to whisk until the dressing is completely emulsified and silky in texture.
-
Add Cheese and Pepper: Stir in the grated Parmesan cheese and a dash of freshly ground black pepper. Set this flavorful dressing aside to let the flavors meld together.
-
Prepare the Coating: In a shallow bowl, mix the flour, garlic powder, cumin, paprika, salt, and pepper. This seasoned mixture will give your chicken a delightful flavor.
-
Coat the Chicken: Take each chicken breast piece and coat it in the flour mixture, then dip into the beaten eggs, and finally press into the panko breadcrumbs, ensuring each piece is fully covered.
-
Fry the Chicken: Heat oil in a large skillet to 350°F (175°C). Fry the chicken for about 4–5 minutes on each side until it’s golden brown, crispy, and cooked through. Transfer to a paper towel-lined plate to absorb excess oil.
-
Cook the Bacon: In a separate pan, cook the bacon over medium heat until crispy. Drain on paper towels and break them into bite-sized pieces for the wrap.
-
Assemble the Lettuce: In a medium bowl, toss the chopped romaine lettuce with a couple of tablespoons of your homemade Caesar dressing, ensuring it’s well-coated.
-
Warm the Tortilla: Gently warm the tortilla in a dry skillet or in the microwave for a few seconds until it’s soft and pliable, making it easy to roll up.
-
Build the Wrap: Spread 1 tablespoon of dressing down the center of the warm tortilla. Layer on the dressed lettuce, crispy bacon, sliced chicken, and shaved Parmesan.
-
Roll It Up: Fold the bottom edge of the tortilla over the filling, fold in the two sides, and roll it tightly away from you into a secure cylinder.
-
Toast the Wrap: Heat a clean skillet over medium heat. Place the wrap seam-side down and toast for about 1–2 minutes. Flip and toast the other side until both are golden brown and thoroughly crispy.
Optional: Add sliced avocado for extra creaminess and nutrition.
Exact quantities are listed in the recipe card below.
What to Serve with Crispy Chicken Caesar Wrap?
Creating the perfect dining experience is all about balance, and that includes thoughtful sides and delightful beverages to complement your main dish.
-
Garlic Parmesan Fries: Crispy golden fries dusted with garlic and parmesan, elevating the wrap’s flavors with a delightful crunch. They’re a wonderful way to incorporate more texture into your meal.
-
Light Caesar Salad: A fresh take on the classic, the crunch of romaine and a drizzle of Caesar dressing ties beautifully with the flavors of the wrap.
-
Grilled Vegetable Skewers: Smoky, slightly charred veggies like bell peppers and zucchini add a burst of color and nutrition, providing a fresh contrast to the crispy chicken.
-
Crisp Coleslaw: A tangy, creamy slaw will add a pleasant crunch and sweetness, enhancing the rich flavors of the wrap without overpowering it.
-
Roasted Sweet Potato Wedges: The natural sweetness of roasted sweet potatoes offers a lovely balance to the savory elements of the wrap.
-
Sparkling Lemonade: A refreshing, fizzy drink with a hint of citrus brings brightness to the table while cutting through the richness of the wrap and dressing.
-
Chocolate Chip Cookies: For dessert, these warm, gooey cookies are perfect alongside your meal; their sweetness will satisfy your craving for something sweet after the savory wrap.
These pairings will work in harmony to create a memorable meal experience with your Crispy Chicken Caesar Wrap!
Make Ahead Options
These Crispy Chicken Caesar Wraps are perfect for meal prep, saving you time on busy weeknights! You can prepare the chicken and dressing components up to 24 hours in advance. Simply bread and fry the chicken, then allow it to cool completely before refrigerating to maintain its crunch. Prepare the homemade Caesar dressing and store it in an airtight container in the fridge. When you’re ready to serve, just toss the romaine with dressing and layer the components in the warmed tortilla. This way, you’ll enjoy a quick, delicious meal that’s just as scrumptious as if made fresh!
Chicken Caesar Wrap Variations
Feel free to let your creativity shine by adjusting the flavors and ingredients in this delightful wrap!
-
Gluten-Free: Use a gluten-free flour blend and gluten-free breadcrumbs for a deliciously crispy experience without the gluten.
-
Spicy Kick: Add diced jalapeños or a splash of hot sauce to the Caesar dressing for an enticing heat that amps up each bite. Just imagine that perfect heat harmonizing with the creaminess of the dressing!
-
Vegetarian Delight: Replace the chicken with crispy chickpeas or marinated tofu to enjoy a meatless version bursting with protein and flavor. Both options will give this wrap a lovely texture while staying true to the classic Caesar profile.
-
Herbed Twist: Mix fresh herbs like basil or parsley into the Caesar dressing for an aromatic boost that brings a fresh zing. This delicate hint of herbaceousness will brighten the entire wrap beautifully!
-
Bacon Alternatives: Swap bacon for turkey bacon or tempeh bacon for a lighter option that still delivers savory crunch without compromising flavor. Each bite will be both satisfying and a little bit different!
-
Creamy Avocado: Layer in sliced avocado for an extra creamy element that pairs perfectly with the crispy chicken and crunchy veggies. The richness of the avocado will elevate your wrap to the next level!
-
Extra Crunch: Add sliced radishes or cucumbers for an extra refreshing crunch that contrasts wonderfully with the warm fried chicken and creamy dressing. Crisp veggies bring a delightful surprise with every mouthful.
-
Cheese Variations: Experiment with cheeses like feta or blue cheese for a unique twist on the classic flavor combo in your wrap. Each alternative brings its own delightful characteristics that can truly customize your experience!
How to Store and Freeze Chicken Caesar Wrap
Fridge: Store leftover Chicken Caesar Wraps wrapped tightly in plastic wrap or in an airtight container for up to 3 days to maintain freshness.
Freezer: If you want to freeze your wraps, wrap each one securely in foil and then place them in a freezer-safe bag; they can be stored for up to 2 months.
Reheating: To reheat, thaw in the refrigerator overnight, then warm in a skillet over medium heat for about 5 minutes per side until heated through and crisp.
Assembly: It’s best to keep the components separate until ready to eat to ensure the wrap stays crispy; assemble just before serving for optimal texture.
Expert Tips for the Best Chicken Caesar Wrap
-
Fry at the Right Temperature: Use a thermometer to ensure the oil is at 350°F. Too low, and chicken will absorb oil; too high, and it’ll burn.
-
Don’t Skip the Coating Steps: Each chicken piece should follow the flour, egg, and breadcrumb process. This helps achieve that unbeatable crispy texture essential for your Chicken Caesar Wrap.
-
Rest the Chicken: After frying, let your chicken rest on a paper towel-lined plate. This way, it stays crispy by letting any excess oil drain away.
-
Customize Your Greens: Feel free to mix in baby spinach or arugula with the romaine for extra flavor and nutrition, making your wrap even more delightful.
-
Warm Up Tortilla Well: Make sure your tortilla is warm before assembling. A cold tortilla can break, leading to a messy wrap that won’t hold all your scrumptious ingredients.
Crispy Chicken Caesar Wrap Recipe FAQs
How do I choose the right chicken breast for the wrap?
Absolutely! For this recipe, look for boneless, skinless chicken breasts that are firm and plump, without dark spots or excessive moisture. Aim for pieces that are roughly equal in size to ensure even cooking, and try to pick organic or free-range options for the best flavor and quality.
How should I store leftover Chicken Caesar Wrap?
Very simply! Wrap your leftover Chicken Caesar Wrap tightly in plastic wrap or place it in an airtight container. It will stay fresh for up to 3 days in the refrigerator. Just make sure it is sealed well to prevent it from drying out.
Can I freeze my Chicken Caesar Wrap?
Yes, you can freeze them with a little care! To freeze, tightly wrap each assembled wrap in foil and place them in a freezer-safe bag. They can be stored for up to 2 months. When you’re ready to enjoy, thaw overnight in the fridge and reheat on a skillet for the best crispiness!
What should I do if my chicken isn’t crispy enough after frying?
If you find your chicken isn’t crispy as expected, there are a few tricks to elevate the crunch! Ensure your oil is hot enough (around 350°F/175°C) before adding the chicken. After frying, let it rest on a paper towel-lined plate to drain excess oil. If it’s still lacking crunch, you can pop it under a broiler for 1-2 minutes for an extra crispy finish.
Does this wrap contain any allergens?
Certainly! This Chicken Caesar Wrap does contain common allergens, such as eggs, dairy (from the Parmesan cheese), fish (from the anchovies), and gluten (from the flour and tortilla). Always double-check your labels and consider swapping with allergen-free alternatives like gluten-free wraps or omitting the anchovies if there are any concerns.
How can I ensure my Caesar dressing is perfect every time?
Great question! To achieve a creamy and flavorful dressing, it’s crucial to whisk the ingredients thoroughly. Start with the anchovies and garlic, then slowly add the olive oil while whisking continuously to emulsify the dressing. If it’s too thick, a splash of water or lemon juice can help loosen it up. Taste and adjust the seasoning with salt and pepper as needed!
Crispy Chicken Caesar Wrap That Will Wow Your Taste Buds
Equipment
- - Skillet
- bowl
- Whisk
- - Thermometer
Ingredients
Dressing
- 4 anchovies anchovies
- 2 cloves garlic
- 1 tbsp Dijon mustard
- 1 tbsp Worcestershire sauce
- 2 tbsp lemon juice
- 1 large egg yolk
- 1/2 cup olive oil
- 1/4 cup Parmesan cheese grated
- black pepper to taste
Chicken
- 2 pieces boneless chicken breast
- 1/2 cup all-purpose flour
- 1 tsp garlic powder
- 1 tsp ground cumin
- 1 tsp paprika
- 1 tsp salt to taste
- 1 tsp black pepper to taste
Wrap
- 2 large wheat tortilla
- 2 eggs eggs beaten
- 1 cup panko breadcrumbs
- 1 cup oil for frying
- 4 slices bacon
- 2 cups romaine lettuce chopped
- 1/4 cup shaved Parmesan optional
Instructions
Preparation
- Whisk the Dressing: In a small bowl, combine anchovies, garlic, Dijon mustard, Worcestershire sauce, lemon juice, and egg yolk. Whisk until well blended; it should be smooth and creamy.
- Emulsify the Dressing: While whisking, slowly drizzle in olive oil. Continue to whisk until the dressing is completely emulsified and silky in texture.
- Add Cheese and Pepper: Stir in the grated Parmesan cheese and a dash of freshly ground black pepper. Set this flavorful dressing aside to let the flavors meld together.
- Prepare the Coating: In a shallow bowl, mix the flour, garlic powder, cumin, paprika, salt, and pepper.
- Coat the Chicken: Coat each chicken breast piece in the flour mixture, dip into the beaten eggs, and press into the panko breadcrumbs.
- Fry the Chicken: Heat oil in a skillet to 350°F. Fry the chicken for about 4–5 minutes on each side until golden brown. Transfer to a paper towel-lined plate.
- Cook the Bacon: Cook the bacon over medium heat until crispy. Drain and break into bite-sized pieces.
- Assemble the Lettuce: Toss chopped romaine lettuce with a couple of tablespoons of your homemade Caesar dressing.
- Warm the Tortilla: Gently warm the tortilla in a skillet or microwave until soft and pliable.
- Build the Wrap: Spread 1 tablespoon of dressing down the center of the warm tortilla. Layer on dressed lettuce, crispy bacon, sliced chicken, and shaved Parmesan.
- Roll It Up: Fold the bottom edge of the tortilla over the filling, fold in the sides, and roll tightly into a cylinder.
- Toast the Wrap: Heat a clean skillet over medium heat. Place the wrap seam-side down and toast for about 1–2 minutes. Flip and toast the other side.