

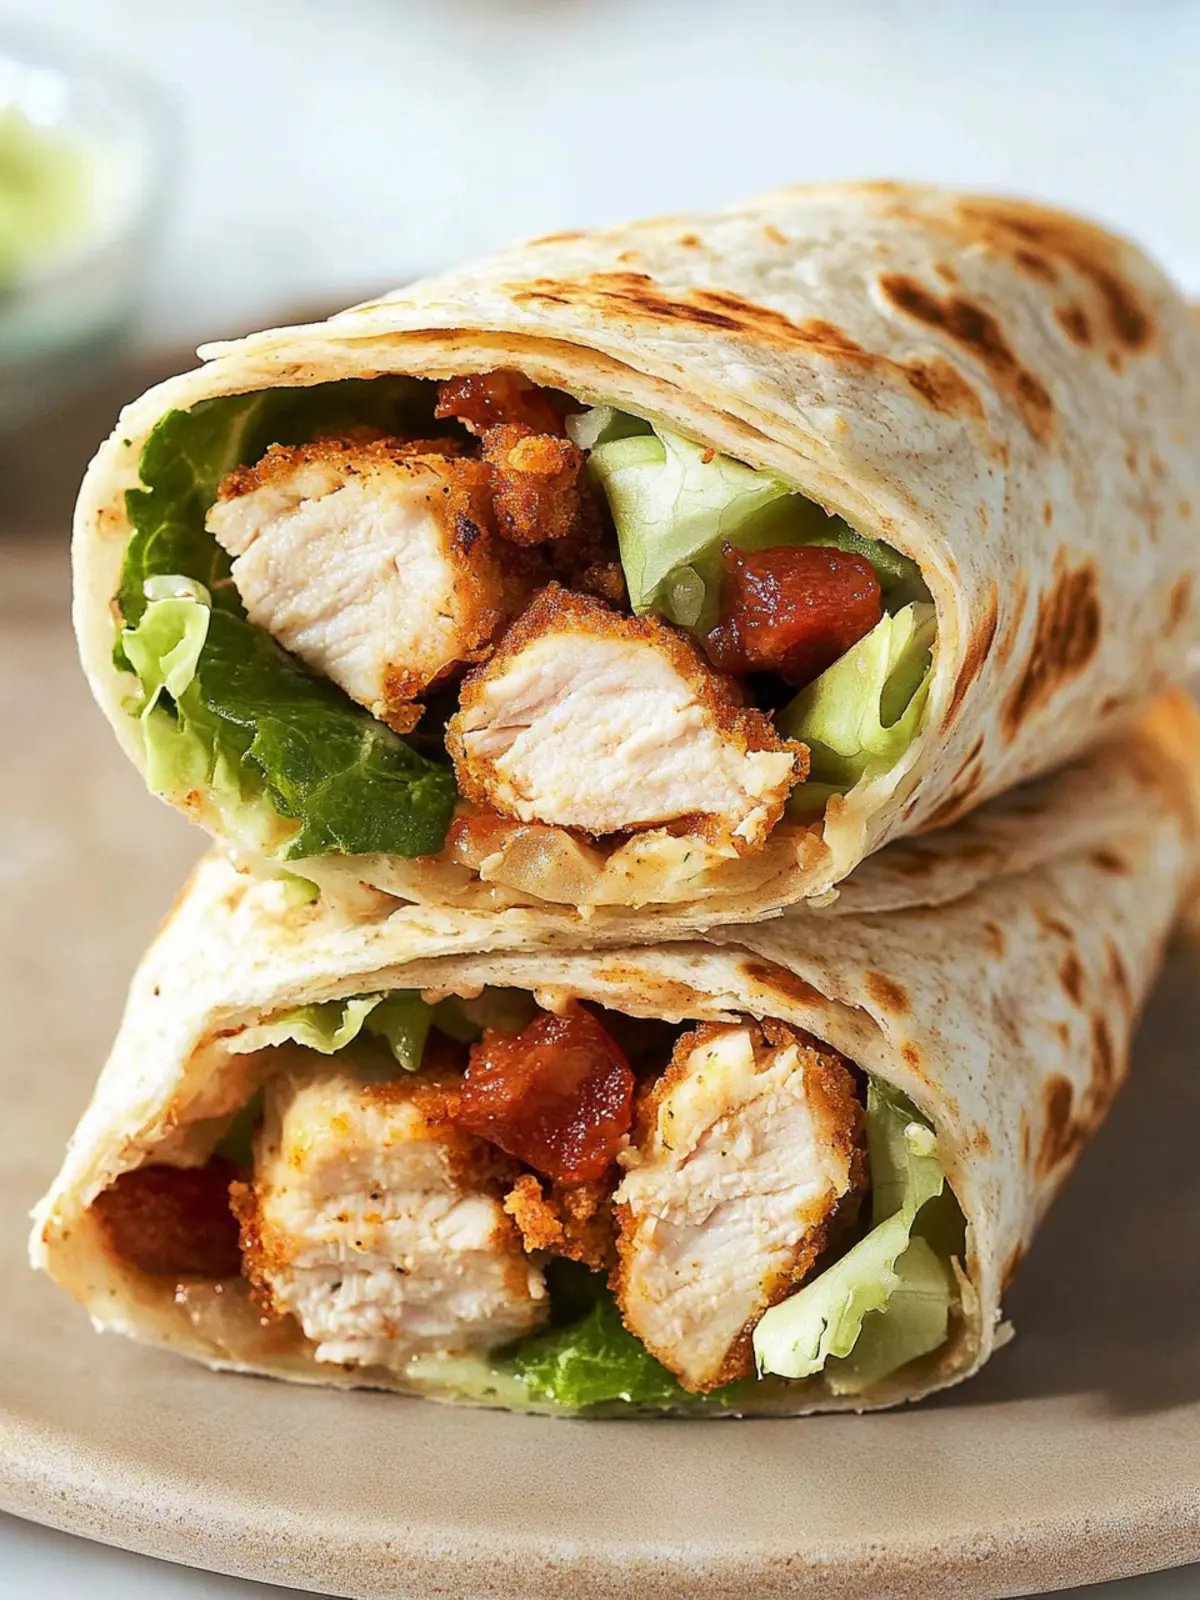
When life gets hectic, sometimes all you need is a little culinary creativity to transform your day. That’s exactly what happened for me when I decided to put my own twist on a classic. Enter the Crispy Chicken Caesar Wrap—a dish that perfectly balances crunchy texture with creamy, zesty flavors.
This wrap started as a simple weeknight meal idea but quickly turned into my go-to comfort food. The warmth of the freshly fried chicken paired with homemade Caesar dressing delivers a satisfying crunch in every bite, while the bacon adds a mouthwatering smokiness that makes it impossible to resist.
With just 30 minutes from prep to plate, this delightful wrap is not only a feast for the senses but also a hassle-free way to escape the monotony of fast food. Whether you’re meal prepping for the week or trying to impress dinner guests, this Crispy Chicken Caesar Wrap is sure to be a crowd-pleaser. So roll up your sleeves and prepare to indulge in this delicious homemade treat that will leave you craving more!
Why is this Chicken Caesar Wrap a must-try?
Flavor Explosion: The crispy, golden chicken paired with homemade Caesar dressing creates a savory delight that’s hard to resist.
Quick & Easy: Whipping this up takes just 30 minutes, making it perfect for busy weeknights or leisurely weekends.
Crowd-Pleasing Appeal: This wrap will impress family and friends alike with its gourmet taste and satisfying texture.
Versatile Delight: Whether you’re enjoying it for lunch or dinner, this wrap adapts beautifully to fit any occasion.
Better Than Takeout: Ditch the fast food and relish in the satisfaction of creating a wholesome meal right at home! Enjoy it solo or as a part of your next gathering; you won’t regret adding this to your meal rotation.
Chicken Caesar Wrap Ingredients
Unlock all the delicious layers of flavor with these essential components!
For the Dressing
- Anchovies – Adds a depth of umami flavor that’s essential for a true Caesar taste.
- Garlic – Freshly chopped garlic lends a robust aroma and taste.
- Dijon Mustard – Provides a touch of tanginess that complements the creamy dressing.
- Worcestershire Sauce – A must-have for the savory punch in your Chicken Caesar Wrap!
- Lemon Juice – Brightens the overall flavor and balances richness.
- Egg Yolk – Helps emulsify the dressing, making it creamy and luscious.
- Olive Oil – Use high-quality extra virgin olive oil for the best flavor infusion.
- Parmesan Cheese – Finely grated for that rich, nutty flavor typical of Caesar recipes.
- Freshly Ground Black Pepper – Just the right touch of heat to enhance every bite.
For the Chicken
- Boneless Chicken Breast – Tender and quick-cooking, it forms the heart of your wrap.
- All-Purpose Flour – Coating the chicken in flour first helps the egg mix adhere perfectly.
- Garlic Powder – Adds an extra layer of garlic flavor for a delicious crust.
- Ground Cumin – A pinch of warmth that deepens the profile of the chicken.
- Paprika – Gives the chicken a beautiful color and a mild smoky taste.
- Salt and Pepper – Essential for seasoning and enhancing the flavor of your chicken.
For the Wrap
- Large Wheat Tortilla – A sturdy base that holds all the goodness without tearing.
- Panko Breadcrumbs – For that extra crunch and texture that makes this wrap special.
- Eggs – Beaten and used to create a rich coating for the chicken.
- Oil for Frying – Ensure the oil is hot enough for crispy, golden chicken.
- Bacon – Cooked until crispy, it introduces a savory element that’s irresistible.
- Chopped Romaine Lettuce – Fresh and crisp, it adds a refreshing crunch to each bite.
- Shaved Parmesan – For optional serving, it elevates the wrap’s flavor and presentation.
How to Make Crispy Chicken Caesar Wrap
-
Whisk the Dressing: In a small bowl, combine anchovies, garlic, Dijon mustard, Worcestershire sauce, lemon juice, and egg yolk. Whisk thoroughly until well blended and set aside.
-
Emulsify the Dressing: While whisking continuously, slowly drizzle in the olive oil to achieve a smooth, emulsified dressing. Stir in the grated Parmesan and a pinch of black pepper for an extra kick.
-
Prepare the Flour Mixture: In a shallow bowl, mix together flour, garlic powder, cumin, paprika, salt, and pepper. This blend will help create a deliciously crispy coating for your chicken.
-
Coat the Chicken: Dredge each piece of chicken in the flour mixture first. Then dip it into the beaten eggs, and finally press it firmly into the panko breadcrumbs until completely coated.
-
Fry the Chicken: Heat oil in a large skillet to 350°F (175°C). Carefully place the chicken in the skillet and fry for 4–5 minutes per side until golden brown and crispy. Transfer to a paper towel-lined plate to drain excess oil.
-
Cook the Bacon: In a separate pan, cook the bacon over medium heat until crispy. Drain on paper towels and break into large, bite-sized pieces for easy layering.
-
Toss the Lettuce: In a medium bowl, combine the chopped romaine lettuce with about 2 tablespoons of your homemade Caesar dressing, mixing well to ensure each leaf is coated.
-
Warm the Tortilla: Gently warm the tortilla in a dry pan or microwave it for a few seconds until soft and pliable. This will make it easier to wrap everything together.
-
Assemble the Wrap: Spread 1 tablespoon of dressing down the center of the tortilla. Layer the dressed lettuce, crispy bacon pieces, and sliced chicken on top, along with shaved Parmesan if desired.
-
Wrap it Up: Fold the bottom edge of the tortilla over the filling, then fold in the sides and roll away from you to create a tight, secure cylinder.
-
Toast the Wrap: Heat a clean skillet over medium heat. Place the wrap seam-side down and toast for 1–2 minutes, then flip and toast the other side until golden brown and crispy, creating that wonderful crunch.
Optional: Serve with extra shaved Parmesan for a gourmet touch!
Exact quantities are listed in the recipe card below.
Expert Tips for the Best Chicken Caesar Wrap
-
Perfect Chicken Coating: Ensure the chicken is evenly coated in flour, egg, and panko to achieve that crispy exterior. Skipping coating layers can lead to soggy chicken.
-
Oil Temperature Check: Use a thermometer to maintain the frying oil at 350°F (175°C). Improper temperatures can lead to greasy or undercooked chicken in your Chicken Caesar Wrap.
-
Crispy Bacon: Cook bacon until it’s fully crispy to give that delicious crunch. Undercooked bacon can be chewy and spoil the texture of the wrap.
-
Dressing Balance: Adjusting the lemon juice and Parmesan in the dressing can enhance its flavor. Don’t hesitate to taste and tweak for your ideal Caesar experience!
-
Wrap Technique: When folding the tortilla, keep it tight to secure the filling. This prevents spills and ensures every bite is a delightful surprise!
Chicken Caesar Wrap Variations
Feel free to get creative and make this wrap your own; with the right tweaks, the deliciousness can be dialed up a notch!
-
Gluten-Free: Substitute all-purpose flour and panko with gluten-free alternatives like almond flour and gluten-free breadcrumbs for the same crispy texture.
-
Spicy Twist: Add a few dashes of hot sauce to your homemade dressing or sprinkle red pepper flakes over the chicken before frying for zingy heat.
-
Veggie Delight: Swap out the chicken for roasted or grilled vegetables like zucchini and bell peppers to enjoy a delightful vegetarian version.
-
Creamy Avocado: Include slices of creamy avocado in your wrap for added richness and a buttery texture that complements the flavors beautifully.
-
Herbed Dressing: Fresh herbs like basil or parsley can be mixed into the dressing for a vibrant, fragrant twist, enhancing both aroma and taste.
-
Buffalo Style: Instead of traditional Caesar dressing, toss the crispy chicken in buffalo sauce for a fiery flavor adventure that will keep you coming back for more!
-
Cheesy Crust: Boost the flavor further by adding extra grated Parmesan cheese on the outside of the chicken before frying for a cheesy, golden crust.
-
Crunchy Coleslaw: Add a handful of crunchy coleslaw as an additional layer in your wrap for a textural contrast and a refreshing crunch in every bite.
Let your imagination run wild, and soon, this Chicken Caesar Wrap will transform into a multitude of delightful variations!
How to Store and Freeze Chicken Caesar Wrap
Fridge: Keep any leftover Chicken Caesar Wrap in an airtight container for up to 2 days to maintain freshness. Reheat gently in a skillet for best results.
Freezer: If you want to store the wrap longer, freeze it before toasting. Wrap it tightly in plastic wrap and place in a freezer bag for up to 1 month.
Thawing: To enjoy a frozen wrap, thaw it in the fridge overnight before reheating, allowing the flavors to meld back together.
Reheating: For optimal crispiness, reheat in a skillet over medium heat for 3-5 minutes on each side until warmed through and crispy again.
Make Ahead Options
These Crispy Chicken Caesar Wraps are perfect for meal prep enthusiasts! You can prepare the Caesar dressing up to 3 days in advance—just store it in an airtight container in the refrigerator to keep it fresh and zesty. Additionally, the chicken can be breaded and kept in the fridge for up to 24 hours before frying, ensuring a quick and easy cook time later. When you’re ready to serve, simply fry the chicken and assemble the wraps with the warmed tortilla, dressed lettuce, crispy bacon, and shaved Parmesan. This way, you’ll have a delicious, homemade meal in no time, making dinner not only delightful but stress-free!
What to Serve with Crispy Chicken Caesar Wrap?
Elevate your meal experience with delicious sides and beverages that perfectly complement this satisfying wrap.
-
Sweet Potato Fries: These seasoned, crispy fries contrast well with the wrap while introducing a touch of sweetness.
-
Garlic Breadsticks: Soft and buttery with a hint of garlic, they add a comforting touch to balance the wrap’s crunchiness.
-
Caesar Salad: A classic companion, this fresh version enhances the Caesar flavor while offering additional crunch from the romaine.
-
Coleslaw: The creamy, tangy slaw provides a refreshing crunch that contrasts with the wrap’s savory elements, making every bite delightful.
-
Cucumber Salad: A light, zesty cucumber salad offers a crisp, refreshing taste that cuts through the richness of the chicken and dressing.
-
Lemonade: A glass of homemade lemonade with a hint of zest brightens the palate and complements the wrap’s flavors beautifully.
-
Chardonnay: A chilled glass of Chardonnay pairs wonderfully, balancing the savory elements with its crisp acidity and fruity notes.
Serve any of these alongside your Chicken Caesar Wrap for a well-rounded, satisfying meal experience!
Crispy Chicken Caesar Wrap Recipe FAQs
How do I select the best chicken for the wrap?
Absolutely! Look for boneless chicken breasts that are plump and free from dark spots or bruises. Fresh chicken should feel firm and moist but not slimy. If you can, choose organic or free-range chicken for heightened flavor and quality.
What is the best way to store leftover Chicken Caesar Wrap?
The Chicken Caesar Wrap can be stored in an airtight container in the fridge for up to 2 days. It’s best to enjoy it fresh, but if you have leftovers, just reheat them in a skillet for a couple of minutes to bring back that crispy texture.
Can I freeze the Chicken Caesar Wrap?
Very! To freeze, make the wraps but skip the toasting step. Wrap each one tightly in plastic wrap and then place them in a freezer bag for up to 1 month. This method keeps them fresh and prevents freezer burn. To enjoy, simply thaw in the fridge overnight, then reheat in a skillet over medium heat for 3–5 minutes on each side until crispy.
What if my chicken isn’t crispy enough after frying?
If the chicken isn’t getting that golden crunch, ensure your oil is hot enough before frying (it should be around 350°F or 175°C). Also, try not to overcrowd the pan, as this can lower the oil temperature. If frying multiple pieces, do it in batches. For extra crunch, you can double coat the chicken by repeating the process of dipping in flour, egg, and breadcrumbs.
Are there any dietary concerns I should know about?
Of course! If you have allergies, be sure to avoid anchovies in the dressing. You can substitute them with capers for a plant-based alternative. Always check ingredients, especially in bacon and pre-packaged products, as they can contain various additives. This wrap can be tailored for gluten-free diets by using gluten-free breadcrumbs and tortillas.
How long can I store the dressing?
You can keep the homemade Caesar dressing in the fridge for up to 3 days in an airtight container. To maintain freshness, give it a good whisk before using it again. If you want to make it ahead, you can do so and store it as needed. Enjoy curating this delightful chicken Caesar wrap!
Ultimate Crispy Chicken Caesar Wrap You’ll Crave Every Time
Equipment
- - Skillet
- bowl
- Whisk
- - Tongs
Ingredients
Dressing
- 2 fillets Anchovies
- 2 cloves Garlic freshly chopped
- 1 tbsp Dijon Mustard
- 2 dashes Worcestershire Sauce
- 2 tbsp Lemon Juice
- 1 Egg Yolk
- 1/2 cup Olive Oil extra virgin
- 1/4 cup Parmesan Cheese finely grated
- 1 pinch Freshly Ground Black Pepper
Chicken
- 2 pieces Boneless Chicken Breast
- 1/2 cup All-Purpose Flour
- 1 tsp Garlic Powder
- 1 tsp Ground Cumin
- 1 tsp Paprika
- 1 tbsp Salt
- 1 tbsp Pepper
Wrap
- 2 large Wheat Tortilla
- 1 cup Panko Breadcrumbs
- 2 large Eggs beaten
- oil for Frying enough for frying
- 4 slices Bacon cooked until crispy
- 2 cups Chopped Romaine Lettuce fresh
- 1/4 cup Shaved Parmesan for serving
Instructions
Preparation
- In a small bowl, combine anchovies, garlic, Dijon mustard, Worcestershire sauce, lemon juice, and egg yolk. Whisk thoroughly until well blended and set aside.
- While whisking continuously, slowly drizzle in the olive oil to achieve a smooth, emulsified dressing. Stir in the grated Parmesan and a pinch of black pepper.
- In a shallow bowl, mix together flour, garlic powder, cumin, paprika, salt, and pepper.
- Dredge each piece of chicken in the flour mixture, then dip it into the beaten eggs, and finally press it firmly into the panko breadcrumbs.
- Heat oil in a skillet to 350°F (175°C). Fry the chicken for 4-5 minutes per side until golden brown and crispy.
- In a separate pan, cook the bacon over medium heat until crispy. Drain on paper towels.
- Combine the chopped romaine lettuce with about 2 tablespoons of your homemade Caesar dressing.
- Warm the tortilla gently in a dry pan or microwave it briefly until soft and pliable.
- Spread 1 tablespoon of dressing down the center of the tortilla. Layer the dressed lettuce, crispy bacon pieces, and sliced chicken on top.
- Fold the bottom edge of the tortilla over the filling, then fold in the sides and roll away from you to create a tight cylinder.
- Toast the wrap in a skillet over medium heat, seam-side down for 1-2 minutes, then flip to toast the other side until golden brown.