
Table of contents
I remember the first time I found these amazing peanut butter candies. My grandmother’s kitchen was filled with the sweet smell of chocolate and crushed Butterfinger bars. It was magical and became a family favorite.
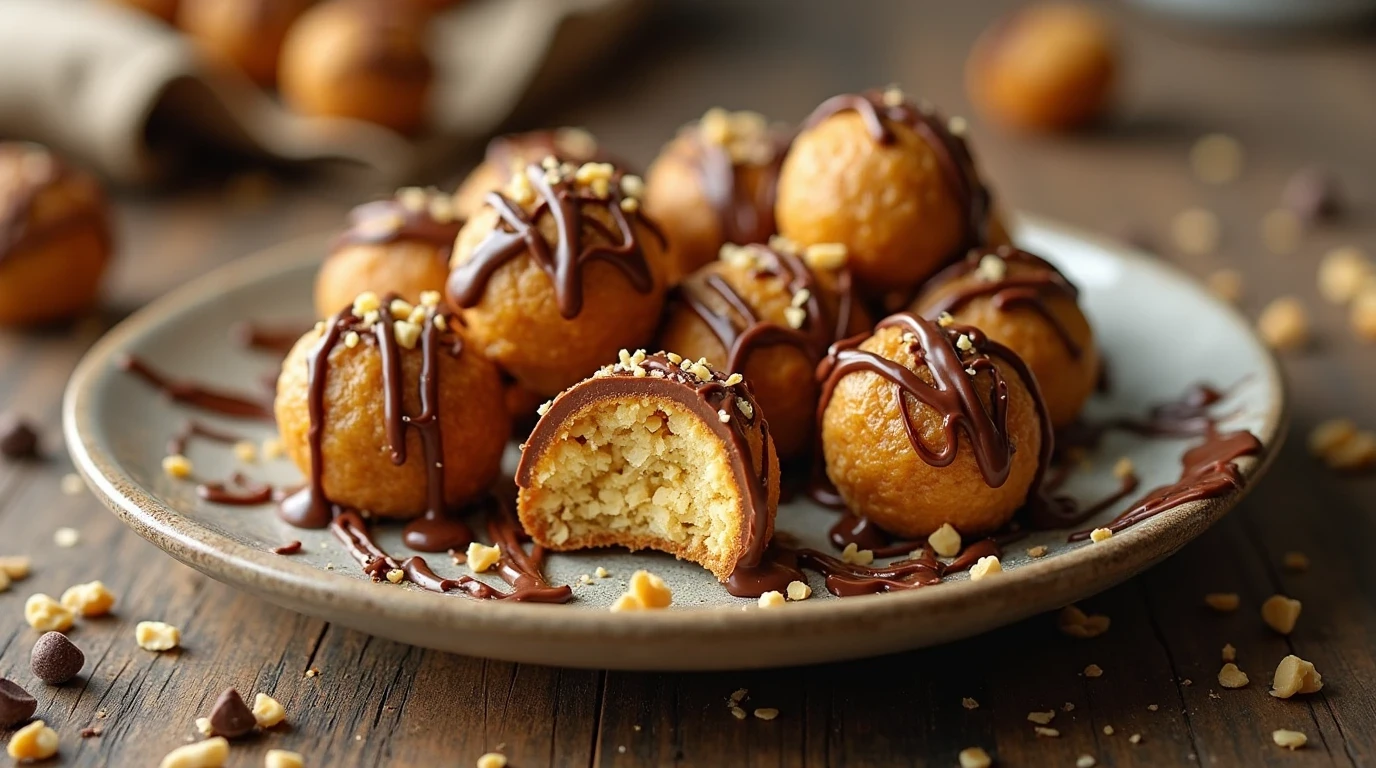
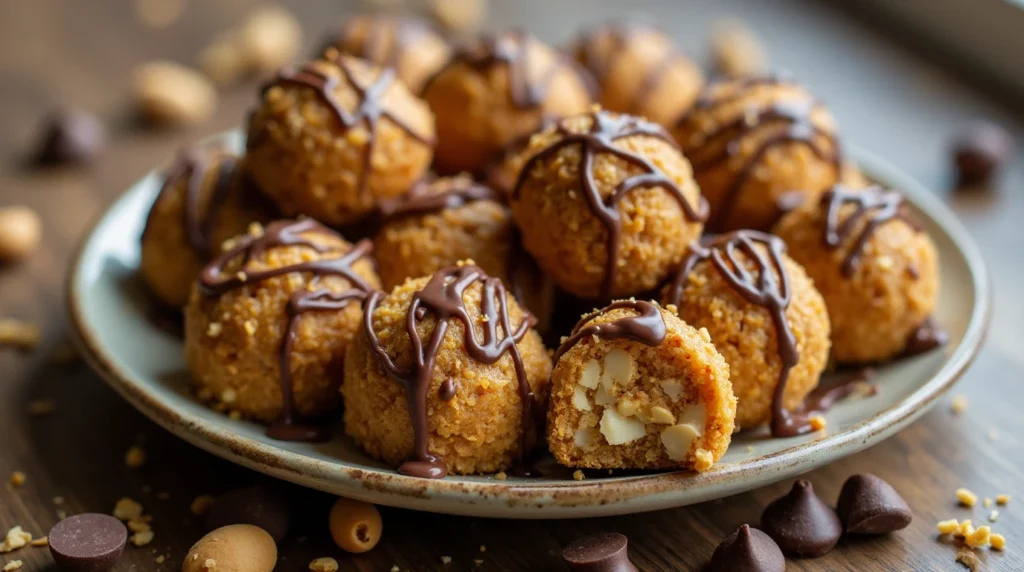
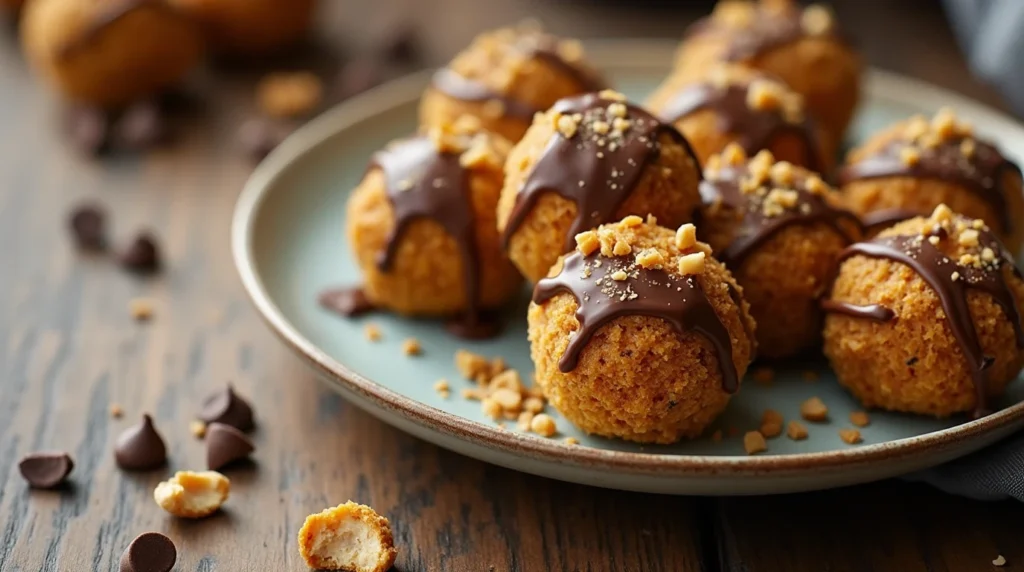
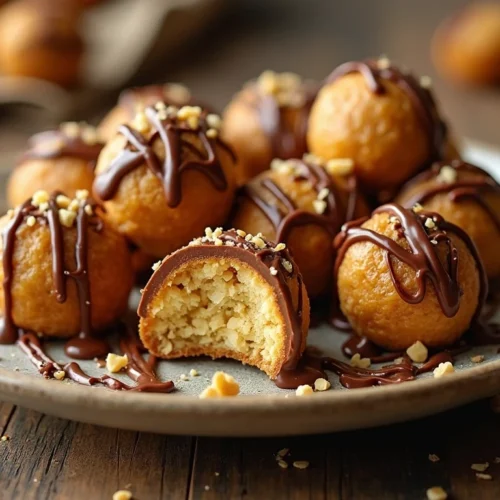
Butterfinger balls are more than just a no-bake treat. They mix crunchy texture with rich flavor, turning simple ingredients into a special dessert. With a few easy steps, you can make a delicious treat that will wow everyone.

These treats are not just desserts; they celebrate classic American sweets. The mix of peanut butter, chocolate, and crushed Butterfinger bars is irresistible. It’s both nostalgic and new.
If you’re planning a party, need a quick dessert, or just want something sweet, Butterfinger balls are perfect. They’re gluten-free, easy to make, and loved by all.
Introduction to Butterfinger Balls: A Perfect No-Bake Dessert
Looking for a sweet treat that’s easy to make and tastes amazing? Butterfinger Balls are perfect for anyone wanting to make delicious, bite-sized treats quickly. These desserts are loved by kids and adults alike, making everyone want more.
What Makes Butterfinger Balls Special
These holiday sweets mix rich flavors and textures in a unique way. The magic comes from combining crispy Butterfinger candy with creamy peanut butter, all covered in smooth chocolate. Each bite is a mix of sweet and salty that will delight your taste buds.
Quick Overview of Ingredients
- 1 cup creamy peanut butter
- 2 cups crushed Butterfinger candy bars
- 1 cup powdered sugar
- 1/4 cup unsalted butter
- 12 ounces semi-sweet chocolate chips
Time and Effort Requirements
Butterfinger Balls are the easiest desserts to make. You’ll only need 20 minutes to prepare and less than an hour to make them ready. The recipe is simple enough for beginners but impressive for any occasion.
| Preparation Detail | Time Estimate |
|---|---|
| Prep Time | 20 minutes |
| Total Time | 45-60 minutes |
| Servings | 25 balls |
| Calories per Serving | 111 kcal |
Ready to make your kitchen a sweet paradise? These irresistible Butterfinger Balls are all about simplicity, flavor, and fun!
Essential Ingredients for Perfect Peanut Butter Candy
Making the ultimate no-bake butterfinger truffles starts with the right ingredients. Let’s explore the key parts that turn simple items into a tasty peanut butter candy everyone will enjoy.
To make the most delicious crunchy butterfinger treat, you’ll need a few important ingredients:
- Peanut Butter: 1 cup of creamy peanut butter (Jif or Skippy work best)
- Unsalted Butter: ½ cup, softened
- Vanilla Extract: 1 teaspoon for enhanced flavor
- Powdered Sugar: 2 cups for the perfect sweet base
- Graham Cracker Crumbs: 1 cup for added texture
- Butterfinger Candy Bars: 4 bars, crushed
- Chocolate Bark: 12 oz for coating
The secret to these no-bake butterfinger truffles is the quality of ingredients. I suggest using regular creamy peanut butter. It gives better consistency and helps the mixture stick together perfectly.
Pro tip: For coating, use chocolate bark or melting wafers. They give a smooth, glossy finish that makes these treats irresistible.
Optional add-ins can make your creation even better:
- Extra crushed Butterfinger pieces
- Holiday sprinkles
- Flaky sea salt
With these ingredients, you’re ready to make a mouthwatering dessert. It will be a hit at any gathering!
Kitchen Tools and Equipment Needed
To make delicious Butterfinger balls, you need the right kitchen tools. These tools make preparing the snacks smooth and fun. Choosing the right equipment is key to getting perfect results every time.
Essential Mixing Tools
Here are the must-have tools for making your party food:
- Stand mixer with paddle attachment
- Large mixing bowl
- Rubber spatula
- Measuring cups and spoons
- Kitchen scale (optional but helpful)
Recommended Storage Containers
Storing your candy-filled peanut butter balls right is important:
| Container Type | Storage Duration | Temperature |
|---|---|---|
| Airtight plastic container | Up to 2 weeks | Refrigerated |
| Freezer-safe container | Up to 3 months | Frozen |
| Glass container with lid | Up to 1 week | Room temperature |
Optional Decorating Equipment
Make your Butterfinger balls look amazing with these tools:
- Dipping forks
- Parchment paper
- Microwave-safe melting bowl
- Silicone baking mat
- Decorative sprinkles or crushed Butterfinger pieces
Having these tools ready will help you make tasty treats for any event. The right tools are essential for making these treats irresistible!
Step-by-Step Preparation Guide
Making these no-bake treats is simple and fun! As a home baker, I’ll guide you through making these tasty peanut butter candy balls. They’re sure to wow your guests.
- Ingredient Preparation
- Gather all ingredients at room temperature
- Measure 1 cup creamy peanut butter
- Soften 1/4 cup unsalted butter
- Mixing the Base
- Beat peanut butter and butter until smooth
- Add 1 teaspoon vanilla extract
- Mix in 1 cup powdered sugar
- Adding Texture
- Fold in 1 cup graham cracker crumbs
- Crush 5 fun-size Butterfinger bars
- Gently mix crushed Butterfinger into the mixture
Now, it’s time to shape and chill your peanut butter candy. Use a tablespoon to scoop and roll the mix into small balls. Place them on a parchment-lined baking sheet and chill in the freezer for about 30 minutes.
Chocolate Coating Details:
| Chocolate Type | Quantity | Melting Method |
|---|---|---|
| Chocolate Chips/Bark | 12 ounces | Microwave (30-second intervals) |
| Alternative Melting | N/A | Double boiler method |
For the final step, dip each chilled ball into melted chocolate. Sprinkle with crushed Butterfinger or sea salt while the chocolate is wet. Let the chocolate set before enjoying your no-bake treats!
Tips for Working with Chocolate Coating
Making perfect chocolate truffles needs skill and precision. These treats require careful coating to look professional. I’ll share my top tips to make your snacks irresistible.
Proper Melting Techniques
Melting chocolate can be tricky, but I’ve found foolproof ways. Follow these steps for smooth, glossy chocolate:
- Chop chocolate almond bark into small, uniform pieces
- Use a microwave-safe bowl with low, 30-second intervals
- Stir between each heating cycle to prevent burning
- Aim for a temperature between 86-90°F for optimal consistency
Dipping and Decorating Methods
The secret to professional chocolate truffles is in the dipping. Here’s how to do it right:
- Chill Butterfinger balls for 15-20 minutes before dipping
- Use a fork or dipping tool for even chocolate coverage
- Tap excess chocolate gently to create a smooth finish
- Sprinkle crushed Butterfinger pieces while chocolate is wet
Troubleshooting Common Issues
Even pros face chocolate coating challenges. Here’s a quick guide to common problems:
| Issue | Solution |
|---|---|
| Chocolate is too thick | Add 1 tsp coconut oil to thin |
| Chocolate seized | Use room temperature tools |
| Uneven coating | Maintain consistent chocolate temperature |
Pro tip: Work quickly and confidently when dipping your bite-sized confections to achieve a professional chocolate coating!
Storage and Shelf Life Recommendations
When making these tasty treats, it’s key to store them right. This keeps their flavor and texture just right. My tips will help you enjoy your holiday sweets for longer.
Storing Butterfinger Balls needs some thought to keep their special taste and feel. You can store them in different ways, depending on when you plan to serve them:
- Refrigerator Storage: Keep in an airtight container for up to 7 days
- Freezer Storage: Preserve for up to 2 months
- Room Temperature: Safe for 1 week in sealed container
Freezing these treats? Use a container that’s safe for the freezer. Let them come to room temperature before you eat them. This way, they taste and feel their best.
| Storage Method | Duration | Recommended Conditions |
|---|---|---|
| Refrigerator | Up to 7 days | Airtight container |
| Freezer | Up to 2 months | Freezer-safe bag or container |
| Room Temperature | Up to 1 week | Sealed container away from direct heat |
Pro tip: To keep them looking great, put parchment paper between layers. This stops them from sticking together. It makes your holiday sweets look perfect for any party or event.
Nutritional Information and Serving Size
Enjoying these tasty peanut butter candy bites? Knowing their nutritional info is key. I’ll share the important details that make these Butterfinger Balls a treat and a smart snack choice.
Caloric Content and Macronutrients
Each Butterfinger Ball is full of flavor and has a good nutritional balance. Here’s what you can expect:
- Calories: About 160-180 per ball
- Protein: 4-6 grams per serving
- Carbohydrates: 15-20 grams
- Fat: 10-13 grams
- Fiber: 2-3 grams
Portion Control Guidelines
These snacks are rich and filling. Here’s how to enjoy them wisely:
- Stick to 2-3 balls per serving
- Pair with a protein-rich food for balanced nutrition
- Think of them as an occasional treat, not a daily snack
For those watching their macronutrients or calories, these treats are a tasty, mindful choice. Remember, it’s all about moderation to enjoy these treats!
Creative Variations and Customizations
Turning classic no-bake butterfinger truffles into new treats is simple. I enjoy trying different twists on these candy-filled peanut butter balls. This keeps them interesting and tasty.
Here are some creative ways to customize your crunchy butterfinger treat:
- Chocolate Coating Variations
- Dark chocolate shell
- White chocolate drizzle
- Milk chocolate coating
- Nutty Alternatives
- Almond butter base
- Cashew butter blend
- Sunflower seed butter for nut-free option
- Extra Crunch Options
- Crushed pretzel topping
- Toasted coconut flakes
- Chopped peanuts
If you have dietary restrictions, there are alternatives. Use gluten-free graham crackers instead of traditional cookies. Plant-based chocolate is great for vegan versions of these treats.
Pro tip: Chill your truffles between coating stages for a smooth finish. The secret is to experiment and find your favorite mix of flavors and textures!
Perfect Occasions for Serving Butterfinger Balls
Butterfinger Balls are the ultimate crowd-pleaser for holiday celebrations. They turn any event into a joyful occasion. These treats are loved by both kids and adults, making them perfect for any party.
As a kid-friendly recipe, they are ideal for many events. They are especially great for:
- Family reunions
- Holiday gatherings
- Potluck parties
- School bake sales
- After-school snack time
Butterfinger Balls are easy to serve because of their small size. Each ball offers a mix of crunchy and creamy textures. The recipe makes 20-24 balls, so everyone gets a taste.
| Occasion | Serving Suggestion |
|---|---|
| Holiday Parties | Display on festive platters |
| Kids’ Birthdays | Include as dessert centerpiece |
| Potlucks | Easy to transport and share |
| Movie Nights | Perfect bite-sized snack |
Butterfinger Balls are great for any social event because they can be made ahead. They look impressive and taste amazing. They keep well in the fridge for up to 5 days, making them a fantastic choice for any gathering.
Common Mistakes to Avoid
Making perfect peanut butter candy needs careful attention. As someone who enjoys making easy desserts, I’ve found that avoiding common mistakes is key. This makes a big difference in your no-bake treats.
Ingredient Selection Challenges
Choosing the right ingredients is vital for tasty Butterfinger Balls. Here are some common mistakes to avoid:
- Peanut Butter Selection: Don’t use all-natural, separated peanut butter. Opt for creamy, stabilized brands that mix well.
- Measure ingredients carefully to keep the right consistency
- Make sure ingredients are fresh before mixing
Temperature Control Considerations
Temperature is crucial for perfect no-bake treats. Here are some important details to remember:
- Chill the mixture for exactly 30 minutes before shaping
- Keep the chocolate melting temperature between 86-90°F
- Use a double boiler to avoid burning the chocolate
I suggest using a kitchen thermometer for accurate temperature control. If chocolate gets too hot, it can become grainy. This ruins your peanut butter candy.
| Mistake | Consequence | Solution |
|---|---|---|
| Incorrect Peanut Butter | Separation, poor texture | Use creamy, stabilized brands |
| Improper Chilling | Soft, misshapen balls | Refrigerate for 30 minutes |
| Chocolate Overheating | Grainy coating | Keep temperature between 86-90°F |
By avoiding these common mistakes, you’ll make professional-quality Butterfinger Balls. They’re sure to impress!
Butterfinger Balls: Bite-Sized Candy Treat
Ingredients
- 1 cup creamy peanut butter
- ½ cup unsalted butter softened
- 1 teaspoon vanilla extract
- 2 cups powdered sugar
- 1 cup graham cracker crumbs
- 4 Butterfinger candy bars crushed
- 12 ounces chocolate bark or melting wafers
Instructions
- Prepare the Mixture:
- In a large mixing bowl, combine the creamy peanut butter and softened unsalted butter until smooth.
- Add the vanilla extract and mix well.
- Gradually incorporate the powdered sugar and graham cracker crumbs, mixing until fully combined.
- Fold in the crushed Butterfinger candy bars, ensuring an even distribution throughout the mixture.
- Form the Balls:
- Using a small cookie scoop or your hands, roll the mixture into 1-inch balls.
- Place the formed balls onto a baking sheet lined with parchment paper.
- Transfer the baking sheet to the refrigerator and chill for about 20 minutes, allowing the balls to firm up.
- Coat with Chocolate:
- Melt the chocolate bark or melting wafers according to the package instructions until smooth.
- Using a fork or dipping tool, dip each chilled ball into the melted chocolate, ensuring it is fully coated.
- Place the coated balls back onto the parchment-lined baking sheet.
- Set and Serve:
- Allow the chocolate coating to set completely at room temperature or place the baking sheet back in the refrigerator for quicker setting.
- Once the chocolate has hardened, transfer the Butterfinger Balls to an airtight container for storage.
Conclusion
Making Butterfinger balls is a fun journey that turns a classic candy bar into a tasty dessert. These chocolate truffles mix crunchy Butterfinger bits with smooth peanut butter. They are loved by everyone, young and old.
These no-bake treats are not just tasty, but also create special moments. They are easy to make with simple ingredients. You can even add your own twist with sea salt or flavor extracts.
Storing them is easy – keep them in the fridge for up to 5 days or freeze for 2 months. This way, you can enjoy them whenever you want. They’re perfect for parties, family gatherings, or just for yourself.
The beauty of these treats is how simple they are and the happiness of sharing something homemade. So, get your ingredients ready, be creative, and start making your own Butterfinger balls!
FAQ
What are Butterfinger Balls?
Butterfinger Balls are tasty treats made with peanut butter, crushed Butterfinger bars, and graham cracker crumbs. They’re covered in chocolate. These no-bake desserts are great for parties or family events.
How long do Butterfinger Balls take to prepare?
It takes about 1 hour and 20 minutes to make them. Only 15 minutes are active prep time. Chill the balls for 30 minutes before coating with chocolate. Then, let them set completely.
Can I store Butterfinger Balls for later?
Yes, store them in an airtight container in the fridge for 5-7 days. For longer storage, freeze them for up to 2 months. Let them come to room temperature before serving.
What are the key ingredients needed?
You’ll need creamy peanut butter, unsalted butter, vanilla extract, and powdered sugar. Also, graham cracker crumbs, crushed Butterfinger bars, and chocolate bark for coating. You can add flakey sea salt or more crushed Butterfingers on top.
Are there any variations to the classic recipe?
Yes! Try different chocolate coatings or add other crushed candies. You can also use different nut butters. The recipe is versatile and can be tailored to your taste while keeping the Butterfinger flavor.
How many calories are in a Butterfinger Ball?
Each ball has about 202-225 calories. It has 20g carbohydrates, 4g protein, and 13-15g fat. The recipe makes 36 servings, with one ball being a serving.
What are some common mistakes to avoid?
Avoid using all-natural peanut butter and not chilling the balls before dipping. Also, don’t overheat the chocolate. This can make the chocolate grainy. Use the right temperature and ingredients for the best taste.
What kitchen tools do I need to make Butterfinger Balls?
You’ll need a stand mixer, a large baking sheet, parchment paper, and a microwave-safe bowl for melting chocolate. A kitchen scale is optional but helpful. Use airtight containers for storage.