

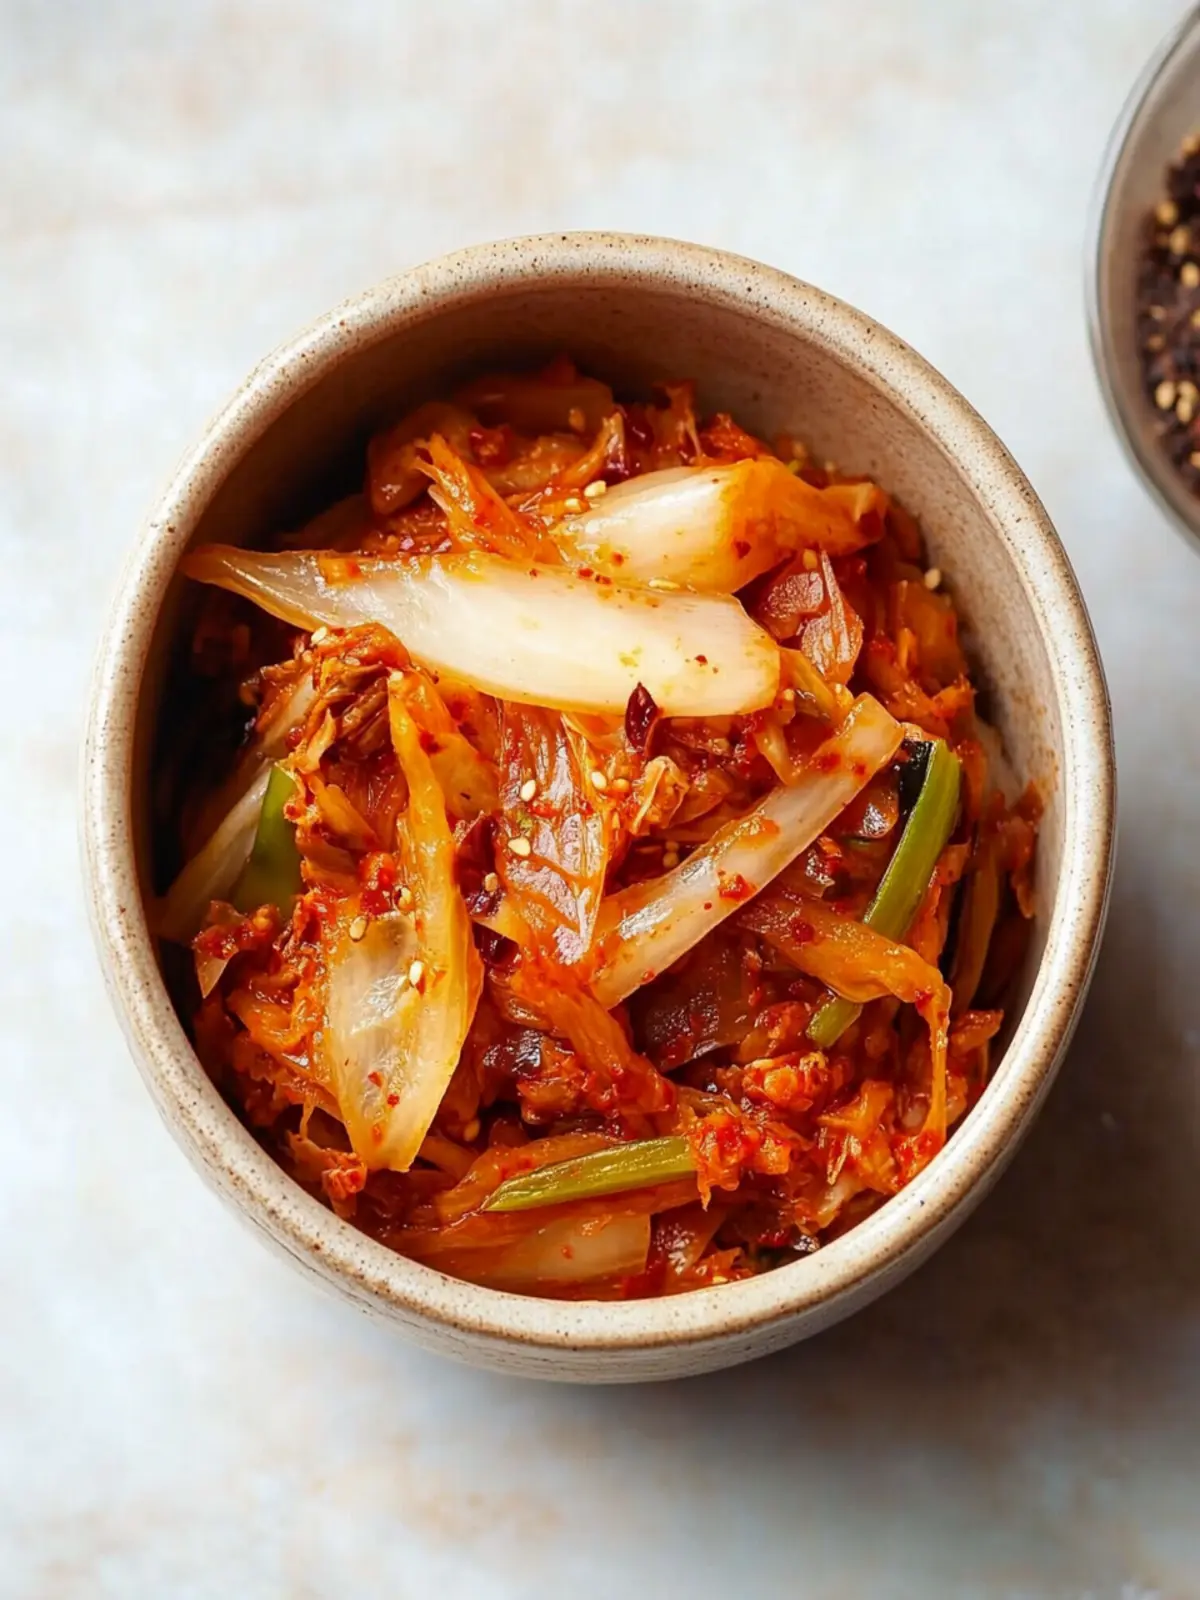
The moment I opened my fridge and caught a whiff of the tangy aroma of my homemade kimchi, I was instantly transported to the bustling streets of Seoul. This isn’t just any side dish; it’s a vibrant celebration of flavors, transforming simple ingredients into a culinary masterpiece that has been cherished in Korean cuisine for centuries.
As I embarked on my journey of crafting this traditional kimchi recipe, I discovered not only a delicious pairing for practically any meal but also a powerful ally for gut health, teeming with probiotics. What makes this kimchi truly special is its versatility—whether you prefer a fiery kick or a milder creation, you can easily personalize it to match your taste. So, if you’re ready to embark on a fermented adventure that promises both health benefits and a punch of flavor, grab your apron, and let’s dive into making this classic homemade kimchi together!

Why is this Kimchi Recipe Homemade special?
Flavor Explosion: This kimchi recipe delivers a bold and tangy punch, elevating every meal it accompanies.
Gut Health Hero: Packed with probiotics, it promotes digestion and overall well-being, making it a nutritious addition to your diet.
Easy Customization: With simple adjustments, you can make it as spicy or mild as you desire, ensuring it suits your palate perfectly.
Versatile Dish: Whether as a delightful side or a zesty topping on various dishes, this kimchi fits seamlessly into any cuisine.
Satisfying Crunch: Enjoy that satisfying crunch with each bite, bringing a unique texture that enhances your dining experience.
Dive deeper into the world of fermentation with this delicious kimchi recipe and discover how to make it uniquely yours!
Kimchi Recipe Homemade Ingredients
• Discover the flavorful components of this classic dish!
For the Cabbage Base
- Napa or Chinese Cabbage – The primary ingredient for that crunchy texture; if unavailable, Savoy cabbage works beautifully as a substitute.
- Coarse Sea Salt or Kosher Salt – Crucial for creating a natural brine and pulling moisture from the cabbage; avoid iodized salt to prevent additives interference.
For the Vegetables
- Daikon Radish (8-10 oz, cut into matchsticks) – Adds a refreshing, crisp bite and subtle sweetness; regular radish can stand in if daikon’s hard to find.
- Carrot (8-10 oz, cut into matchsticks) – Infuses color and a touch of sweetness; feel free to swap in any firm vegetable, like bell pepper.
- Scallions (10, sliced) – They provide aromatic depth and a mild onion flavor; chives are a fine substitute in a pinch.
For the Flavor Base
- Garlic (10 cloves, peeled) – It brings a pungent flavor to your kimchi; fresh garlic is key—steer clear of jarred varieties!
- Ginger (½ inch piece, peeled) – Offers a warm, zesty note; if you’re in a bind, a pinch of ground ginger can do the trick.
- Gochugaru (8-12 tbsp) – The secret to that vibrant red color and spicy kick; adjust according to your heat preference or use milder chili powder.
- Granulated Sugar (2 tsp) – This not only balances flavors but also supports fermentation; honey is a great alternative if preferred.
- Fish Sauce (5 tbsp) – A deep umami flavor enhancer; for a vegetarian option, use soy sauce or tamari instead.
Now that you’ve gathered the Kimchi Recipe Homemade ingredients, it’s time to bring your culinary adventure to life!
How to Make Kimchi Recipe Homemade
-
Prepare Cabbage: Start by removing any damaged leaves from the Napa cabbage and cut it into quarters. Slice the quarters into 1-inch pieces, then place them in a large bowl. Sprinkle with salt and massage gently until the cabbage wilts, which will take about 5-10 minutes. Allow it to drain in a colander for 1-2 hours, then rinse and strain thoroughly.
-
Prepare Vegetables: In the same bowl, combine the drained cabbage with matchstick-cut daikon radish, carrot, and sliced scallions. Add the grated garlic and ginger, together with Gochugaru, sugar, and fish sauce. Mix everything well by squeezing the veggies together until a flavorful liquid forms, about 5 minutes.
-
Ferment: Pack the vibrant mixture tightly into a fermentation crock or jar, being sure to submerge it in liquid. If needed, add a little water to keep the veggies submerged. Cover loosely to allow gases to escape, and store in a cool, dark place for 4-7 days. Taste daily to find your preferred level of fermentation.
-
Store: Once your kimchi reaches the desired tanginess, transfer it to smaller jars, pressing down firmly to keep everything submerged. Seal tightly and refrigerate to slow the fermentation process, ensuring it’ll be delicious for months to come!
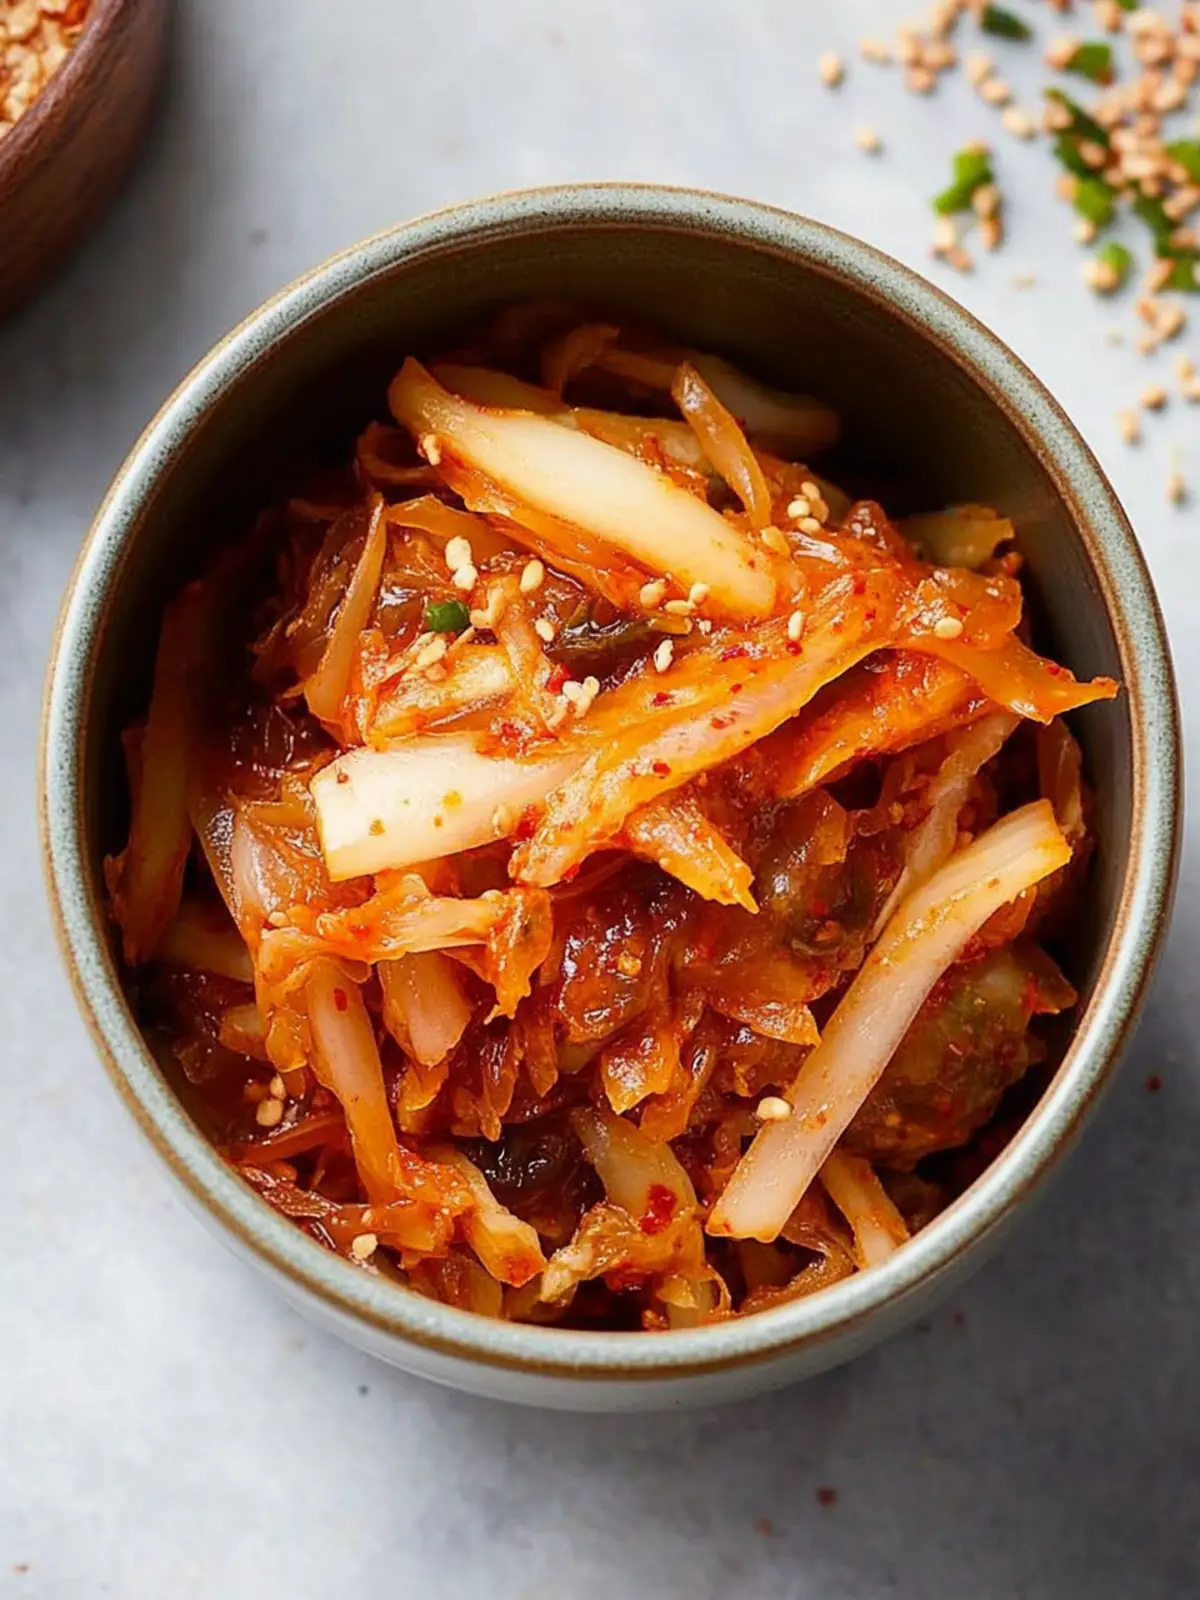
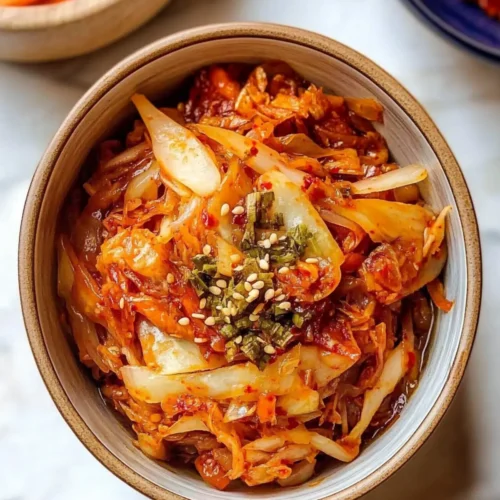
Optional: Enjoy with a sprinkle of sesame seeds on top for an extra burst of flavor.
Exact quantities are listed in the recipe card below.
Variations & Substitutions for Kimchi Recipe Homemade
Feel free to explore these fun twists and adjustments that can perfectly tailor your kimchi to your preferred taste and dietary needs!
-
Sweet Fruit Adding: Mix in diced Asian pears or mango slices for a touch of sweetness and natural flavor. It’s a refreshing surprise that balances the spice beautifully.
-
Greens Galore: Swap out Napa cabbage for kale or radicchio to create unique flavor profiles and fascinating textures. Each leafy green brings its own flair to the party!
-
Spicy Adjustments: Tweak the heat by either reducing Gochugaru or substituting it with a milder chili powder. Feel free to ramp it up with extra chili flakes if you crave more kick!
-
Vegetarian Delight: Replace fish sauce with soy sauce or tamari to create a fully vegetarian-friendly kimchi without sacrificing that deep umami layer.
-
Crunchy Nuts: Toss in a handful of toasted sesame seeds or crushed nuts to incorporate a delightful crunch and extra protein. It elevates both texture and nutrition.
-
Herb Infusion: Add fresh herbs like cilantro or mint for a bright twist. This will introduce a lovely freshness that complements the fermentation beautifully.
-
Zesty Citrus: Squeeze in some lime or lemon juice for an unexpected citrusy zing. This brightens the overall flavor, creating an exciting balance!
-
Garlic Lovers Unite: If you’re a garlic fanatic, increase the amount to suit your taste. The more, the merrier when it comes to that rich garlic profile!
Embrace your creativity with these variations, and let your homemade kimchi reflect your culinary personality!
What to Serve with Kimchi Recipe Homemade?
Imagine the perfect meal where every bite is alive with flavor and texture, all thanks to your homemade kimchi.
- Steamed Rice: This classic pairing creates a neutral base, allowing the tangy and spicy notes of kimchi to shine, adding balance to your meal.
- Korean BBQ: Enjoy grilled marinated meats alongside kimchi, which complements the smoky flavors and cuts through richness with its acidity.
- Savory Pancakes: Kimchi pancakes are a delicious way to incorporate your homemade kimchi into a crispy, savory delight, enhancing the meal’s flavor profile.
- Noodle Bowls: Add kimchi to ramen or soba noodle bowls as a vibrant topping, providing an exciting crunch and a boost of umami with every slurp.
- Tofu Stir-Fry: Pair your kimchi with a tofu stir-fry for a great vegetarian option, where the texture of the smooth tofu beautifully contrasts with the crunchy kimchi.
- Crispy Lettuce Wraps: Use kimchi as a zesty filling in lettuce wraps with grilled chicken or shrimp for a fresh, hand-held delight bursting with flavor.
Make Ahead Options
These kimchi recipe homemade options are perfect for busy cooks looking to save time! You can prepare the cabbage and the brine up to 24 hours in advance; simply massage the cabbage with salt and let it drain. Additionally, the vegetable mixture can be prepped and combined without fermentation; store it in an airtight container for up to 3 days in the refrigerator. When you’re ready to start fermenting, pack the mixture into your jar and follow the fermentation instructions. To maintain quality, ensure all vegetables stay submerged in the brine and check daily for fermentation progress. Enjoy the convenience of delicious homemade kimchi that’s just as delightful when prepared ahead of time!
Expert Tips for Kimchi Recipe Homemade
- Choose the Right Salt: Use coarse sea salt or kosher salt, as iodized salt contains additives that can affect fermentation.
- Fresh Ingredients Matter: Opt for fresh garlic and vegetables; processed or jarred items can compromise the flavor and fermentation process.
- Submerging is Key: Always keep your vegetables submerged in the brine to prevent mold and ensure successful fermentation.
- Taste Daily: Check the flavor every day during fermentation. This allows you to stop when it hits your preferred tanginess without going too far.
- Storage Matters: Store the kimchi in airtight jars in the fridge; this preserves flavor and maintains the probiotic-rich benefits for months to come.
Enjoy the journey of crafting your kimchi recipe homemade and make it a delightful staple in your kitchen!
Storage Tips for Kimchi Recipe Homemade
Fridge: Store your kimchi in the refrigerator for up to 6 months. Keeping it tightly packed in airtight jars helps minimize air exposure, preserving its unique flavors.
Freezer: For longer storage, you can freeze kimchi for up to 1 year. Use freezer-safe containers or bags, but note that this may alter the texture upon thawing.
Reheating: There’s no need to reheat kimchi, as it’s enjoyed best cold or at room temperature. Just scoop out what you need directly from the jar for fresh flavor!
Air Exposure: Always ensure your kimchi is submerged in brine while stored to prevent mold development. If any fuzziness appears, skim it off and keep the vegetables submerged.
Kimchi Recipe Homemade Recipe FAQs
How do I choose the right cabbage for my kimchi?
Absolutely! The key ingredient is Napa or Chinese cabbage, which gives the best texture and flavor. You want a cabbage with crisp leaves, free from dark spots or wilting—freshness is vital! If you can’t find Napa cabbage, Savoy cabbage makes a superb substitute.
How long can I store homemade kimchi, and what are the best storage methods?
Homemade kimchi can be enjoyed fresh for up to 6 months when stored correctly in the refrigerator. Keep it in airtight jars, tightly packed to reduce air exposure. The flavors will continue to deepen over time, making each bite an experience!
Can I freeze my homemade kimchi?
Yes, indeed! You can freeze kimchi for up to 1 year in freezer-safe containers or bags. However, be aware that while it will retain its delicious flavor, the texture may change after thawing, becoming softer. To freeze, simply portion it out, seal tightly, and label with the date.
What should I do if I see mold on my kimchi?
Very important! If you notice any mold, don’t panic. Carefully skim off the fuzzy mold from the surface, ensuring the submerged vegetables are unaffected. If it’s just a light layer, you can still enjoy the kimchi. Keep everything submerged to prevent this from happening in the future.
Is kimchi safe for people with dietary restrictions?
Absolutely! Kimchi can be tailored to fit various dietary needs. For fish sauce, you can substitute with soy sauce or tamari for a vegetarian/vegan option. However, if you have allergies, always check the individual ingredients like fish sauce and make sure they’re suitable for your diet. Plus, it’s gluten-free, so it’s great for many!
Can I adjust the spice level in my kimchi?
The more the merrier! You can customize the intensity of your kimchi by adjusting the amount of Gochugaru (Korean chili flakes) according to your spice preference. For a milder version, simply decrease the quantity or mix in less spicy chili powders. Enjoy tailoring it to your taste!
Delicious Kimchi Recipe Homemade for Gut Health Lovers
Equipment
- - Large bowl
- - Colander
- Fermentation Crock or Jar
Ingredients
For the Cabbage Base
- 1 head Napa or Chinese Cabbage Savoy cabbage can work as a substitute.
- ½ cup Coarse Sea Salt or Kosher Salt Avoid iodized salt.
For the Vegetables
- 8-10 oz Daikon Radish Cut into matchsticks; regular radish can be used.
- 8-10 oz Carrot Cut into matchsticks; can substitute with firm vegetables.
- 10 Scallions Sliced; chives can be a substitute.
For the Flavor Base
- 10 cloves Garlic Peeled; use fresh garlic.
- ½ inch Ginger Peeled; can use ground ginger in a pinch.
- 8-12 tbsp Gochugaru Adjust according to spice preference.
- 2 tsp Granulated Sugar Honey can be used as an alternative.
- 5 tbsp Fish Sauce Use soy sauce or tamari for a vegetarian option.
Instructions
How to Make Kimchi Recipe Homemade
- Prepare Cabbage: Start by removing any damaged leaves from the Napa cabbage and cut it into quarters. Slice the quarters into 1-inch pieces, then place them in a large bowl. Sprinkle with salt and massage gently until the cabbage wilts, which will take about 5-10 minutes. Allow it to drain in a colander for 1-2 hours, then rinse and strain thoroughly.
- Prepare Vegetables: In the same bowl, combine the drained cabbage with matchstick-cut daikon radish, carrot, and sliced scallions. Add the grated garlic and ginger, together with Gochugaru, sugar, and fish sauce. Mix everything well by squeezing the veggies together until a flavorful liquid forms, about 5 minutes.
- Ferment: Pack the vibrant mixture tightly into a fermentation crock or jar, being sure to submerge it in liquid. If needed, add a little water to keep the veggies submerged. Cover loosely to allow gases to escape, and store in a cool, dark place for 4-7 days. Taste daily to find your preferred level of fermentation.
- Store: Once your kimchi reaches the desired tanginess, transfer it to smaller jars, pressing down firmly to keep everything submerged. Seal tightly and refrigerate to slow the fermentation process, ensuring it'll be delicious for months to come!
- Optional: Enjoy with a sprinkle of sesame seeds on top for an extra burst of flavor.