
Table of contents
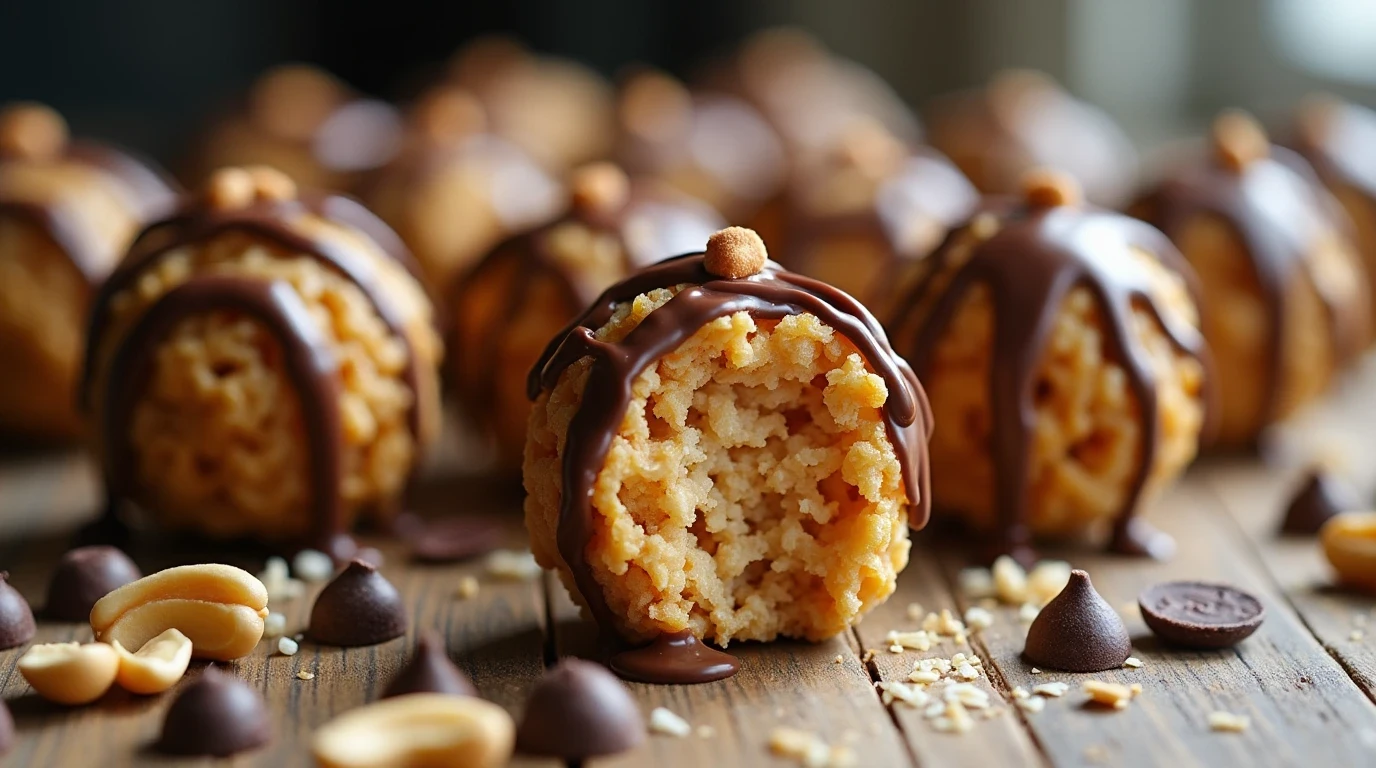
I remember the first time I saw these no-bake treats. I was in my grandmother’s kitchen, watching her make magic with simple ingredients. Peanut butter rice krispie balls quickly became a family favorite. They’re a kid-friendly recipe that brings joy in every bite.
These desserts are more than treats. They take us back to childhood, where simple things become amazing. With just three cups of Rice Krispies, a cup of creamy peanut butter, and a little effort, you can make wonders that everyone will love.

What’s special about these treats is how versatile they are. They’re perfect for a quick snack or a crowd-pleasing dessert. They’re easy to make, don’t need baking, and can be made to fit different tastes and diets.
In the next sections, I’ll share everything you need to know about making these treats. We’ll cover ingredients, techniques, and storage tips to keep them fresh and delicious.
Introduction to No-Bake Peanut Butter Treats
Exploring peanut butter snacks has been thrilling. No-bake treats have changed how we enjoy desserts. They are quick and easy to make. Rice krispies recipes are especially loved for their crunch and taste.
Why These Treats Are Perfect for Any Occasion
Gluten-free snacks are becoming more popular. No-bake peanut butter treats are a great choice. They are perfect for many situations:
- Quick party appetizers
- After-school snacks
- Late-night sweet cravings
- Impromptu gatherings
The Appeal of No-Bake Desserts
No-bake desserts have many benefits. They don’t need to be baked, which is great for hot days. With a few ingredients, you can make delicious treats in minutes. You can also customize them in many ways.
History of Rice Krispie Treats
Rice Krispie treats have a rich history. They were first made in the 1930s. Now, they are more than just simple bars. Modern twists, like peanut butter rice krispie balls, make them gourmet.
Here’s what these treats are made of:
- Fat content: 43%
- Carbohydrates: 17%
- Protein: 16%
- Sugar: 33%
These numbers show that while tasty, they can be part of a healthy diet if eaten in moderation.
Essential Ingredients for Peanut Butter Rice Krispie Balls
Making tasty peanut butter rice krispie balls is easy with the right ingredients. These snacks need just a few simple parts to become a favorite treat. Let’s look at the main ingredients that make these snacks so good.
The base of these tasty balls includes three main ingredients:
- Creamy Peanut Butter: Pick a smooth, drippy peanut butter to hold everything together
- Crispy Rice Cereal: Gives the balls their crunchy texture
- Maple Syrup: Adds sweetness and helps with the right consistency
When making these snacks, use top-quality ingredients. The right peanut butter is key for texture and taste. Gluten-free rice cereal is great for those with dietary limits, but regular cereal works too.
Adding some extra ingredients can make your rice krispie balls even better:
- Dark chocolate chips for a sweet coating
- Powdered sugar for extra sweetness
- Vanilla extract for more flavor
Pro tip: Each ball is under 100 calories, making them a great snack without guilt. The recipe is easy to adjust, so you can make it your own.
Kitchen Tools and Equipment Needed
To make tasty peanut butter krispie treats, you need the right tools. I’ll show you the essential equipment for a smooth and fun preparation.
Must-Have Utensils
For making peanut butter krispie treats, you’ll need these basic tools:
- Large mixing bowl
- Measuring cups and spoons
- 9×13-inch baking pan
- Parchment paper
- Heatproof spatula
- Sharp knife
- Nonstick baking spray
Optional Tools for Enhanced Preparation
These extra tools can make your no-bake treat making better:
- Stand mixer with paddle attachment
- Electric hand mixer
- Microwave-safe bowl
- Double boiler
- Cookie scoop
Storage Containers
Keeping your treats fresh is key. Use these containers for storage:
| Container Type | Best For | Storage Duration |
|---|---|---|
| Airtight plastic container | Room temperature storage | 3-5 days |
| Glass container with lid | Refrigerator storage | Up to 1 week |
| Freezer-safe container | Long-term preservation | Up to 3 months |
Pro tip: Always line your storage containers with parchment paper to prevent sticking and maintain the treats’ shape.
Step-by-Step Making Process
I’ll show you how to make tasty peanut butter rice krispie balls. This recipe is quick and easy, needing little cooking.
- Gather your ingredients:
- 1½ cups creamy peanut butter
- 2 cups powdered sugar
- 2½ cups Rice Krispies cereal
- 6 Tbsp unsalted butter
- Mix dry ingredients:
- Combine powdered sugar with Rice Krispies in a large mixing bowl
- Gently fold to prevent crushing the cereal
- Prepare wet ingredients:
- Melt butter
- Mix with peanut butter until smooth
For the chocolate coating, you’ll need 3 cups of semisweet chocolate chips and 1 Tbsp vegetable oil. Pro tip: Melt 1-2 cups of chocolate chips at a time to prevent rapid cooling.
| Step | Details | Time |
|---|---|---|
| Mixing | Combine peanut butter, sugar, cereal | 5 minutes |
| Rolling | Form into small balls | 10 minutes |
| Chilling | Freeze to set | 15 minutes |
| Coating | Dip in melted chocolate | 10 minutes |
The total preparation time is under 30 minutes. You’ll get about 45 delicious peanut butter rice krispie balls. Each ball has around 164 calories, making them a great sweet treat for any time.
Optional decorations include sprinkles, chocolate drizzle, or chopped nuts. Add them quickly before the chocolate hardens!
Tips for Perfect Texture and Consistency
Making the best peanut butter rice krispie balls needs focus on texture and technique. Getting the right no-bake peanut butter balls consistency is an art. It mixes precise ingredients with careful handling.
Choosing the Right Peanut Butter
The key to great peanut butter rice krispie balls texture is the peanut butter. I suggest using creamy brands like JIF, Skippy, or Peter Pan. These brands offer a smooth base that binds ingredients well.
- Avoid natural peanut butter with separated oil
- Choose smooth, creamy varieties for best results
- Ensure peanut butter is at room temperature
Proper Rice Krispies Handling
Keeping Rice Krispies crunchy is key for the perfect texture. Gentle mixing is important. It prevents the cereal from getting crushed, which makes the treat less appealing.
Temperature Control Tips
Temperature is crucial for the perfect no-bake peanut butter balls consistency. Chilling the mixture between steps helps keep it shaped and improves texture.
| Step | Temperature Recommendation | Purpose |
|---|---|---|
| Mixing Ingredients | Room Temperature | Easier blending |
| Forming Balls | Refrigerate 30 minutes | Firm up mixture |
| Chocolate Coating | Cool room temperature | Prevent chocolate cracking |
Pro tip: If the mixture is too sticky, add more powdered sugar or Rice Krispies. For a crumbly texture, add more peanut butter.
By following these tips, you’ll make perfectly textured, delicious peanut butter rice krispie balls every time!
Chocolate Coating Techniques
Turning peanut butter balls into delicious treats needs the right chocolate coating skills. The right method can make these simple desserts look like they were made by a pro. They will surely impress everyone.
For chocolate coating, I suggest a few important steps for a smooth finish:
- Use high-quality chocolate chips for the best taste
- Add coconut oil or shortening to thin the chocolate
- Choose dipping techniques that are easy to clean up
- Keep the chocolate at the right temperature
Dipping methods can change how your treats look. You might go for a partial coating for a classic look or full chocolate for a complete cover.
| Coating Method | Technique Details | Visual Result |
|---|---|---|
| Partial Dipping | Leave a small part uncovered | Classic buckeye look |
| Full Coating | Immerse fully in chocolate | Smooth, professional finish |
| Decorative Drizzle | Add contrasting chocolate lines | Elegant finish |
Pro tip: Use a skewer or toothpick for precise coating. Tap off extra chocolate and place on a lined baking sheet to set. Sprinkle with decorative toppings before the chocolate hardens for an elegant touch.
With these techniques, your peanut butter balls will look as good as they taste!
Storage and Shelf Life Guidelines
Storing peanut butter rice krispie balls right is key to keeping them tasty and fresh. Knowing how long no-bake treats last lets you enjoy them at their best.
Room Temperature Storage
For storing peanut butter rice krispie balls at room temperature, remember these tips:
- Use an airtight container
- Keep in a cool, dry place
- Consume within 3 days for optimal freshness
Refrigeration Methods
Refrigeration is great for keeping your no-bake treats fresh longer. Here’s how to do it right:
| Storage Method | Duration | Recommendation |
|---|---|---|
| Refrigerated Storage | Up to 2 weeks | Use parchment paper between layers |
| Sealed Container | Maintains freshness | Keep away from strong-smelling foods |
Freezing Instructions
Freezing is a top choice for keeping these treats fresh longer. Pro tip: Freezing them right keeps their flavor strong.
- Place coated balls on a baking sheet
- Freeze for 30 minutes initially
- Transfer to a freezer-safe container
- Store for up to 3 months
To enjoy them, thaw the peanut butter rice krispie balls in the fridge. This stops the chocolate from melting too fast. It keeps them just right in texture and taste.
Dietary Modifications and Alternatives
Making gluten-free peanut butter balls and vegan rice krispie treats is easy. You don’t have to give up on taste or texture. I’ve found ways to make this recipe work for different diets.
For those with special dietary needs, these changes can make the recipe better:
- Gluten-Free Option: Use gluten-free crispy rice cereal for gluten-free peanut butter balls. Try Erewhon or Rice Chex.
- Vegan Rice Krispie Treats: Use vegan marshmallows and plant-based butter instead of regular ones.
- Nut-Free Alternatives: Use sunflower seed butter or soy nut butter instead of peanut butter for those with nut allergies.
These changes make the recipe more flexible. Let’s look at how different ingredients change the nutrition:
| Ingredient | Calories | Protein | Carbs |
|---|---|---|---|
| Original Recipe | 110 | 3g | 12g |
| Vegan Version | 100 | 5g | 5g |
| Gluten-Free Version | 105 | 4g | 10g |
Pro tip: For vegan rice krispie treats, add plant-based protein powder. Vanilla-flavored works well with the sweet taste.
- Best protein powders for vegan treats:
- Pea protein
- Hemp protein
- Brown rice protein
These changes mean everyone can enjoy these treats, no matter their diet or restrictions.
Creative Variations and Toppings
Turning classic peanut butter balls into exciting treats opens a world of flavors. I’ve found amazing ways to make these simple treats more exciting. It’s a great way to get creative in the kitchen.
Decorative Finishes That Wow
Make your holiday rice krispie treats stand out with these decoration ideas:
- Drizzle with white chocolate for an elegant touch
- Use colored candy melts for vibrant designs
- Sprinkle edible glitter for festive flair
- Roll in crushed nuts for added texture
Flavor Enhancement Strategies
Enhance the taste of your peanut butter balls with these easy tips:
- Add 1/2 teaspoon vanilla extract for depth
- Sprinkle sea salt for a gourmet twist
- Mix in ground cinnamon for warmth
- Incorporate mini chocolate chips
Holiday-Themed Spectacular Options
Make unforgettable seasonal treats with these creative ideas:
- Christmas: Red and green sprinkles
- Halloween: Orange and black candy melts
- Fourth of July: Patriotic color coating
- Easter: Pastel-colored decorations
Pro tip: Try different cereals like Cocoa Krispies or Fruity Pebbles. They add unique flavors that will amaze your family and friends.

Peanut Butter Rice Krispie Balls
Ingredients
- 1 cup creamy peanut butter
- ¼ cup unsalted butter softened
- 1 cup powdered sugar
- 2 cups Rice Krispies cereal
- 2 cups semi-sweet chocolate chips
- 2 tablespoons vegetable shortening optional, for smoother chocolate
Instructions
- Prepare the Peanut Butter Mixture:
- In a large mixing bowl, combine the creamy peanut butter and softened butter until smooth and well blended.
- Gradually add the powdered sugar, mixing thoroughly until fully incorporated.
- Gently fold in the Rice Krispies cereal, ensuring the cereal is evenly distributed throughout the mixture.
- Form the Balls:
- Using a tablespoon or a small cookie scoop, portion out the mixture and roll it between your palms to form compact balls.
- Place the formed balls onto a baking sheet lined with parchment or wax paper.
- Transfer the baking sheet to the refrigerator and chill the balls for at least 30 minutes to firm up.
- Prepare the Chocolate Coating:
- In a microwave-safe bowl, combine the semi-sweet chocolate chips and vegetable shortening.
- Microwave in 30-second intervals, stirring after each interval, until the chocolate is fully melted and smooth.
- Dip the Balls:
- Remove the chilled peanut butter balls from the refrigerator.
- Using a fork or a toothpick, dip each ball into the melted chocolate, ensuring it is fully coated.
- Allow any excess chocolate to drip back into the bowl before placing the coated ball back onto the parchment-lined baking sheet.
- Set the Coating:
- Once all the balls are coated, return the baking sheet to the refrigerator.
- Let the chocolate set completely, which should take about 20 minutes.
- Serve:
- After the chocolate has hardened, remove the balls from the refrigerator.
- Arrange them on a serving platter and enjoy these delightful treats.
Conclusion
I’ve found that these easy peanut butter desserts are more than treats. They mix simplicity with creativity. With just 5 ingredients and no baking, they’re easy to make in your kitchen.
Peanut Butter Rice Krispie Balls stand out because they’re so versatile. You can add different mix-ins or try chocolate coatings. They’re perfect for a quick snack, a party treat, or a gift for friends.
What I love most is how you can change this recipe to fit different diets. You can make gluten-free versions or use dairy-free alternatives. This makes the treats a favorite for all kinds of bakers.
Good cooking is about trying new things and having fun. So, get your ingredients ready, be creative, and enjoy making these delicious Peanut Butter Rice Krispie Balls!
FAQ
How long do Peanut Butter Rice Krispie Balls take to make?
These treats are quick to make, ready in under 30 minutes. You mix ingredients, shape into balls, and chill or coat with chocolate. The whole process, including chilling, takes about 45 minutes.
Can I make these treats gluten-free?
Yes! For gluten-free Peanut Butter Rice Krispie Balls, use gluten-free crispy rice cereal. Always check the label to avoid barley malt or gluten.
How long can I store Peanut Butter Rice Krispie Balls?
Store them in an airtight container at room temperature for up to 3 days. Refrigerate for up to 2 weeks or freeze for 3 months. Use parchment paper between layers to prevent sticking.
Can I use alternative nut butters?
Absolutely! You can use almond butter, sunflower seed butter, or other nut butters instead of peanut butter. Make sure the consistency is creamy.
What’s the best way to coat these balls in chocolate?
Melt chocolate chips with a bit of coconut oil or shortening. Dip chilled balls with a skewer or toothpick, tapping off excess. You can fully coat or leave some uncovered for a buckeye look.
Are these treats kid-friendly to make?
Yes! Kids can help with mixing, rolling, and decorating. Just watch them when melting and dipping chocolate.
Can I make these treats vegan?
To make vegan Peanut Butter Rice Krispie Balls, use vegan butter and dairy-free chocolate. Maple syrup is a good vegan sweetener.
How can I add variety to the basic recipe?
Add vanilla extract, cinnamon, or sea salt for flavor. Mix in mini chocolate chips, crushed pretzels, or chopped nuts. Try different cereals or sprinkles for fun variations.