

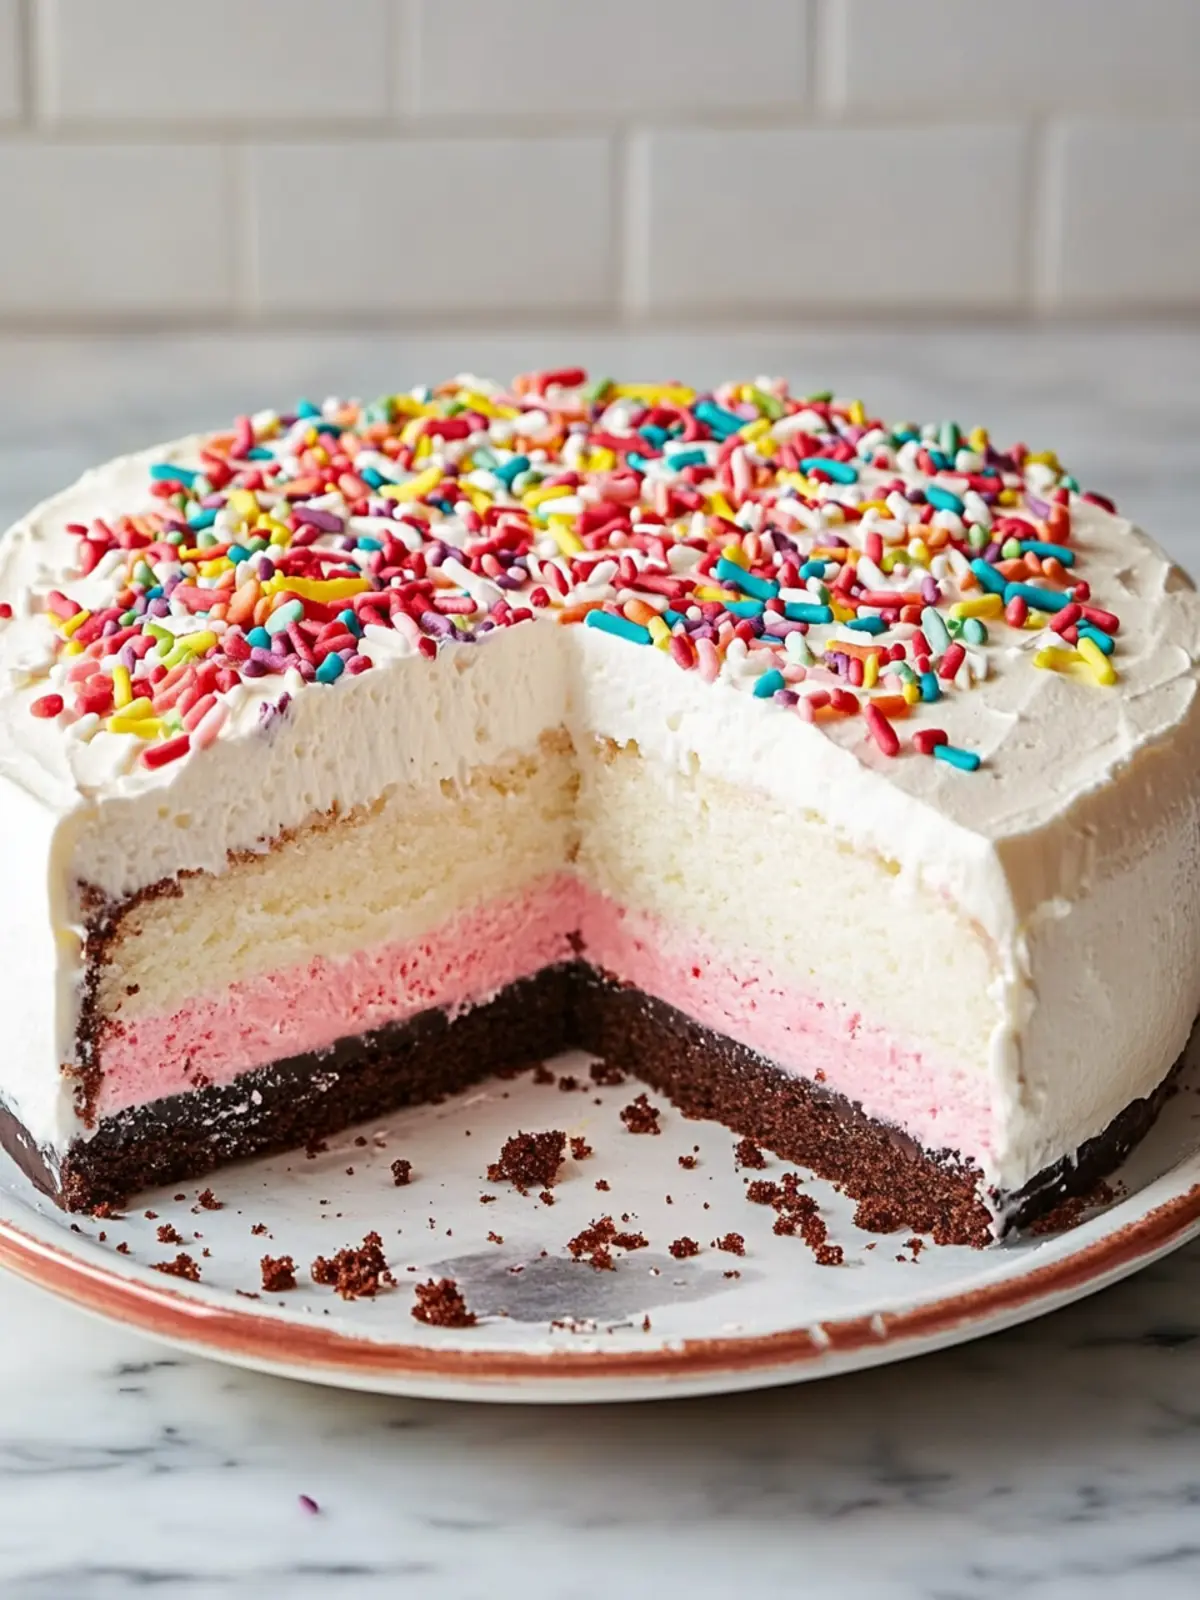
There’s nothing quite like the joy of making a dessert that tastes just as heavenly as it looks. When I decided to recreate a Copycat Dairy Queen Ice Cream Cake, I found myself whisked back to childhood celebrations filled with laughter, candles, and, of course, that irresistibly creamy cake. Imagine the satisfying crunch of Oreo cookie layers meeting the silky richness of chocolate and vanilla ice cream — it’s a dessert that’s practically synonymous with happy memories.
After encountering a particularly drab day filled with fast food and takeout, I craved something homemade yet indulgent. This ice cream cake is the perfect remedy, combining layers of fluffy whipped cream, hot fudge, and delightful crunch that will impress your guests and keep them coming back for seconds. Plus, with a bit of prep and some time in the freezer, you can whip up this delicious wonder without any fuss.
So grab your mixing bowls and let’s create a dessert that’ll make any occasion feel special. You won’t believe how effortlessly this can become your go-to celebratory cake!
Why will you love this Copycat Dairy Queen Ice Cream Cake?
Decadent layers of creamy vanilla and chocolate ice cream make this cake a true treat!
Irresistible crunch comes from the Oreo cookie base, adding an exciting texture to each bite.
Time-friendly preparation ensures you can make this delightful dessert without stress.
Perfect for any celebration, it’s sure to wow your friends and family.
Personal touch allows you to customize flavors and toppings, making it your own signature cake!
Get ready to indulge in homemade deliciousness and keep it simple by checking out easy baking tips for more delightful recipes!
Copycat Dairy Queen Ice Cream Cake Ingredients
• Ready to create your own heavenly dessert? Here’s what you’ll need!
For the Crunch Layer
- 15 Oreo cookies – crush these for a delightful, crispy base that brings the cake to life.
- 3 Tbsp. unsalted butter, melted – this binds the cookie crumbs together for a sturdy yet delicious crust.
For the Chocolate Mixture
- 1/2 cup semisweet chocolate chips – these melting morsels add rich sweetness and depth to your dessert.
- 1 Tbsp. refined coconut oil or vegetable shortening – this helps the chocolate mix smoothly and adds a delightful sheen.
For the Ice Cream Layers
- 1 1/2 qt. vanilla ice cream – opt for high-quality ice cream for the best creamy texture and flavor.
- 1 1/2 qt. chocolate ice cream – use this to create that classic ice cream cake taste that everyone loves!
For the Whipped Cream Topping
- 1 1/2 cups heavy whipping cream – a must for fluffy, cloud-like texture on top of your cake.
- 1/4 cup confectioners’ sugar – sweetens the cream without the grittiness of granulated sugar.
- 1 1/2 tsp. pure vanilla extract – enhances the flavor and aromas of your whipped cream, making it even more delightful.
For the Decor
- 1 (11.5-oz.) jar hot fudge topping – drizzle this velvety sauce for added decadence and caramel flavor.
- Sprinkles, for decorating – these colorful accents make your cake festive and fun for any occasion!
Now that you have all the Copycat Dairy Queen Ice Cream Cake ingredients, let’s dive into the joy of baking and assemble your masterpiece!
How to Make Copycat Dairy Queen Ice Cream Cake
-
Preheat and Prep: Preheat your oven to 350°F (175°C). Line a baking sheet with parchment paper to prepare for the cookie base.
-
Chop Oreos: Chop the 15 Oreo cookies into chickpea-sized pieces and toss them with 3 tablespoons of melted unsalted butter. Spread the mixture on the prepared baking sheet.
-
Bake Crunch Layer: Bake the cookie mixture until it’s fragrant and crisp, about 5 to 8 minutes. Allow it to cool slightly before proceeding.
-
Melt Chocolate: In a medium heatproof bowl, microwave 1/2 cup of semisweet chocolate chips in 30-second increments, stirring well in between until melted and smooth, which will take about 60 to 90 seconds in total. Stir in 1 tablespoon of refined coconut oil.
-
Combine: Add the baked cookie crumbs to the chocolate mixture, tossing to coat evenly. Spread this onto another parchment-lined sheet and refrigerate until hardened, about 30 minutes.
-
Line the Pan: While the crunch layer hardens, line a 9″ springform pan with plastic wrap. Stir the 1 1/2 quarts of vanilla ice cream until smooth and spreadable, then evenly spread it in the bottom of the pan. Freeze for 30 minutes.
-
Prepare Fudge Layer: Microwave the 11.5-oz. jar of hot fudge topping in 15-second increments until slightly warmed and spreadable, approximately 30 to 45 seconds total.
-
Layer Crunchies: Scatter the chilled chocolate crunch pieces over the frozen vanilla ice cream layer. Dollop and spread the fudge topping across the crunchies. Freeze the cake until slightly firm, about 15 to 30 minutes.
-
Add Chocolate Ice Cream: Stir the 1 1/2 quarts of chocolate ice cream until smooth. Spoon it over the fudge layer and spread evenly. Cover the top with plastic wrap and freeze until firm, at least 4 hours or up to 1 week.
-
Invert the Cake: About 2 hours before serving, carefully peel off the top plastic wrap. Invert the cake onto a serving platter, removing the sides of the springform pan and any remaining plastic wrap. Return the cake to the freezer.
-
Whip Cream: Beat 1 1/2 cups of heavy whipping cream, 1/4 cup of confectioners’ sugar, and 1 1/2 teaspoons of pure vanilla extract with a handheld mixer on medium-high speed until stiff peaks form. Transfer one-third of the whipped cream to a piping bag fitted with a star tip.
-
Frost the Cake: Spread the remaining whipped cream over the top and sides of the cake. Pipe a decorative shell border around the top edge and base of the cake if desired. Freeze the decorated cake, uncovered, for 1 to 2 hours before serving.
-
Garnish: Before serving, sprinkle the top edge and base of the cake with colorful sprinkles. Let it sit at room temperature for about 5 minutes, then slice and enjoy!
Optional: Consider drizzling extra hot fudge over each slice for indulgent goodness.
Exact quantities are listed in the recipe card below.
Expert Tips for Copycat Dairy Queen Ice Cream Cake
-
Chill Your Tools: Before whipping the cream, chill your mixing bowl and beaters. This helps achieve those perfect stiff peaks more easily.
-
Oreo Chunk Size: Be mindful of your Oreo chunk size! If they’re too large, the crunch layer can become difficult to slice. Aim for small, even pieces.
-
Even Layers: To create beautifully even layers, make sure your ice cream is soft enough to spread smoothly without mixing with the layers below.
-
Patience is Key: Freeze each layer until firm to prevent slippage when stacking. This is crucial for achieving that tall, impressive cake structure.
-
Avoid Overmixing: When whipping your cream, stop as soon as stiff peaks form. Overmixing can turn it into butter, which isn’t ideal for this Copycat Dairy Queen Ice Cream Cake!
-
Customization Options: Feel free to swap out the ice cream flavors! Create your unique version by using cookie dough or strawberry ice cream for a different treat.
How to Store and Freeze Copycat Dairy Queen Ice Cream Cake
Fridge: Store leftovers in the fridge for up to 3 days. Cover tightly with plastic wrap to prevent ice crystals or drying out, ensuring each slice remains deliciously creamy.
Freezer: Freeze the cake for up to 1 week if not serving immediately. Wrap it well in plastic wrap and then aluminum foil to maintain its flavor and texture.
Thawing: To enjoy, transfer the cake to the fridge to thaw for about 1 hour before serving. This allows the layers to soften slightly for easy slicing and a heavenly melt-in-your-mouth experience.
Reheating: If you prefer a warm treat, consider microwaving individual slices for about 10-15 seconds. This will make the chocolate fudge layer extra gooey!
Make Ahead Options
These Copycat Dairy Queen Ice Cream Cakes are perfect for busy home cooks looking to save time while enjoying a delightful dessert! You can prepare the cookie crunch layer and chocolate mixture up to 24 hours in advance. Simply store the chocolate crunch pieces in an airtight container in the refrigerator to maintain their crispiness. Additionally, you can layer the vanilla ice cream up to 3 days ahead; just ensure it’s tightly covered to prevent freezer burn. When you’re ready to impress your guests, just complete the assembly by adding the chocolate layer, fudge, and whipped cream before serving. With these make-ahead options, you’ll have a stunning cake ready with minimal last-minute effort!
Copycat Dairy Queen Ice Cream Cake Variations
Discover endless possibilities to make this dessert uniquely yours! Let your creativity run wild and delight your taste buds with these fun twists.
-
Mint Chocolate: Add a few drops of peppermint extract to the whipped cream for a refreshing minty flavor that perfectly complements the chocolate.
-
Fruit-filled: Swirl in some raspberry or strawberry jam between the ice cream layers for a fruity burst in every bite.
-
Nutty Delight: Sprinkle chopped nuts like pecans or almonds between the layers for a delightful crunch that enhances the cake’s texture.
-
Coconut Bliss: Substitute the vanilla ice cream with coconut ice cream for a tropical twist, perfect for summer gatherings.
-
Spicy Kick: Mix in a pinch of cayenne pepper to the chocolate mixture for a surprising heat that elevates the dessert to a whole new level.
-
Caramel Swirl: Drizzle caramel sauce between the layers of ice cream for a luxurious and gooey treat that will leave everyone wanting more.
-
Colorful Layers: Use different flavors of ice cream, like strawberry and pistachio, to create a rainbow of colors and flavors that are sure to impress.
-
Vegan Version: Use dairy-free ice cream and coconut cream instead of heavy whipping cream for a plant-based treat that everyone can enjoy.
Get ready to explore these variations and create a Copycat Dairy Queen Ice Cream Cake that’s not just a dessert but a joyful experience for your taste buds!
What to Serve with Copycat Dairy Queen Ice Cream Cake?
Elevate your dessert experience by pairing this luscious cake with delightful sides that harmonize perfectly with its rich flavors.
-
Fresh Berries: Juicy strawberries and blueberries add a refreshing tartness that balances the sweetness of the cake. Their vibrant colors make for a beautiful presentation, too!
-
Chocolate Sauce: A drizzle of extra hot fudge enhances the indulgence, amplifying the chocolatey notes and inviting everyone for seconds.
-
Whipped Cream: Serve a generous dollop of lightly sweetened whipped cream to complement the cake’s creaminess and add an airy texture. This contrast creates a delicious mouthful!
-
Ice Cream Cones: For a playful twist, serve a scoop of your favorite ice cream alongside the cake in crispy cones. The added crunch is a fun contrast that delights all ages!
-
Chocolate Milkshake: For a decadent drink pairing, prepare rich chocolate milkshakes. Their creamy texture and chocolate flavor echo the cake, making each bite even more delightful.
-
Fruit Sorbet: A scoop of refreshing fruit sorbet cleanses the palate and introduces a fruity zing, making every bite of cake feel like a special occasion.
-
Coffee: A warm cup of brewed coffee or espresso serves as the perfect contrast to the cold, creamy cake—it’s a classic that never goes out of style.
-
Mini Cheesecakes: Bite-sized cheesecakes provide a different dessert option while still maintaining rich, creamy flavors that everyone will love. They help create a delightful dessert spread!
Copycat Dairy Queen Ice Cream Cake Recipe FAQs
What types of Oreos should I use?
Absolutely! You can use regular Oreos for a classic taste, but feel free to get creative with flavored varieties like double-stuffed or mint. Just be sure to stick with a similar texture to create that satisfying crunch.
How should I store leftovers?
To keep your Copycat Dairy Queen Ice Cream Cake fresh, wrap it tightly in plastic wrap and store it in the freezer for up to 1 week. For short-term storage, you can keep it in the fridge for up to 3 days, but make sure it’s covered to prevent ice crystals from forming!
Can I freeze the whole cake? How do I do that?
Certainly! To freeze your ice cream cake, first ensure it’s well set. Wrap the entire cake tightly in plastic wrap, followed by aluminum foil to keep out air and preserve its flavor. You can freeze it for up to 1 week. When you’re ready to enjoy, just transfer it to the fridge for about 1 hour before slicing.
What if my ice cream is too hard to spread?
Very common! If your ice cream is too firm, simply let it sit at room temperature for about 10-15 minutes until it softens slightly. This will make it much easier to spread without mixing up the layers. Remember, patience is key!
Are there any dietary considerations I should keep in mind?
Yes! If you have dietary restrictions or allergies, ensure you check the labels on your ingredients. The recipe contains dairy due to the ice cream and heavy whipping cream, making it unsuitable for those with lactose intolerance or dairy allergies. For a non-dairy version, consider using coconut or almond milk-based ice creams and a vegan whipped topping.
How can I customize the flavors?
The more the merrier! You can easily swap out the vanilla and chocolate ice cream for your favorites. Imagine a luscious strawberry or cookies and cream cake! Just ensure the flavors complement each other well, and feel free to mix in additional treats like chopped nuts or fruit for added texture and taste.
Copycat Dairy Queen Ice Cream Cake That's Easy and Irresistible
Equipment
- 9-inch springform pan
- Mixing bowls
- handheld mixer
- Baking sheet
- Parchment paper
Ingredients
For the Crunch Layer
- 15 pieces Oreo cookies crushed
- 3 Tbsp unsalted butter melted
For the Chocolate Mixture
- 1/2 cup semisweet chocolate chips
- 1 Tbsp refined coconut oil or vegetable shortening
For the Ice Cream Layers
- 1 1/2 qt vanilla ice cream high quality recommended
- 1 1/2 qt chocolate ice cream
For the Whipped Cream Topping
- 1 1/2 cups heavy whipping cream
- 1/4 cup confectioners' sugar
- 1 1/2 tsp pure vanilla extract
For the Decor
- 1 (11.5-oz.) jar hot fudge topping
- sprinkles for decorating
Instructions
Preparation
- Preheat your oven to 350°F (175°C). Line a baking sheet with parchment paper.
- Chop the 15 Oreo cookies into chickpea-sized pieces and toss them with 3 tablespoons of melted unsalted butter. Spread the mixture on the prepared baking sheet.
- Bake the cookie mixture until it’s fragrant and crisp, about 5 to 8 minutes. Allow it to cool slightly before proceeding.
- In a medium heatproof bowl, microwave 1/2 cup of semisweet chocolate chips in 30-second increments, stirring well in between until melted and smooth, which will take about 60 to 90 seconds in total. Stir in 1 tablespoon of refined coconut oil.
- Add the baked cookie crumbs to the chocolate mixture, tossing to coat evenly. Spread this onto another parchment-lined sheet and refrigerate until hardened, about 30 minutes.
- While the crunch layer hardens, line a 9" springform pan with plastic wrap. Stir the 1 1/2 quarts of vanilla ice cream until smooth and spreadable, then evenly spread it in the bottom of the pan. Freeze for 30 minutes.
- Microwave the 11.5-oz. jar of hot fudge topping in 15-second increments until slightly warmed and spreadable, approximately 30 to 45 seconds total.
- Scatter the chilled chocolate crunch pieces over the frozen vanilla ice cream layer. Dollop and spread the fudge topping across the crunchies. Freeze the cake until slightly firm, about 15 to 30 minutes.
- Stir the 1 1/2 quarts of chocolate ice cream until smooth. Spoon it over the fudge layer and spread evenly. Cover the top with plastic wrap and freeze until firm, at least 4 hours or up to 1 week.
- About 2 hours before serving, carefully peel off the top plastic wrap. Invert the cake onto a serving platter, removing the sides of the springform pan and any remaining plastic wrap. Return the cake to the freezer.
- Beat 1 1/2 cups of heavy whipping cream, 1/4 cup of confectioners' sugar, and 1 1/2 teaspoons of pure vanilla extract with a handheld mixer on medium-high speed until stiff peaks form. Transfer one-third of the whipped cream to a piping bag fitted with a star tip.
- Spread the remaining whipped cream over the top and sides of the cake. Pipe a decorative shell border around the top edge and base of the cake if desired. Freeze the decorated cake, uncovered, for 1 to 2 hours before serving.
- Before serving, sprinkle the top edge and base of the cake with colorful sprinkles. Let it sit at room temperature for about 5 minutes, then slice and enjoy!