
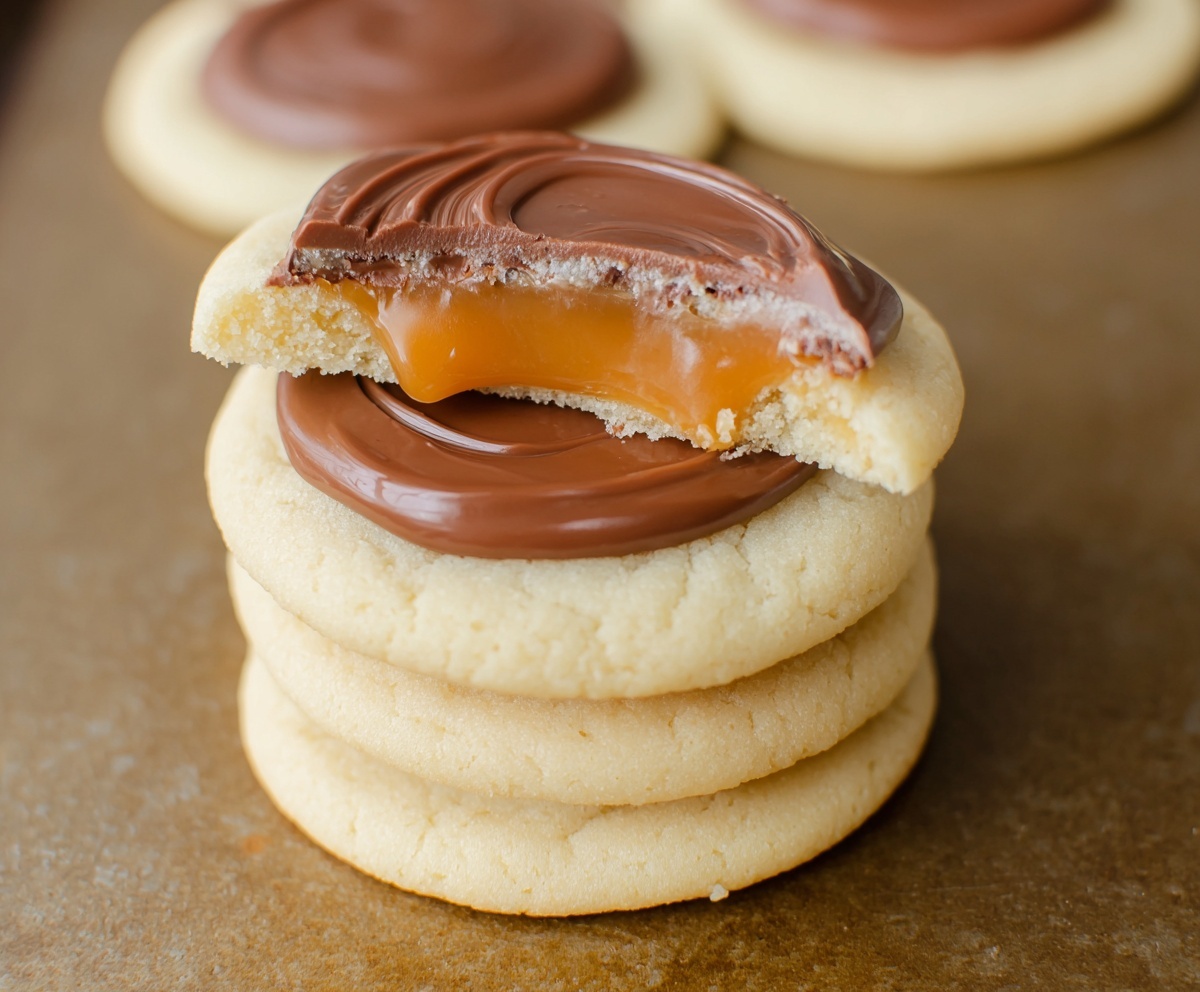
Twix Cookies are everything you love about the classic candy bar—but baked into a soft, buttery sugar cookie topped with rich caramel and smooth milk chocolate. Whether you’re baking for a party, holiday tray, or just your sweet tooth, these cookies are sure to impress. They’re simple to make, fun to assemble, and deliver that irresistible crunch and gooey bite that Twix fans crave.
Table of Contents
Why You’ll Love This Recipe

- 🍫 Candy bar flavor in a homemade cookie
- 🧒 Kid-friendly & fun to make
- 🎉 Perfect for holidays, cookie swaps, or gifts
- 💡 Easy to customize with toppings like nuts or sea salt
- ❄️ Freezer-friendly for make-ahead baking
Ingredients
- ½ cup salted butter, softened
- ½ cup granulated sugar
- 1 tsp vanilla extract
- 1 egg white
- 1½ cups all-purpose flour
- 1 tsp baking powder
- 20 soft caramels, unwrapped
- 1 tbsp whole milk
- 2 cups milk chocolate chips
Instructions
- Preheat the Oven
Set your oven to 350°F (175°C). Line a baking sheet with parchment or a silicone mat. - Make the Cookie Dough
Cream together the butter and sugar until light and fluffy. Add in the egg white and vanilla extract. Mix until fully combined. - Mix Dry Ingredients
In a separate bowl, whisk together flour and baking powder. Gradually add to the wet mixture until a soft dough forms. - Roll and Cut
Roll out the dough to about ⅓ inch thick. Use a round cookie cutter (about 2½ inches) to cut circles. Place on the prepared baking sheet. - Bake the Cookies
Bake for 6–8 minutes, or until cookies are puffy and just set. Do not overbake. Cool completely on a wire rack. - Prepare the Caramel Layer
Microwave the caramels and milk in a heat-safe bowl for 60 seconds, stirring halfway through. Stir until smooth. - Top with Caramel
Spoon about 1 tsp of caramel onto each cookie, spreading it to cover most of the surface. Chill the cookies in the fridge for 15 minutes to set the caramel. - Add the Chocolate
Melt the chocolate chips in the microwave in 30-second bursts, stirring in between. Spread a thin layer over the caramel. Let the chocolate set before serving.
Recipe Details

- Prep Time: 10 minutes
- Cook Time: 10 minutes
- Additional Time (Cooling/Setting): 20 minutes
- Total Time: 40 minutes
- Servings: 24 cookies
Nutrition Facts (Per Serving – Approximate)
- Calories: 180
- Fat: 9g
- Carbs: 24g
- Sugar: 18g
- Protein: 1g
Note: Nutrition may vary based on ingredients and portion size.
Tips & Variations
- ✅ Use dark chocolate for a more intense flavor.
- 🧂 Sprinkle sea salt over the chocolate for a sweet-salty twist.
- 🥜 Top with chopped nuts like peanuts or pecans for a Snickers-style version.
- 🧊 Freeze layers between steps to speed up assembly.
- 🍪 Make mini versions for bite-sized party treats.
FAQs
Can I use homemade caramel instead of store-bought?
Absolutely! Just make sure it’s thick enough to set on the cookie without dripping off.
How should I store Twix Cookies?
Keep them in an airtight container at room temperature for up to 4 days, or in the fridge for 1 week.
Can I freeze these cookies?
Yes! Freeze fully assembled cookies in layers with parchment between them for up to 2 months.

Twix Cookies
Equipment
- Mixing bowls
- Rolling Pin
- – Round cookie cutter
- Baking sheet
- – Microwave-safe bowls
Ingredients
- – ½ cup salted butter softened
- – ½ cup granulated sugar
- – 1 tsp vanilla extract
- – 1 egg white
- – 1½ cups all-purpose flour
- – 1 tsp baking powder
- – 20 soft caramels unwrapped
- – 1 tbsp whole milk
- – 2 cups milk chocolate chips
Instructions
- Preheat oven to 350°F. Line a baking sheet.
- Cream butter and sugar until fluffy. Mix in vanilla and egg white.
- Add flour and baking powder. Mix into soft dough.
- Roll out and cut circles. Bake 6–8 minutes.
- Cool cookies completely.
- Melt caramels with milk. Spread 1 tsp on each cookie.
- Chill cookies for 15 minutes to set caramel.
- Melt chocolate. Spread over caramel. Let set.
Notes
– Store in airtight container or freeze for later
Conclusion
Twix Cookies are the perfect marriage of candy and cookie, combining soft sugar cookie bases with gooey caramel and rich chocolate. They’re easy to make, fun to decorate, and even more fun to eat. If you’re ready to skip the candy aisle and bake your own, this recipe is your new go-to.