

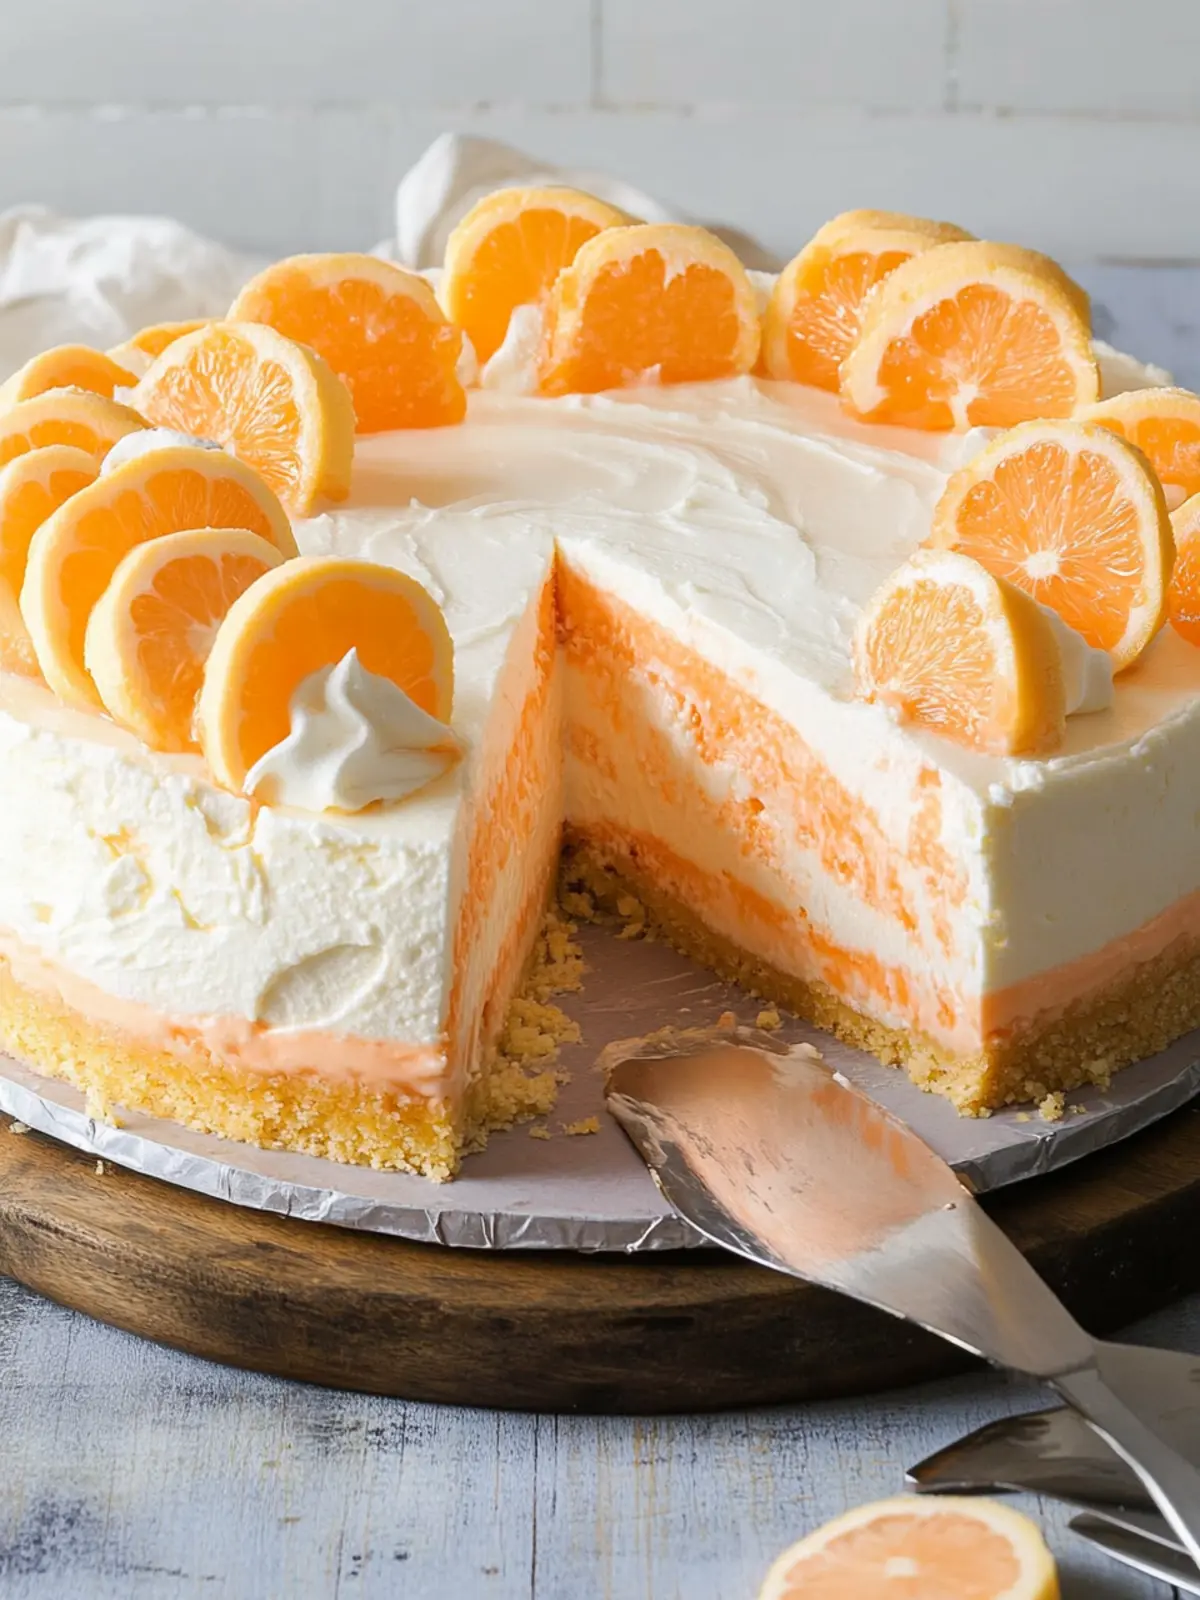
Picture a sunny afternoon, the kind that beckons you to relax and indulge in something refreshing and delightful. That’s exactly what inspired me to whip up this No-Bake Creamsicle Cheesecake—a dessert that encapsulates the essence of summer in every creamy, orange-hued bite. With minimal preparation and a quick chill in the refrigerator, this cheesecake is the ultimate make-ahead treat, perfect for barbecues, family gatherings, or simply treating yourself after a long day.
Imagining the vibrant, sweet flavors of a classic Creamsicle transforms into a silky cheesecake layered over a buttery crust, ideal for impressing friends and family without spending hours in the kitchen. Let’s dive into the sweetness of this easy recipe; it promises to be a crowd-pleaser that honors both your time and taste buds. Get ready to bring a taste of nostalgia to your summer get-togethers!
Why is No-Bake Creamsicle Cheesecake a Must-Try?
Simplicity: With no baking required, just mix, chill, and serve!
Refreshing Flavor: The combination of creamy cheesecake and zesty orange perfectly embodies summer.
Versatile Variations: Customize with different Jell-O flavors or cookie bases to keep things exciting.
Make-Ahead Friendly: Prep it the night before, so it’s ready for your next gathering with zero stress.
Impressive Presentation: This stunning cheesecake will dazzle your guests and leave them asking for the recipe!
For more delightful options, explore our Make-Ahead Dessert Ideas to keep your summer sweet and simple.
No-Bake Creamsicle Cheesecake Ingredients
• Dive into making this delightful No-Bake Creamsicle Cheesecake with the following ingredient essentials!
For the Crust
- Golden Oreo cookies – The perfect base for a buttery, sweet crust; feel free to swap with regular Oreos for added chocolate flavor.
- Melted butter – Helps bind the crust together for a satisfying crunch.
- Kosher salt (pinch) – Elevates the flavor of the crust, balancing out the sweetness.
For the Filling
- Orange Jell-O (3-oz box) – Infuses the cheesecake with that classic Creamsicle flavor; experiment with other Jell-O flavors for delicious variations!
- Boiling water (1 cup) – Essential for dissolving the Jell-O perfectly, ensuring smooth integration.
- Whipped topping (1½ cups) – Adds lightness and airiness to the cheesecake filling for an indulgent taste.
- Cream cheese (2 blocks, 8-oz each, softened) – Forms the rich and creamy base; make sure it’s at room temperature to avoid lumps.
- Sour cream (¼ cup) – Brings a wonderful tanginess and creaminess to the overall texture.
- Powdered sugar (1 cup) – Sweetens the cheesecake without being overly sugary.
- Pure vanilla extract (1 tsp) – Boosts the flavor profile with a warm, aromatic essence.
For the Topping
- Whipped topping (for topping) – Adds a light, airy finish that complements the creamy filling beautifully.
Now that you have everything you need, let’s create this refreshing dessert that will transport you straight to summer bliss!
How to Make No-Bake Creamsicle Cheesecake
-
Prepare the Crust: In a mixing bowl, combine crushed Golden Oreo cookies with melted butter and a pinch of kosher salt. Press the mixture firmly into the bottom of a greased springform pan to create a sturdy base.
-
Dissolve Jell-O: In a separate bowl, add the orange Jell-O to 1 cup of boiling water. Stir well until fully dissolved, then let it cool for a few minutes to avoid melting the cream cheese when mixed.
-
Mix the Cheesecake Filling: In a large bowl, beat the softened cream cheese until smooth and creamy. Then, add the sour cream, powdered sugar, and vanilla extract, mixing until well incorporated. Gently fold in the whipped topping until the mixture is light and airy.
-
Combine Jell-O and Filling: Slowly pour the cooled Jell-O mixture into the cream cheese filling. Use a spatula to gently mix until the vibrant orange hue is evenly distributed throughout the creamy base.
-
Assemble & Chill: Pour the cheesecake filling over the prepared crust, spreading it evenly. Cover and refrigerate for at least 6 hours, or preferably overnight, to allow the cheesecake to set fully.
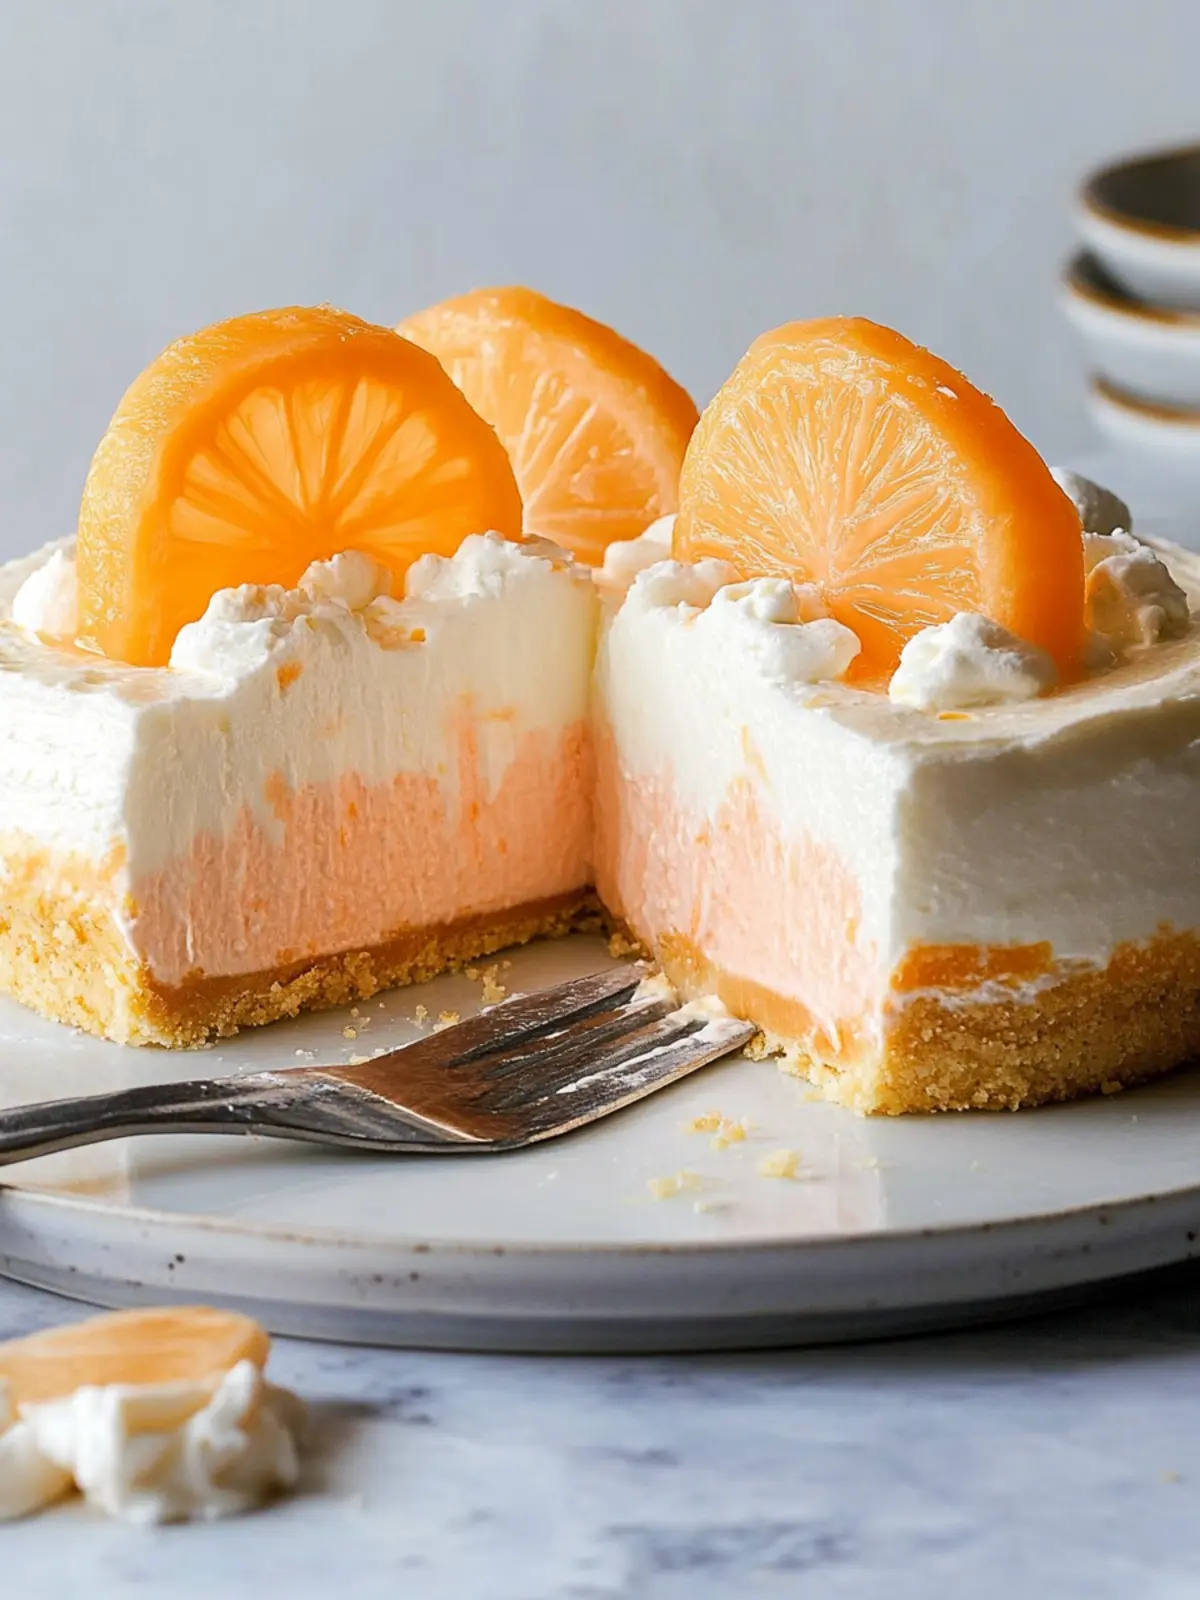
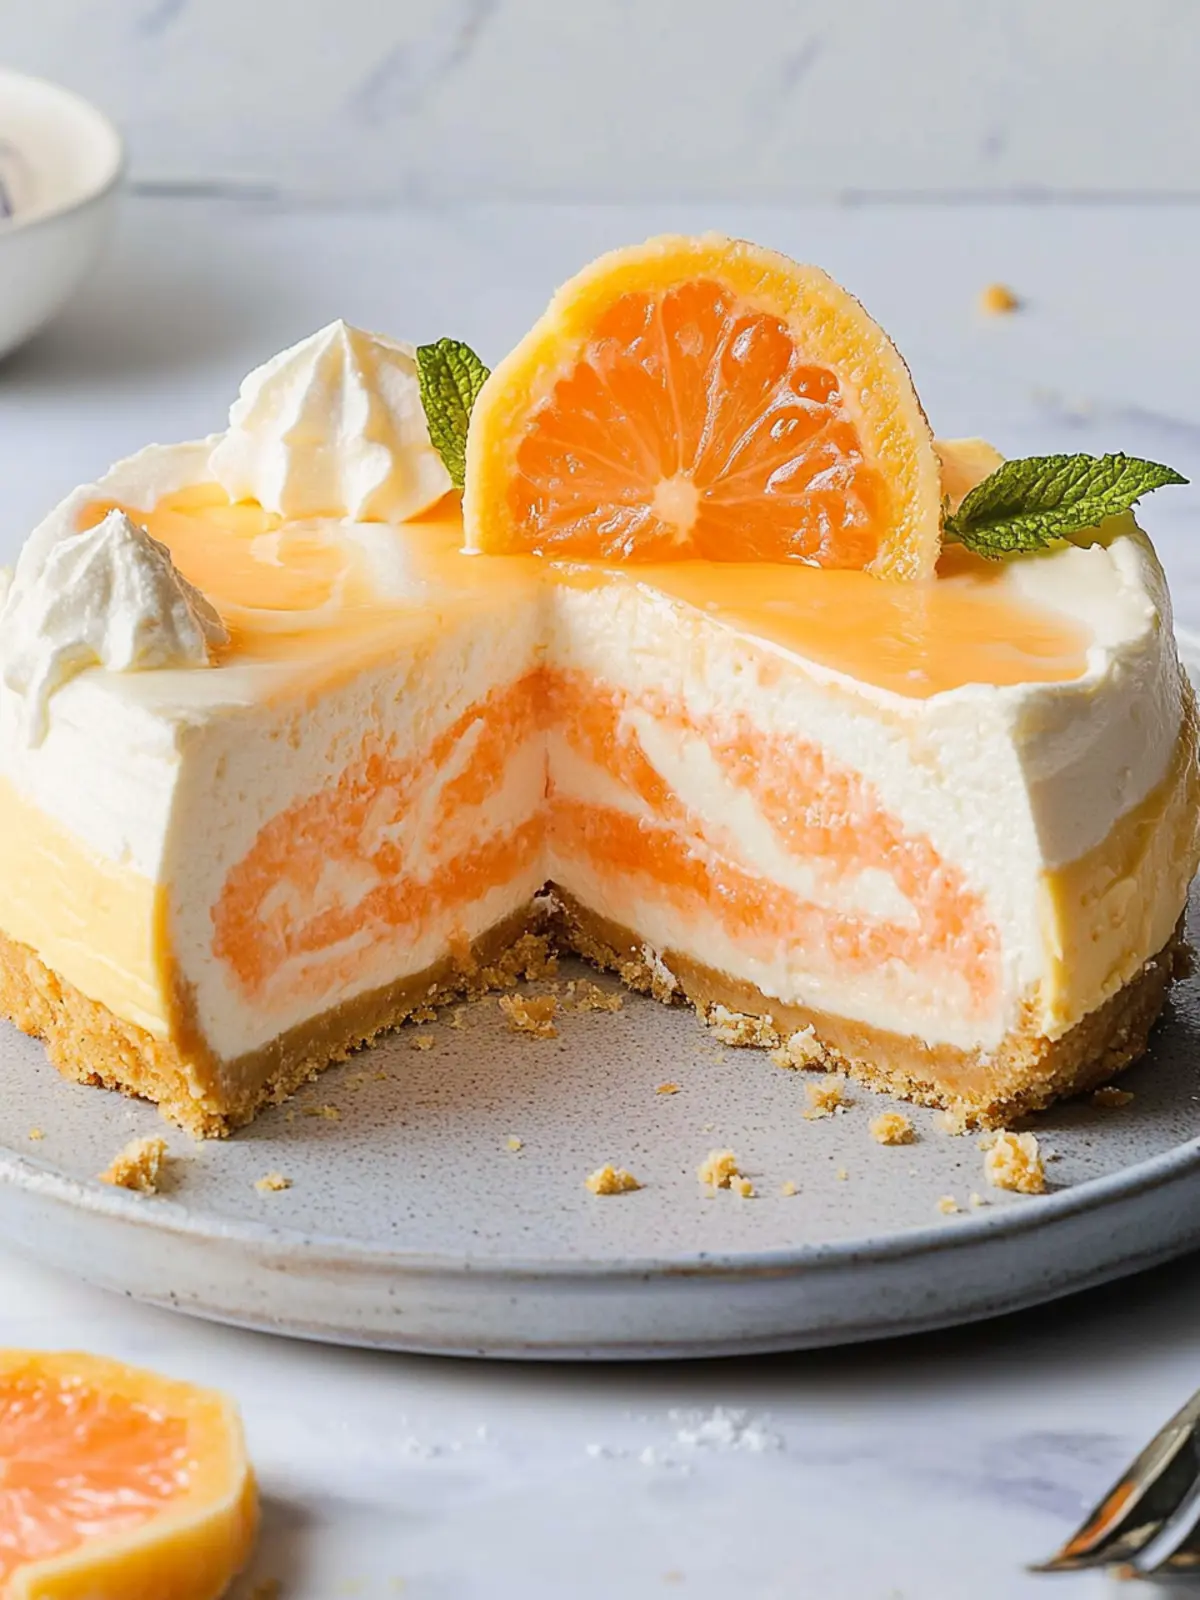
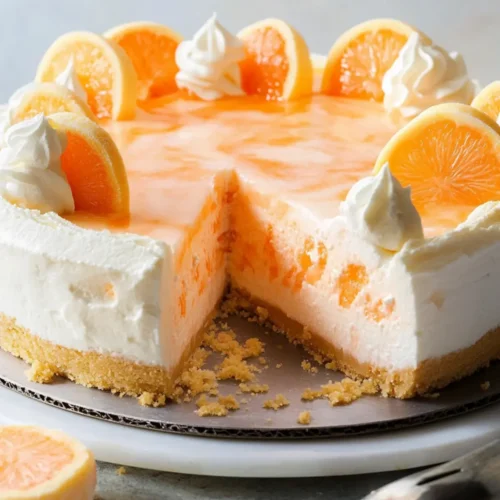
Optional: Garnish with additional whipped topping or fresh fruit for an eye-catching final touch.
Exact quantities are listed in the recipe card below.
What to Serve with No-Bake Creamsicle Cheesecake?
Transform your gathering into a delightful summer celebration with these fabulous pairings, perfect alongside this creamy dessert.
-
Fresh Berries: Juicy strawberries, blueberries, or raspberries offer a vibrant contrast in both flavor and color, enhancing each bite.
-
Whipped Cream: A dollop of freshly whipped cream adds extra creaminess and a touch of elegance, elevating your dessert experience.
-
Coconut Sorbet: This refreshing frozen treat complements the cheesecake’s flavors and introduces a tropical twist perfect for hot days.
-
Iced Tea: A lightly sweetened iced tea with mint harmonizes beautifully with the sweetness of the cheesecake, making every sip refreshing.
-
Lemon Bars: Tangy and sweet, these bars provide a zesty contrast that balances the creamy cheesecake, making your dessert spread dynamic.
-
Sparkling Lemonade: The fizzy zest of sparkling lemonade creates a lively drink pairing, perfect for summer gatherings, captivating your guests’ palates.
Indulge in these pairings to craft a memorable meal that truly celebrates the essence of summer!
Storage Tips for No-Bake Creamsicle Cheesecake
Fridge: Store leftover cheesecake in an airtight container for up to 4 days. This helps maintain its creamy texture and vibrant flavor.
Freezer: If you need to keep it longer, freeze the cheesecake for up to 2 months. Wrap it tightly with plastic wrap and foil before freezing to prevent freezer burn.
Thawing: To enjoy frozen cheesecake, transfer it to the fridge and let it thaw overnight. Allow it to sit at room temperature for 15 minutes before serving for the best texture.
Reheating: There’s no need to reheat the cheesecake; enjoy it chilled for a refreshing treat, especially during hot summer days!
No-Bake Creamsicle Cheesecake Variations
Feel free to get creative and make this cheesecake truly yours with these delightful twists!
-
Gluten-Free: Use gluten-free cookies for the crust, ensuring everyone can enjoy this sweet treat. It’s just as tasty and offers the same crunchy base!
-
Chocolate Lovers: Substitute Golden Oreos with chocolate cookies for a rich, contrasting flavor that will leave dessert enthusiasts swooning. It’s a magical pairing!
-
Fruit-Infused: Swap the orange Jell-O with strawberry or raspberry for a fruity twist; this change will add a refreshing berry flavor perfect for summer!
-
Dairy-Free: Replace cream cheese with a vegan cream cheese alternative and use coconut whipped cream to keep it creamy without dairy. Your plant-based friends will thank you!
-
Citrus Burst: Add a splash of fresh orange juice or zest to the filling for an extra punch of citrusy goodness that enhances the Creamsicle experience.
-
Nutty Crunch: Mix in crushed nuts, like almonds or pecans, into your crust for added texture. This will give each bite a delightful crunch alongside the creamy filling!
-
Heat It Up: Add a dash of cayenne pepper or chili powder to the filling for a surprising kick that balances the sweetness beautifully. It’s a daring flavor adventure!
-
Layered Treat: Create mini cheesecakes in jars and alternate layers of cheesecake with fruit or cookie crumbles for a stunning presentation. This makes a perfect dessert for individual servings!
Tips for the Best No-Bake Creamsicle Cheesecake
- Cream Cheese Consistency: Ensure cream cheese is softened and at room temperature for a smooth filling free of lumps.
- Cool Jell-O Properly: Allow the Jell-O to cool but not set before adding it to the cheesecake mix; this prevents a grainy texture.
- Whip Gently: When folding in the whipped topping, do so gently to maintain the airy lightness crucial for the no-bake cheesecake.
- Chill Time Matters: Don’t rush the chilling process—allowing it to set overnight ensures a firmer, more cohesive cheesecake.
- Custom Flavors: Feel free to switch up the Jell-O flavor or cookie crust—creativity with the No-Bake Creamsicle Cheesecake can lead to delightful surprises!
Make Ahead Options
These No-Bake Creamsicle Cheesecake delights are perfect for busy weeknights and social gatherings! You can assemble the entire cheesecake up to 24 hours in advance, allowing the flavors to meld beautifully while saving you time. Start by following the recipe up to the chilling step, allowing it to set overnight in the refrigerator. For optimal quality, wrap the cheesecake tightly with plastic wrap to prevent any unwanted odors from affecting its flavor. When you’re ready to serve, simply remove it from the fridge, garnish with whipped topping or fresh fruit if desired, and enjoy a dessert that’s just as delicious as when freshly made!
No-Bake Creamsicle Cheesecake Recipe FAQs
What kind of oranges should I use for the best flavor?
Absolutely! Fresh oranges can elevate the flavor of your No-Bake Creamsicle Cheesecake. I recommend using navel oranges for their sweetness and juiciness. Just zest a bit of the orange peel and add it to the filling for that extra burst of citrus flavor!
How should I store leftovers?
For the best taste and texture, store any leftover cheesecake in an airtight container in the fridge for up to 4 days. This keeps it fresh and creamy. If it starts to lose its fluffiness, try serving it with a dollop of extra whipped topping!
Can I freeze the cheesecake, and if so, how?
Yes, you can definitely freeze the No-Bake Creamsicle Cheesecake! Wrap it tightly in plastic wrap then aluminum foil to prevent freezer burn and store it for up to 2 months. When you’re ready to enjoy it, transfer the cheesecake to the fridge and let it thaw overnight. For the best texture, allow it to sit at room temperature for about 15 minutes before serving.
What if my whipped topping doesn’t hold its shape?
If your whipped topping isn’t holding well, it could be due to over-mixing. Always fold it in gently to maintain that airy lightness. Alternatively, consider using a stabilizer like unflavored gelatin mixed with a bit of water to help maintain that delightful fluffiness.
Is this recipe safe for those with gluten allergies?
While the original recipe uses Golden Oreo cookies, you can easily make this No-Bake Creamsicle Cheesecake gluten-free by swapping those out for gluten-free cookies. Always double-check the labels to ensure they’re safe for your dietary needs. Enjoy worry-free!
Can I adjust the sweetness of the cheesecake?
Definitely! If you prefer a less sweet cheesecake, feel free to reduce the amount of powdered sugar in the filling. Start with ¾ cup instead of a full cup and taste it before adjusting further. This way, you can perfect the sweetness to your liking!
No-Bake Creamsicle Cheesecake: Your Ultimate Summer Refreshment
Equipment
- Mixing bowl
- Springform pan
- Spatula
Ingredients
For the Crust
- 24 cookies Golden Oreo cookies can substitute with regular Oreos
- ½ cup melted butter
- 1 pinch kosher salt
For the Filling
- 1 box orange Jell-O (3-oz) or other flavors for variations
- 1 cup boiling water
- 1½ cups whipped topping
- 16 oz cream cheese, softened 2 blocks
- ¼ cup sour cream
- 1 cup powdered sugar
- 1 tsp pure vanilla extract
For the Topping
- whipped topping for serving
Instructions
Preparation Steps
- In a mixing bowl, combine crushed Golden Oreo cookies with melted butter and a pinch of kosher salt. Press the mixture firmly into the bottom of a greased springform pan to create a sturdy base.
- In a separate bowl, add the orange Jell-O to 1 cup of boiling water. Stir well until fully dissolved, then let it cool for a few minutes.
- In a large bowl, beat the softened cream cheese until smooth and creamy. Then, add the sour cream, powdered sugar, and vanilla extract, mixing until well incorporated. Gently fold in the whipped topping.
- Slowly pour the cooled Jell-O mixture into the cream cheese filling. Use a spatula to gently mix until evenly distributed.
- Pour the cheesecake filling over the prepared crust, spreading it evenly. Cover and refrigerate for at least 6 hours, or preferably overnight.