

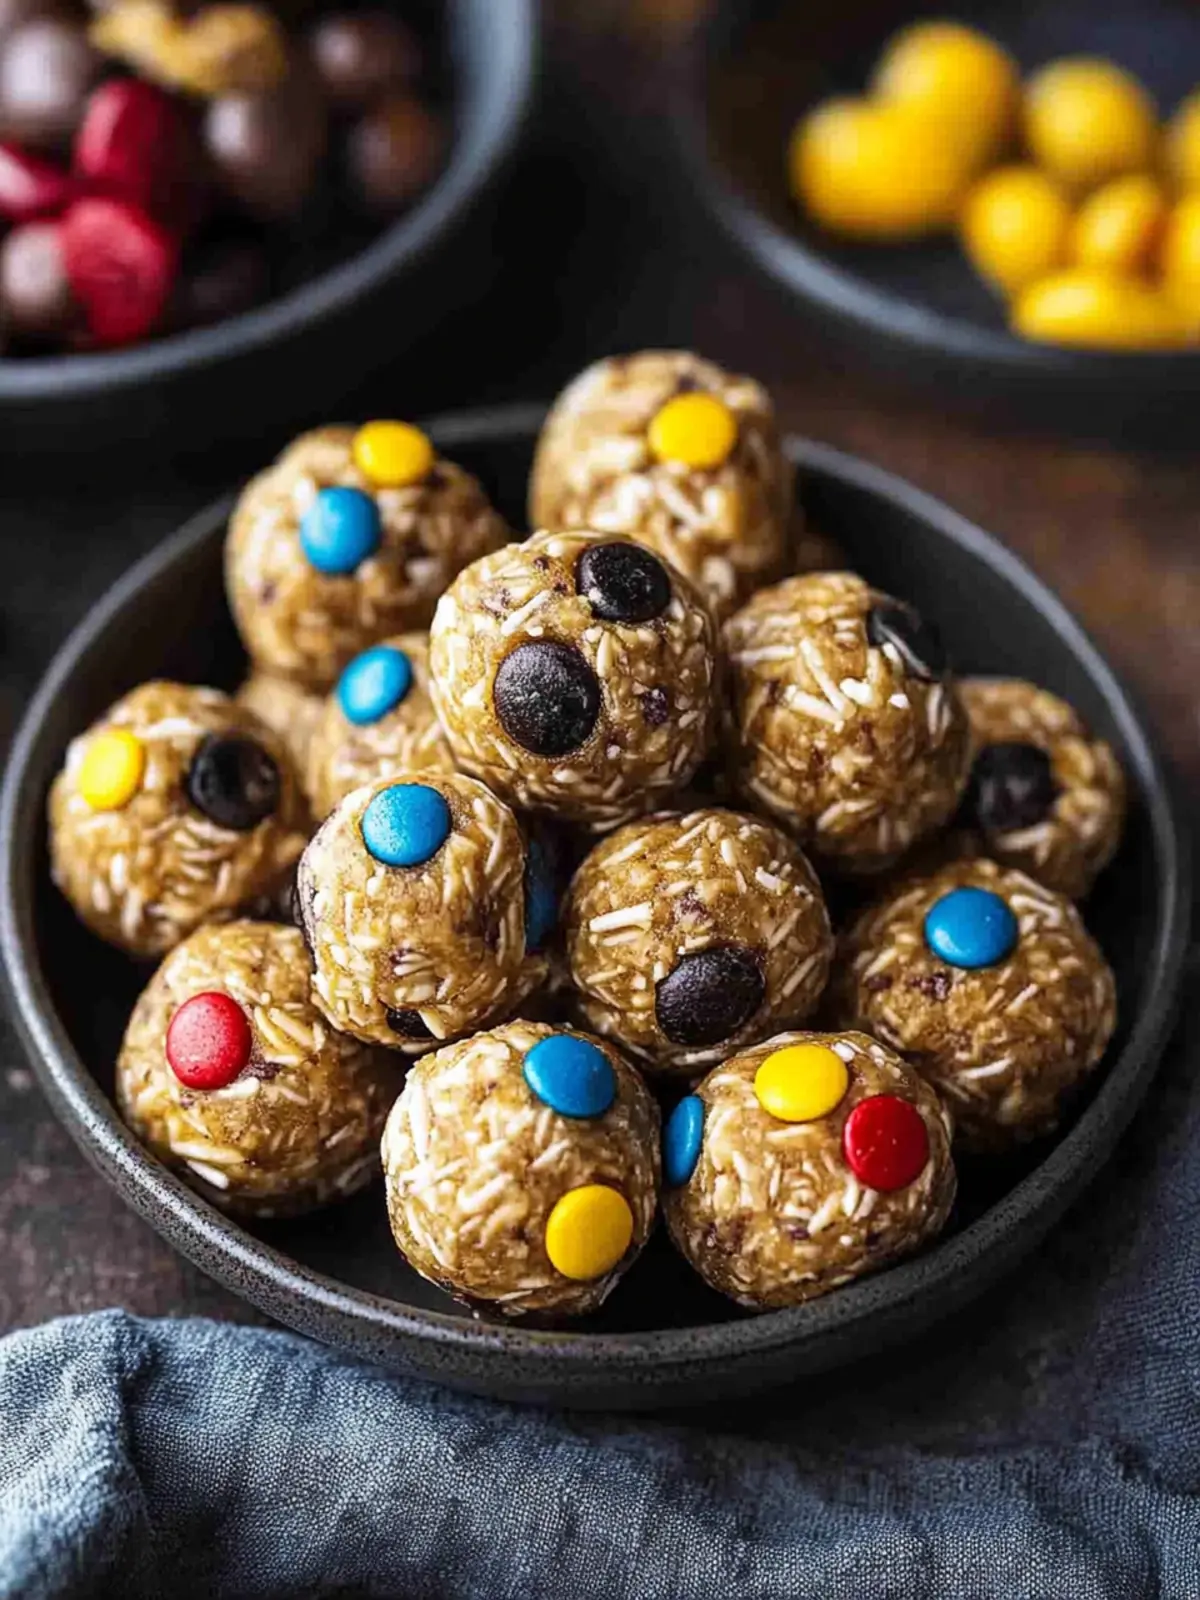
There’s a thrill that comes from turning simple pantry staples into something spectacular. Recently, while on a mission to satisfy my sweet tooth without the guilt, I stumbled upon the idea of protein balls and quickly transformed it into something fun and delicious. Enter my No-Bake Monster Cookie Protein Balls! These delightful bites bring together the nostalgic taste of classic cookies with the wholesome goodness of healthy ingredients.
Imagine the rich flavor of peanut butter, the sweetness of honey, and the joyful crunch of M&Ms all rolled into one. With just a quick mix and a few minutes of your time, you can whip up a batch that’s perfect for a post-workout refuel or an afternoon snack for the kids. Best of all, they’re completely customizable, so you can switch up the mix-ins to keep things exciting. Ready to dive in and create a treat that balances indulgence with nutrition? Let’s get started!

Why are protein balls a must-try?
Quick and Easy: These no-bake protein balls come together in just 15 minutes, making them a super convenient snack option.
Kid-Friendly: Packed with fun ingredients like M&Ms, these treats are sure to delight both kids and adults alike!
Healthy Indulgence: With wholesome ingredients like peanut butter and oats, you can satisfy your sweet tooth without guilt.
Customizable: Feel free to swap out mix-ins like dried fruits or different nut butters to keep it fresh and exciting each time.
Perfect for Meal Prep: Make a big batch and store them to grab on-the-go; they are perfect for busy days or post-workout energy!
Protein Balls Ingredients
• Discover what makes these tasty bites come together!
For the Base
- Natural Peanut Butter – Provides a creamy texture and healthy fats; use drippy and well-stirred peanut butter for the best results.
- Protein Powder – Enhances protein content to support muscle recovery; choose a trusted brand for optimal taste and texture.
- Rolled Oats – Adds fiber and structure while binding the mixture; gluten-free oats can be used for those with dietary restrictions.
- Honey – Acts as a natural sweetener and binder; you can substitute maple syrup for a vegan-friendly option.
- Vanilla Extract – Elevates the flavor profile; always opt for pure vanilla extract for maximum taste.
For the Crunch
- Chia Seeds – Boosts nutrition and adds a delightful crunch; flaxseeds work as a great substitute if needed.
- Mini Chocolate Chips – Provides that classic cookie flavor; consider using regular-sized chocolate chips in moderation for a different texture.
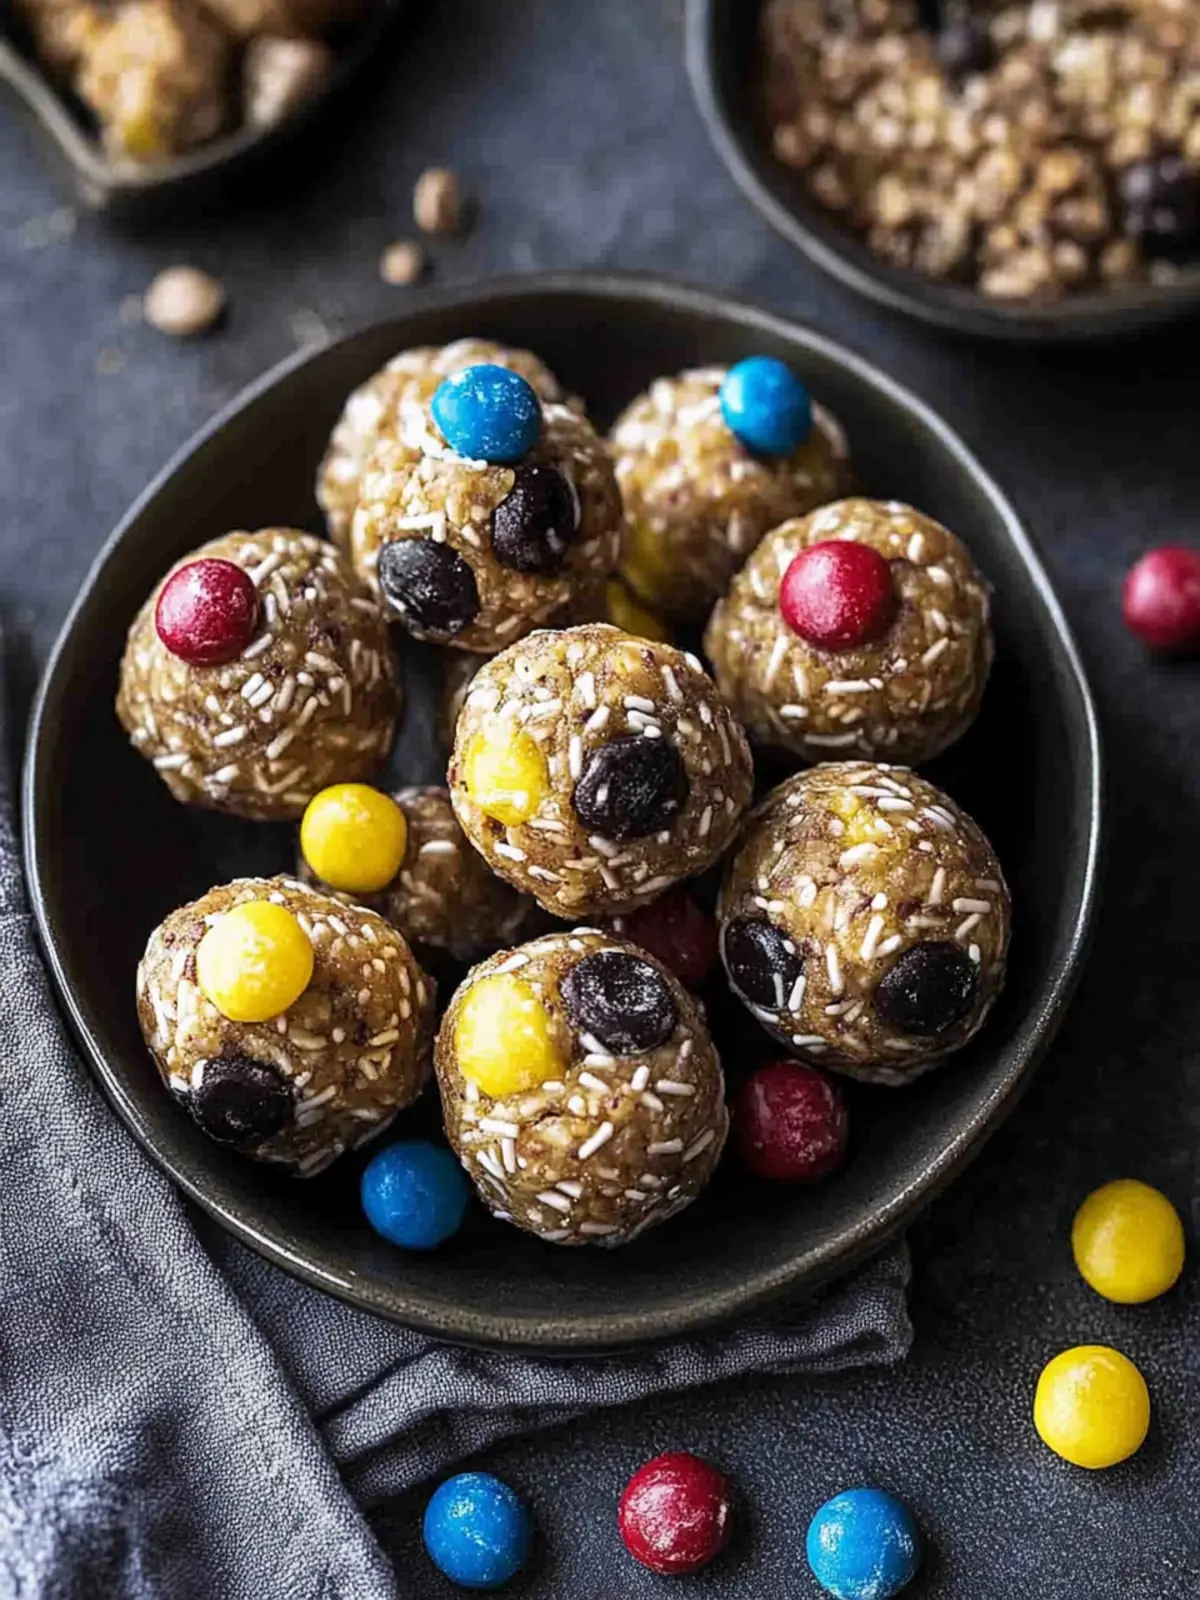
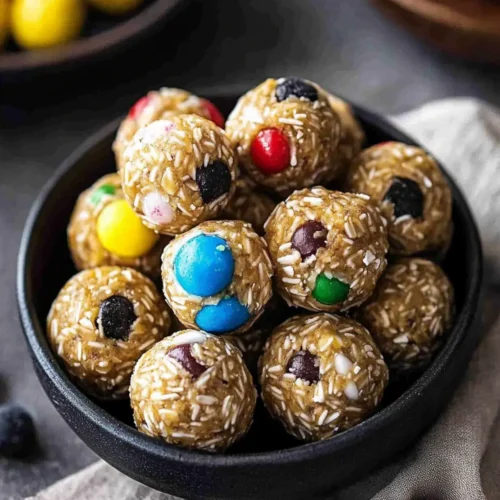
- M&Ms – Adds color and a fun, candy-like crunch; feel free to swap with your favorite candies or omit for a healthier treat.
Now that you have all the key ingredients for these protein balls in hand, you’re just a few steps away from enjoying a deliciously healthy snack that the whole family will love!
How to Make No-Bake Monster Cookie Protein Balls
-
Combine Ingredients: In a medium bowl, combine the natural peanut butter, protein powder, rolled oats, honey, vanilla extract, chia seeds, mini chocolate chips, and M&Ms. Mix everything until well blended.
-
Mix Thoroughly: Use a spoon or your hands to ensure the mixture is cohesive. If it feels too dry, add a splash of water a little at a time to adjust the consistency without making it sticky.
-
Shape the Balls: Portion out about one tablespoon of the mixture and roll it into a ball using slightly damp hands. This helps prevent sticking and makes for a neat finish!
-
Store Perfectly: Place the protein balls into an airtight container. You can refrigerate them for up to a week or freeze for up to three months, ready for whenever you need a quick snack.
-
Thaw Before Enjoying: If you’ve frozen the balls, leave them in the refrigerator overnight to thaw or allow them to sit at room temperature for about 30 minutes before diving in.
Optional: Drizzle with a little melted chocolate for a sweeter treat.
Exact quantities are listed in the recipe card below.
Storage Tips for Protein Balls
Fridge: Store your protein balls in an airtight container in the refrigerator for up to 1 week to maintain their freshness and flavor.
Freezer: For longer storage, freeze the protein balls in a single layer on a baking sheet, then transfer them to an airtight container or freezer bag for up to 3 months.
Thawing: When ready to enjoy, thaw frozen protein balls in the fridge overnight or let them sit at room temperature for about 30 minutes.
Reheating: These delicious protein balls are best enjoyed cold, but if you prefer them a bit warmer, you can microwave them for about 10-15 seconds.
Expert Tips for Protein Balls
-
Room Temperature Peanut Butter: Ensure peanut butter is at room temperature for easier mixing; well-stirred varieties blend in much better.
-
Adjust for Texture: If the mixture feels too dry, add a small amount of water gradually until you reach the desired consistency for your protein balls.
-
Mindful Mixing: Combine the ingredients just until blended to avoid overmixing, which can affect the lovely texture of your snack.
-
Uniform Sizes: Use a cookie scoop to portion out the mixture for evenly-sized protein balls, ensuring they cook uniformly and appeal to everyone.
-
Flavor Variations: Don’t hesitate to swap the protein powder flavor; try chocolate or vanilla to customize the taste of your delicious protein balls.
Make Ahead Options
These No-Bake Monster Cookie Protein Balls are a lifesaver for busy families! You can easily prepare the mixture up to 24 hours in advance. Simply blend all the ingredients and shape the balls as directed, then store them in an airtight container in the refrigerator. For longer storage, freeze the protein balls for up to 3 months. To maintain their quality, ensure they are well-sealed to avoid freezer burn. When you’re ready to enjoy, simply thaw them in the fridge overnight or let them sit at room temperature for about 30 minutes. With this make-ahead option, you’ll have a delicious snack ready at a moment’s notice!
What to Serve with No-Bake Monster Cookie Protein Balls?
Imagine the joyful crunch and creamy delight of your protein balls paired with equally satisfying sides for the ultimate snack experience.
-
Cold Milk:
The classic pairing! A glass of chilled milk complements the sweetness, washing down the delightful flavors of the protein balls. -
Fruit Smoothie:
A fruity twist! Blending your favorite fruits with yogurt or milk creates a refreshing side that matches the sweet, nutty essence of the balls. -
Veggie Sticks with Hummus:
For a savory bite, crunchy veggie sticks dipped in creamy hummus offer a perfect contrast to the sweetness of your protein balls. -
Greek Yogurt Parfait:
Layering Greek yogurt with berries and granola creates a wholesome treat that balances the rich flavors of your protein balls while adding creaminess. -
Nutty Trail Mix:
An energizing side! Combine nuts and dried fruits for a crunchy, nutritious accompaniment that provides more sustained energy. -
Iced Herbal Tea:
Serve it chilled! A refreshing glass of iced herbal tea adds a light contrast to your rich protein balls — the perfect uplifting sip! -
Cheese Cube Platter:
Offer some cheese cubes alongside for a unique twist; the creaminess works well with the chewy texture of the protein balls.
These options enhance your snacking experience, ensuring that every bite brings joy and satisfaction!
Protein Balls Variations
Feel free to get creative and make these protein balls your own with delightful mix-ins and substitutions!
-
Nut Butter Twist: Swap peanut butter for almond or cashew butter for a different nutty flavor profile.
-
Fruit Fiesta: Incorporate dried fruits like cranberries or apricots for a burst of natural sweetness and added chewiness.
-
Chocolate Lover’s Delight: Use chocolate-flavored protein powder instead of vanilla to enhance the chocolatey taste throughout.
-
Seed Swap: Replace chia seeds with hemp seeds for a different texture and added nutrition.
-
Sweetness Alternatives: Substitute honey with agave syrup for a plant-based sweetener that offers a similar flavor.
-
Crunchy Texture: Mix in some chopped nuts, like almonds or walnuts, for an extra crunchy bite with each snack.
-
Candy Change-Up: Try swapping M&Ms with your favorite chocolate-covered nuts or yogurt-covered raisins for a fun twist.
-
Spicy Kick: Add a pinch of cinnamon or a dash of cayenne pepper for a surprising yet delightful kick that contrasts the sweetness.
No-Bake Monster Cookie Protein Balls Recipe FAQs
How do I select the best natural peanut butter for my protein balls?
Absolutely! When choosing peanut butter, look for a variety that is drippy, unsweetened, and free from added oils. Stir it well to ensure a creamy texture, which will help bind the ingredients together beautifully. Avoid brands with added sugars, as they can alter the flavor and make your protein balls unnecessarily sweet.
What’s the best way to store my protein balls, and how long will they last?
Very! To maintain their freshness, store your protein balls in an airtight container in the refrigerator for up to 1 week. If you want to keep them for longer, you can freeze them. Just place the protein balls in a single layer on a baking sheet, then move them to an airtight container or freezer bag. They will stay good for up to 3 months!
Can I freeze my protein balls, and how do I thaw them?
Yes indeed! Freezing is a fantastic option. To freeze the protein balls, follow these steps:
- Portion the protein balls and place them on a baking sheet lined with parchment paper.
- Freeze them for about 1 hour until firm.
- Then transfer them to an airtight container or freezer bag. When you’re ready to enjoy, simply thaw them in the fridge overnight or let them sit at room temperature for around 30 minutes.
What should I do if my mixture is too dry or crumbly?
If you find your mixture is too dry, don’t worry! Start by adding water, one tablespoon at a time, while mixing until the dough is cohesive and holds together well. It’s essential to adjust slowly to avoid making it too sticky. You want it to have a slightly moist but manageable texture for rolling into balls.
Are these protein balls safe for my kids or those with allergies?
Definitely! These protein balls are generally kid-friendly. However, if anyone has allergies, be cautious with ingredients like peanut butter or chocolate. You can swap peanut butter for sunflower seed butter for a nut-free option and ensure that all other ingredients—which are wholesome and adaptable—are allergy-safe. Always check for those pesky cross-contamination labels if you’re concerned!
Can I customize the mix-ins further to suit my family’s taste?
The more the merrier! Feel free to get creative with the mix-ins. You can add dried fruits, like cranberries or raisins, or even experiment with different flavored protein powders like chocolate or vanilla. These variations let you tailor the flavor to your family’s preferences, making snack time even more enjoyable!
Delicious Protein Balls: No-Bake Monster Cookie Treats
Equipment
- Mixing bowl
- - Spoon
- Cookie scoop
- Airtight container
Ingredients
For the Base
- 1 cup Natural Peanut Butter Use drippy and well-stirred for best results.
- 1 scoop Protein Powder Choose a trusted brand.
- 2 cups Rolled Oats Gluten-free oats can be used.
- 1/2 cup Honey Can substitute with maple syrup for vegan.
- 1 teaspoon Vanilla Extract Opt for pure for maximum flavor.
For the Crunch
- 1/4 cup Chia Seeds Flaxseeds can be used as a substitute.
- 1/2 cup Mini Chocolate Chips Regular-sized can be used in moderation.
- 1/2 cup M&Ms Can swap with favorite candies or omit.
Instructions
How to Make No-Bake Monster Cookie Protein Balls
- Combine the natural peanut butter, protein powder, rolled oats, honey, vanilla extract, chia seeds, mini chocolate chips, and M&Ms in a medium bowl. Mix until well blended.
- Use a spoon or hands to ensure the mixture is cohesive. If too dry, add a splash of water gradually.
- Portion out about one tablespoon of the mixture and roll into a ball using slightly damp hands.
- Place the protein balls into an airtight container. Refrigerate for up to a week or freeze for up to three months.
- If frozen, thaw in the refrigerator overnight or let sit at room temperature for about 30 minutes before enjoying.