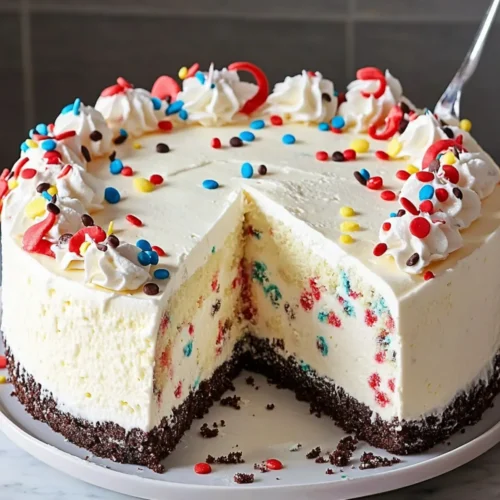
Homemade Copycat Dairy Queen Ice Cream Cake Bliss
Enjoy a slice of nostalgia with this Copycat Dairy Queen Ice Cream Cake, capturing the flavors of childhood treats.
Equipment
- Oven
- Mixing bowl
- cake tin
- - Offset spatula
Ingredients
For the Cookie Crunch Layer
- 25 cookies Oreo cookies Substitute with gluten-free cookies for a gluten-free version.
- 1/2 cup Unsalted butter, melted Can use vegan butter as a substitute.
For the Fudge Ribbon
- 3.5 oz Semisweet chocolate chips Dark chocolate deepens the taste.
- 2 tbsp Refined coconut oil or vegetable shortening Can be omitted if not desired.
For the Ice Cream Layers
- 1.5 qt Vanilla ice cream Substitute with dairy-free ice cream for a vegan option.
- 11.5 oz Hot fudge topping Homemade fudge elevates the dish's gourmet status.
- 1.5 qt Chocolate ice cream Try flavored varieties for a unique twist.
For the Topping
- 1.5 cups Heavy whipping cream Non-dairy whipped cream serves as a suitable substitute.
- 1/4 cup Confectioners' sugar Adjust to taste or use a sugar substitute.
- 1.5 tsp Pure vanilla extract Almond extract offers a lovely alternative.
- Sprinkles Feel free to swap in nuts or chocolate shavings for a unique finish.
Instructions
How to Make Copycat Dairy Queen Ice Cream Cake
- Coarsely chop your Oreo cookies and mix them with melted butter in a bowl. Spread the mixture evenly on a baking sheet and toast it in the oven at 350°F for about 8-10 minutes until crispy and fragrant.
- Once the cookie crunch has cooled, toss it with the melted semisweet chocolate until fully coated. Place this mixture in the refrigerator to chill until it sets, about 30 minutes.
- While your cookie crunch sets, let the vanilla and chocolate ice cream sit at room temperature for around 10 minutes. This will make spreading much easier.
- In a round cake tin, start by spreading an even layer of vanilla ice cream as the base. Pour the hot fudge topping over this layer, swirling it slightly.
- Evenly sprinkle the chilled chocolate cookie mixture over the fudge layer, pressing gently to ensure it adheres.
- Carefully spoon chocolate ice cream over the cookie layer. Use an offset spatula to smooth it out, creating a lovely second layer.
- In a mixing bowl, whip the heavy cream with confectioners' sugar and vanilla extract until stiff peaks form, indicating it's fluffy and ready.
- Dollop the whipped cream mixture over the chocolate ice cream, smoothing it out. Decorate the top with colorful sprinkles for that perfect finishing touch.
- Cover the assembled cake with plastic wrap and freeze for at least 7 hours or overnight. This step ensures it's firm and ready to serve when you’re craving a slice.
Notes
Optional: Drizzle more hot fudge or add fresh fruit slices before serving for an extra touch.